
Contents
Christmas is around the corner, and everyone is trying to stay ahead of the holiday rush, so do I. There are so many incredible things you can do with just needles and a few balls of yarn. The easiest things to knit though are hats, scarfs, and mittens. If you have a baby of 1-2 years old and the slightest idea on how to knit, then this pattern will definitely come in handy during the Christmas time. This knitting pattern is one of the most popular ones I used to knit with a few simple changes – added earflaps to get a more of a baby look and fit, as well as used red & white colors to match the Santa style. Enjoy knitting your project and don’t forget to check an adult version of the winter cable knit hat. Merry Christmas to all of you and a very happy holiday!
Knitting materials and tools:
<> 16” long, circular needles 3.5 mm (US 4) for ribbing part, 4.5 mm (US 7/UK 7) for body part and double pointed knitting needles 4 mm (US 6/UK8) for earflaps;
<> Alize baby wool – 40% wool, 40% acrylic, 20% bamboo. White and red colors: 50 grams = 175 m. (192 yds.) In total 1 white and 1.5 red balls;
Baby Santa cable knit hat size:
Baby: 44-46 cm (> 1 y.o.)
Gauge: 20 stitches = 4 inches in stockinette
26 stitches = 4 inches in ribbing – not stretched
Note for knitters:
Knit with two strands of yarn at once.
Common abbreviations of knitting stitches:
k – knit
p – purl
k2tog – knit two together
inc – increase
skpo – Slip, Knit, Pass Over: Slip one stitch to the right needle knitwise, knit in the next stitch and drop this stitch off the left needle, insert the left needle into the slipped stitch, pass it over the knit stitch and it’s done.
Cable 4 Back (C4B): Slip 4 knit stitches to the extra needle and hold in back of work, 4k from the left hand needle, 4k from the extra needle.
Cable 4 Front (C4F): Slip 4 knit stitches to the extra needle and hold in front of work, 4k from the left hand needle, 4k from the extra needle.
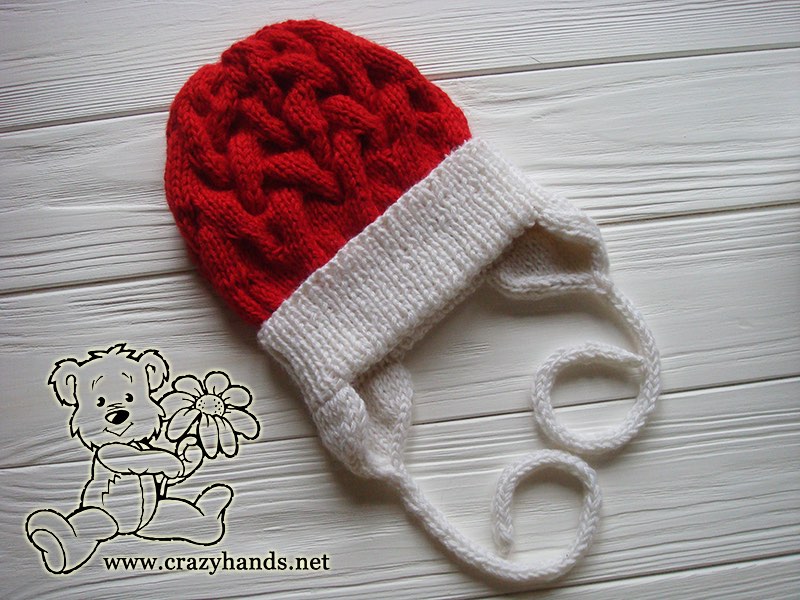
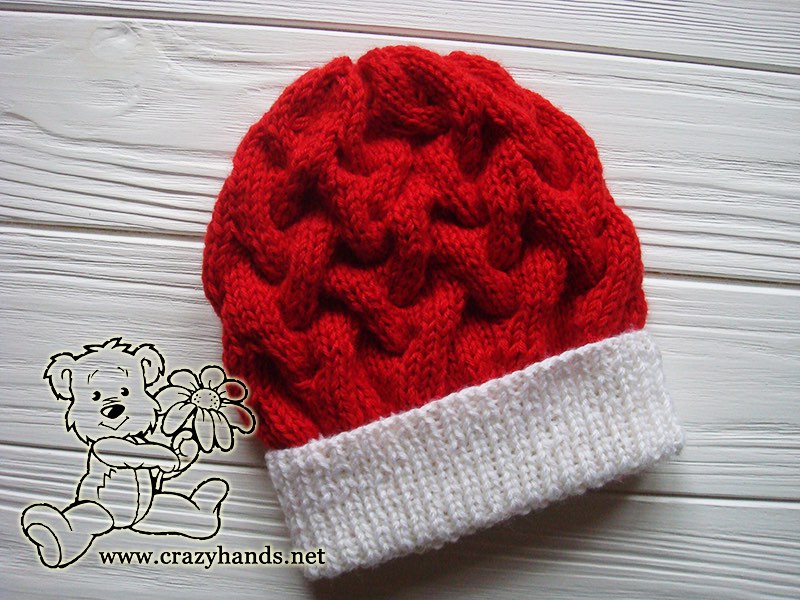
Baby Santa cable knit hat pattern with earflaps
Ribbing of the baby cable knit hat:
Cast on 88 stitches for the baby winter cable hat.
Round 1: Rib 1 by 1 *k1, p1* keep repeating until piece measures 5 cm or 2 inches.
I do suggest knitting folded brim for the baby hat to keep small ears and forehead warm.
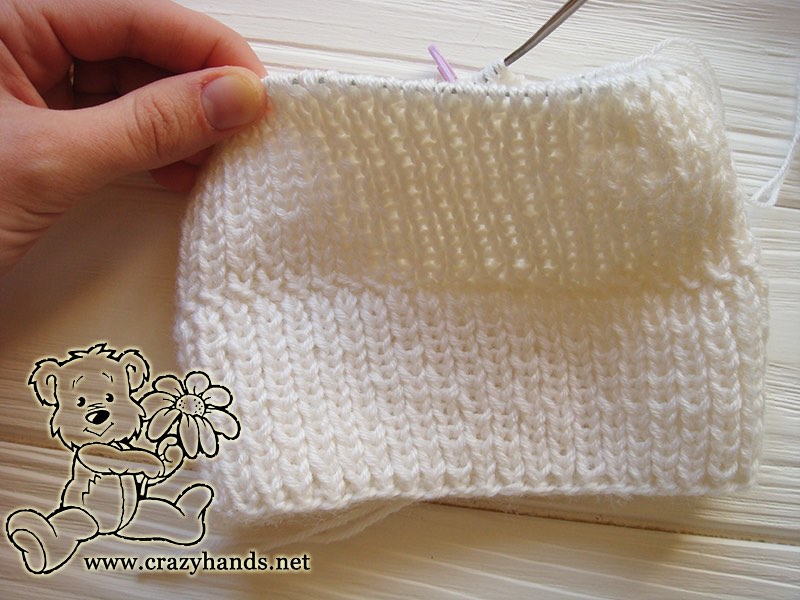
Knitting folded brim of the baby cable hat:
In the next Round knit all knit stitches as purl stitches and all purl stitches as knit ones. Continue working in 1 to 1 ribbing pattern *p1, k1* until the work measures 10 cm or 4 inches from the edge.
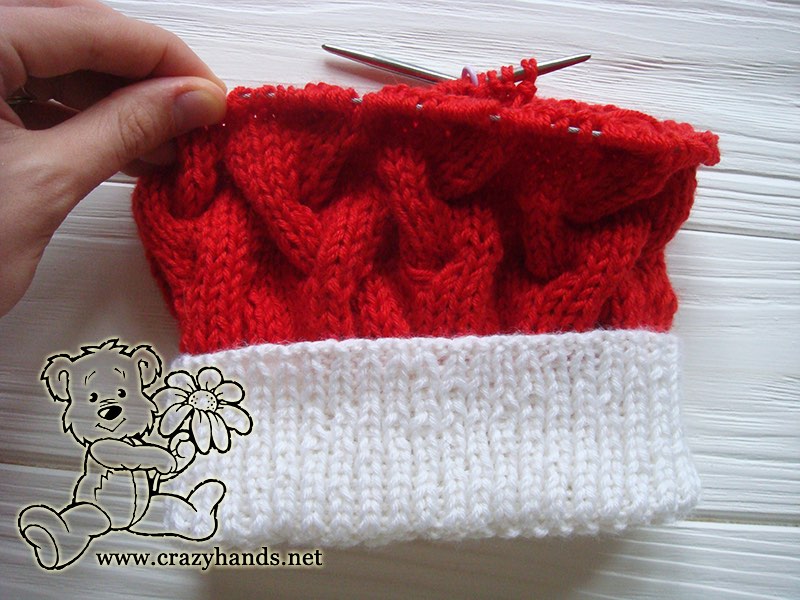
Body of the baby cable hat:
Round 1: Change to a larger size of the needles and switch the yarn color from white to red. In this round, we are going to increase. Recently, many people have asked why we are doing increases and what it gives at the end. In most of the cases changing the size of the needles is not enough to knit a hat that will sit well on the head. If you compare stockinette stitch and cable patterns, you will see that cables make work more compressed and tight that, at the end, can drastically change desired size of the hat. In other words, increases will make your hat sit perfectly.
Use any increase method you like. Add 20 stitches to get in total 108 stitches or any other number divisible by 12. Try to redistribute increases as equally as possible among the ribbing part.
Round 2-6: knit in stockinette stitch.
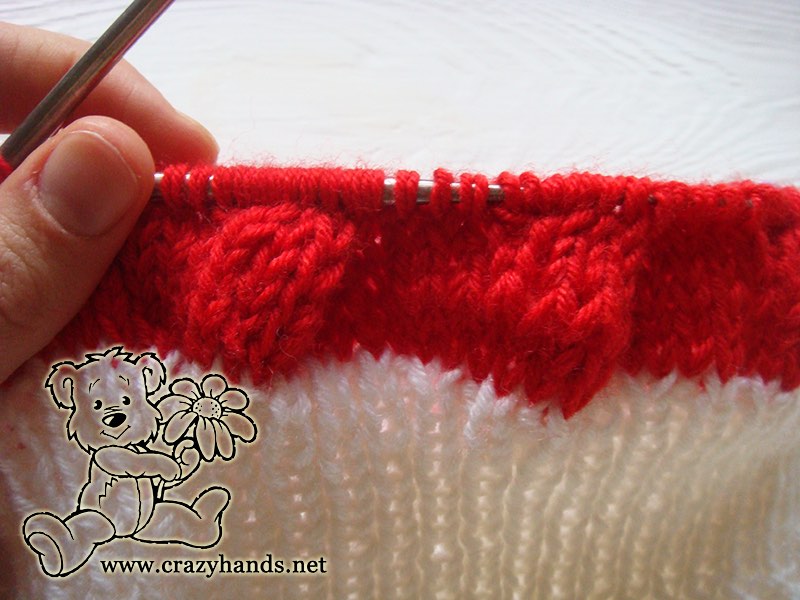
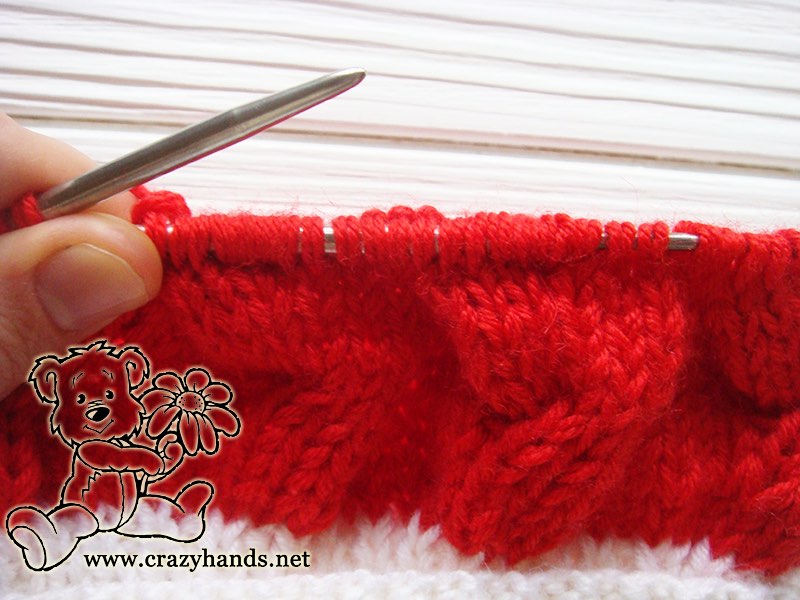
Round 7: *С4В, 4k, repeat from* to end of round.
Round 8-12: knit in stockinette stitch.
Round 13: *4k, C4F, repeat from* to end of round.
Repeat Rounds 2-12 one more time.

Shaping the crown of the baby cable knit hat:
Round 1: *4k, slip 4 knit stitches to the extra needle and hold in front of work, [k2tog, 2k] – from the left hand needle, [k2tog, 2k] – from the extra needle, repeat from* to the end of the round.
Round 2-6: knit in stockinette stitch.
Roound 7: *Slip 4 knit stitches to the extra needle and hold in back of work, 3k from the left hand needle, [k2tog, 2k] – from the extra needle, 3k, repeat from* to the end of the round.
Round 8-9: knit in stockinette stitch (The standard hat length for toddlers is about 17-18 cm or 7 inches. Knit more rounds in stockinette stitch if you prefer to have a slightly longer hat for your baby.)
Round 10: *3k, slip 3 knit stitches to the extra needle and hold in front of work, [k2tog, 1k] – from the left hand needle, [k2tog, 1k] – from the extra needle, repeat from* to the end of the round.
Round 11-12: knit in stockinette stitch (Knit more rounds if needed).
Round 13: *Slip 3 knit stitches to the extra needle and hold in back of work, 2k from the left-hand needle, [k2tog, 1k] – from the extra needle, 2k, repeat from* to the end of the round.
Round 14: *k2tog, k1 repeat from* to the end of the round
Break yarn leaving 10 cm long tail and draw it through all stitches. Pull it tight and fasten securely.
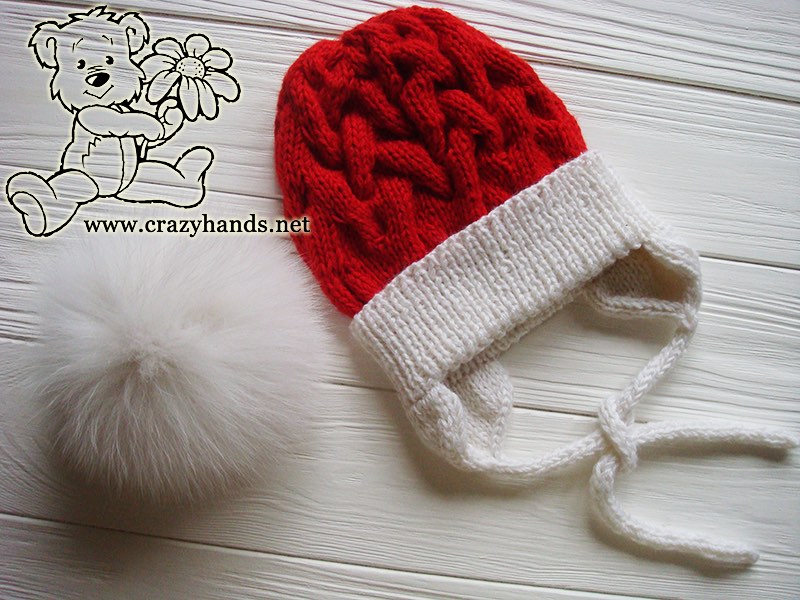
Attach a fur pom pom to the top of the hat.
Knitting the earflaps of the baby cable winter hat
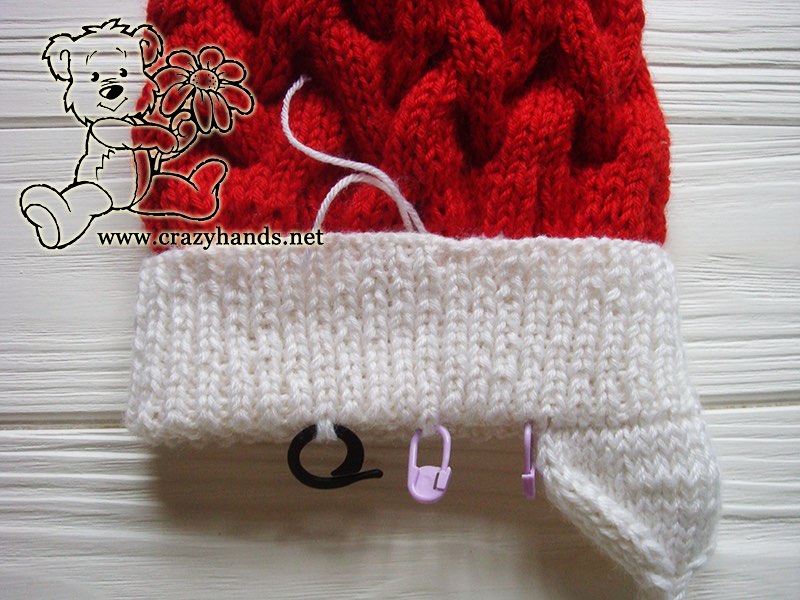
How to calculate earflaps placement? This method works 100% for any age and any size. Divide the total number of stitches of ribbing part (88) by 5. 2/5 – for the front part, 1/5 for the back part, 1/5 and 1/5 for each earflap.
In my case the total number of stitches is not divisible by 5 that is why I round up the result for the earflaps and back part and round it down for the front part.
88/5=17.6 stitches
Earflaps – 18 stitches each
Back part – 18 stitches
Front part – 17+17=34 stitches.
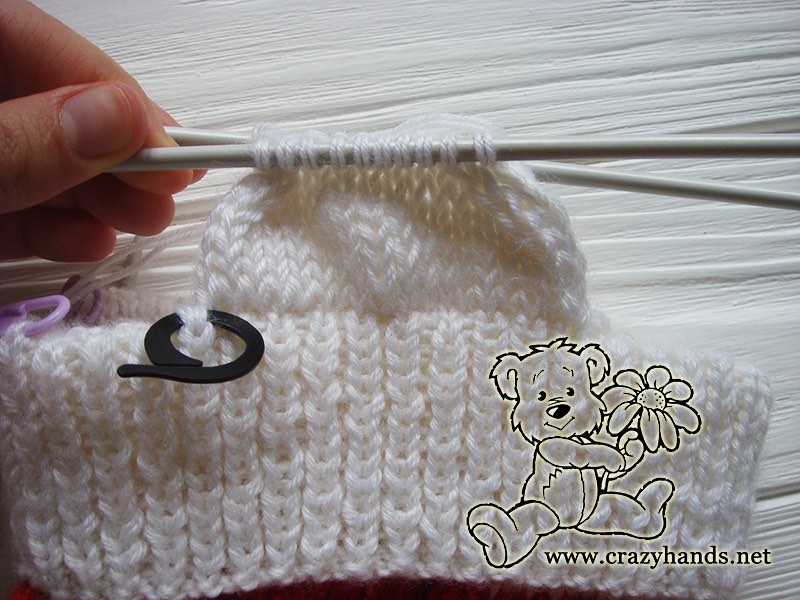
Find your very first stitch and put markers for the earflaps. Take a look at the picture – middle purple marker shows back central part while second purple one and black marker show beginning of the earflaps.
To make the hat even warmer I decided to knit earflaps in two layers. You can also learn how to knit the ordinary earflaps from baby hat knitting pattern in the gradient color.
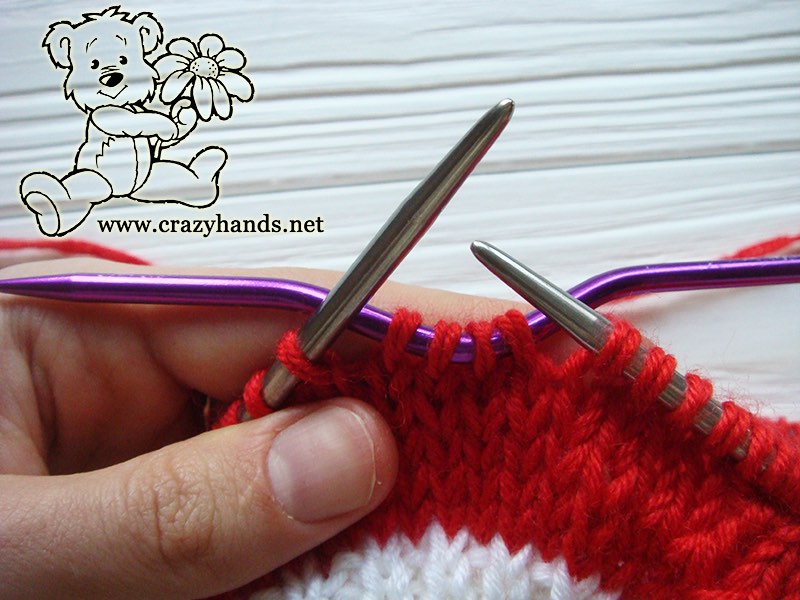
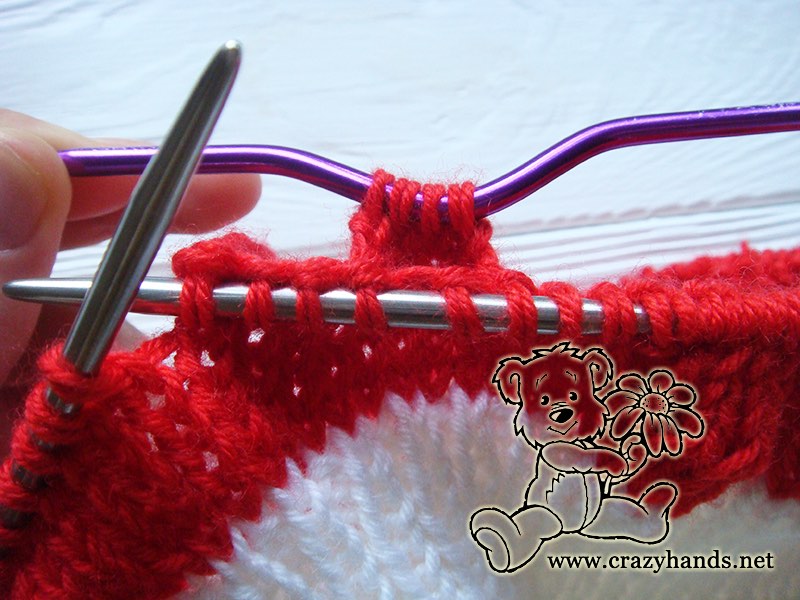
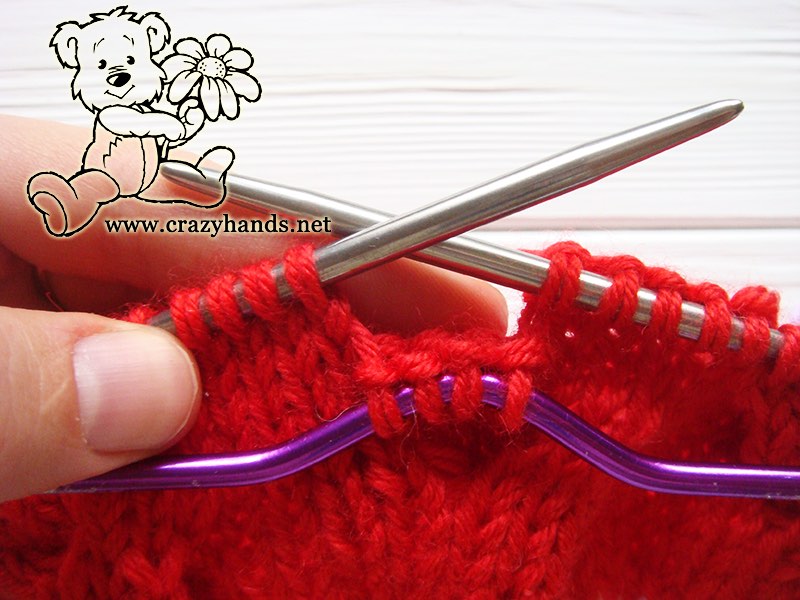
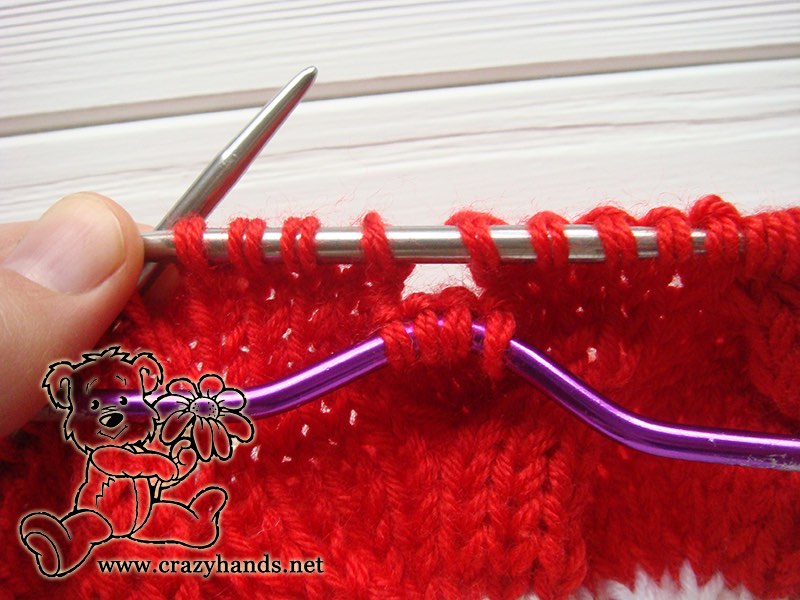
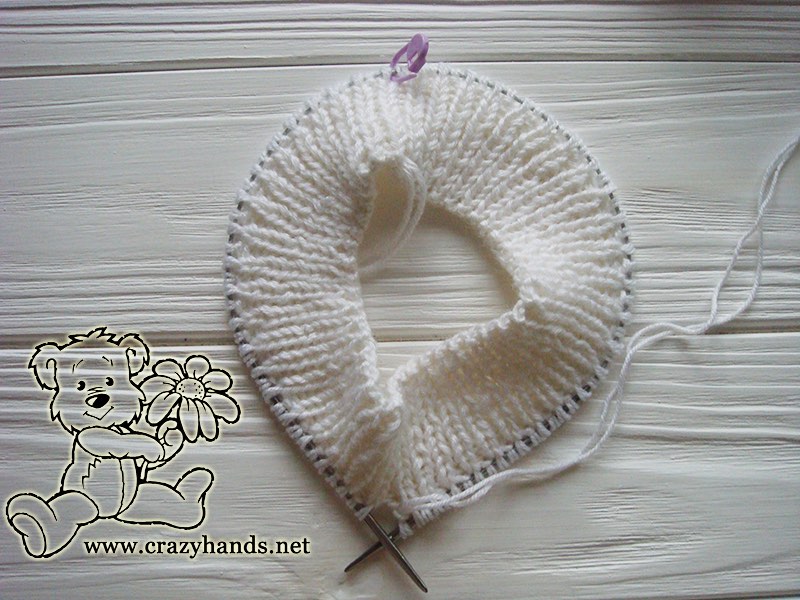
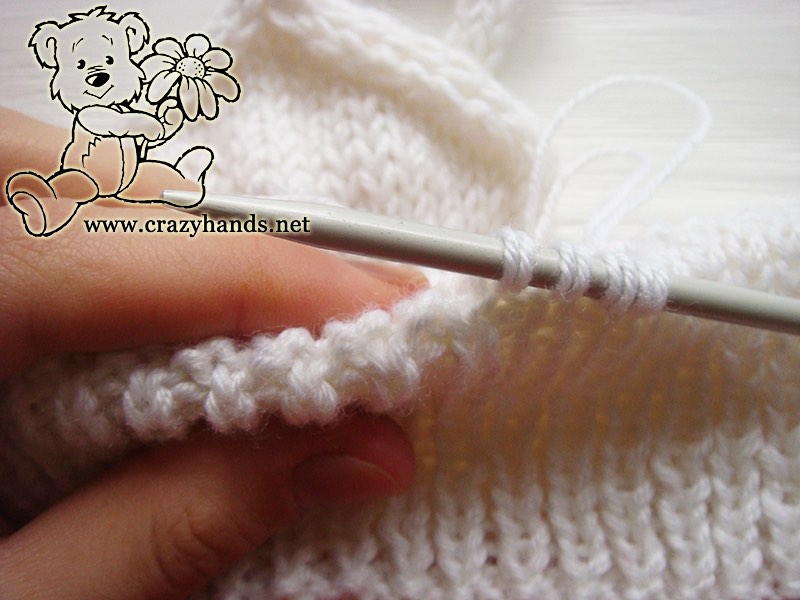
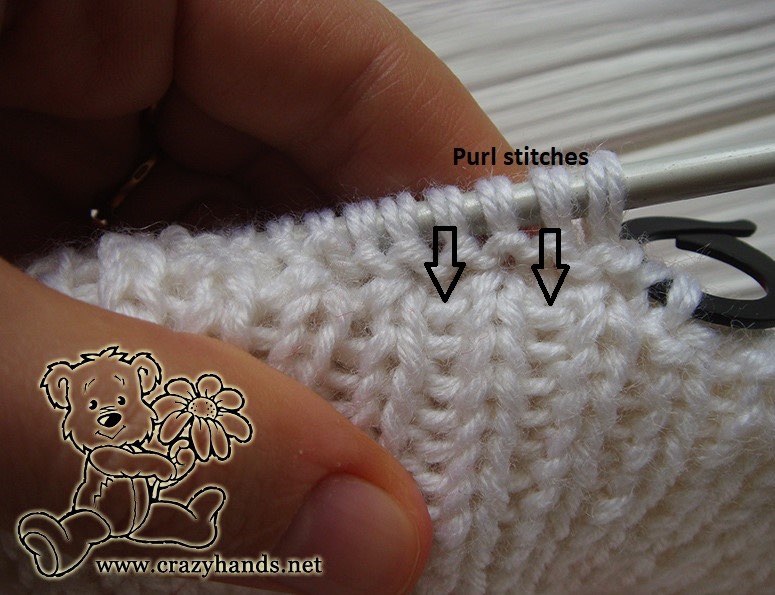
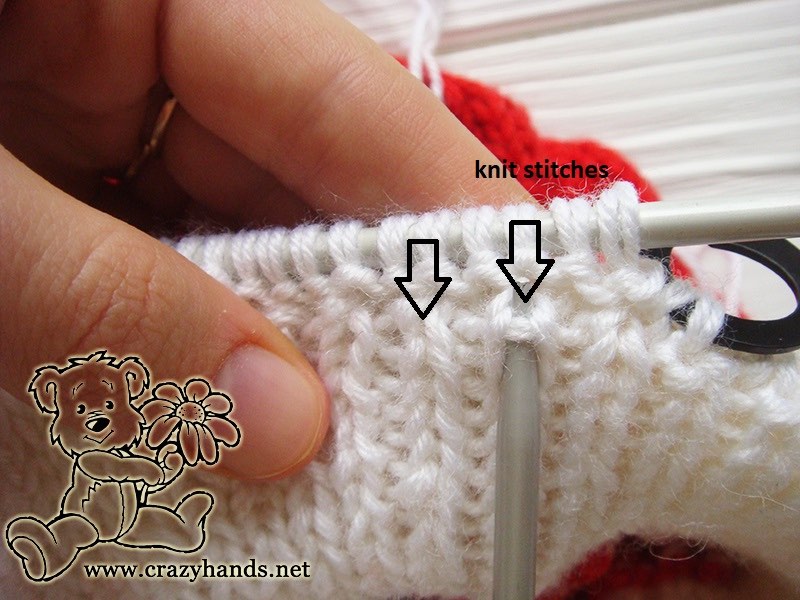
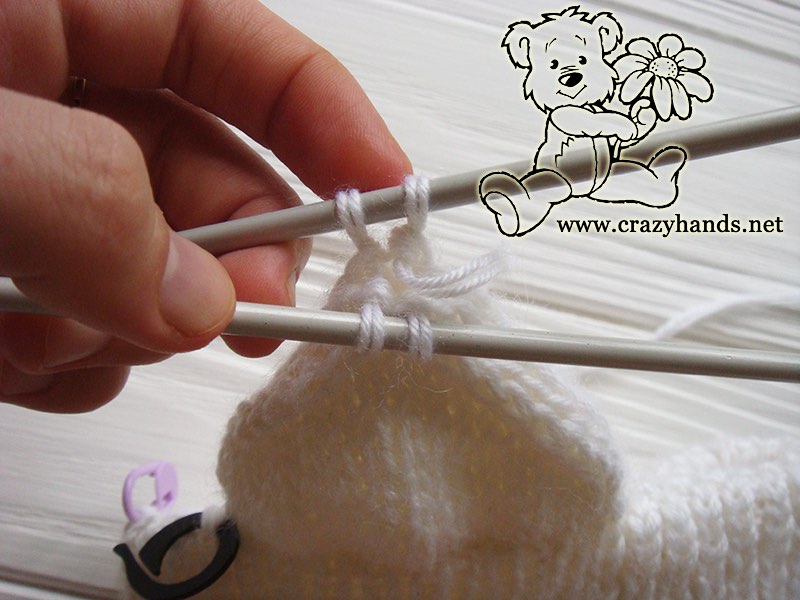
Using 1st double pointed knitting needle pick up 18 stitches along the edge of the folded brim, turn your work and with the 2nd needle pick up again 18 stitches that are lying one round below. There is no problem with picking up purl stitches but to pick up knit stitch you have to go a bit in between. Please check pictures.
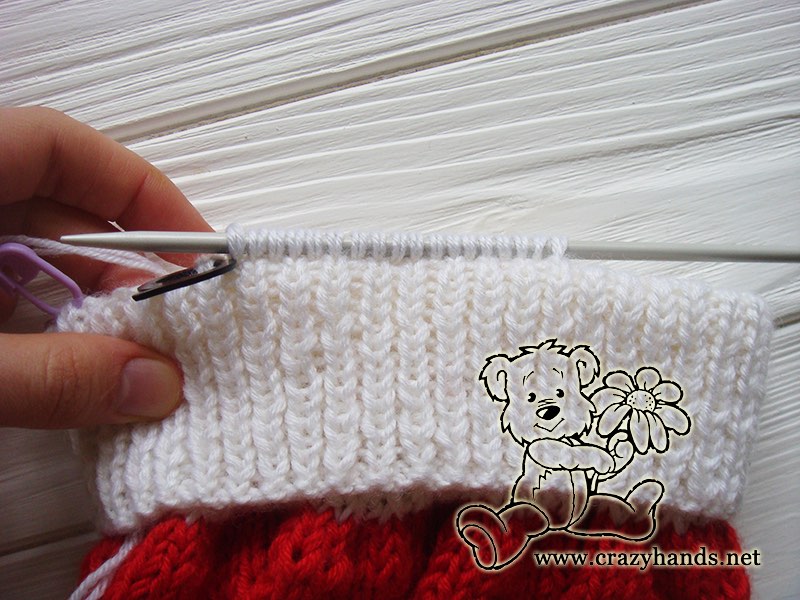
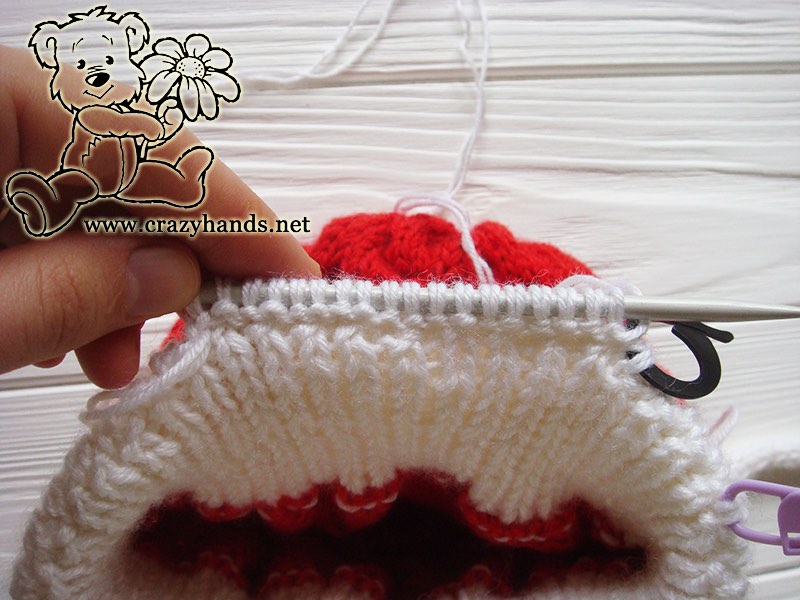
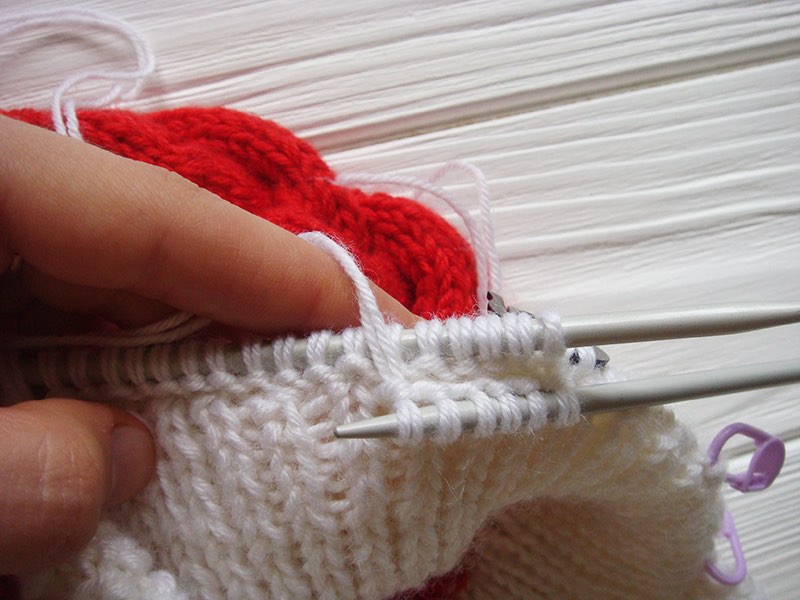
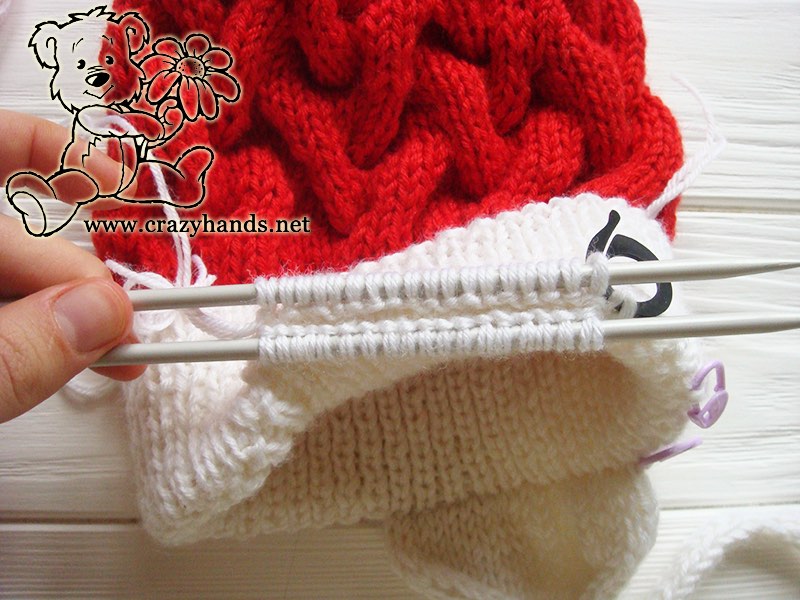
Turn your work again, Now, it looks like that you are going to knit in the round.
Round 1-4: k18, turn work, k18.
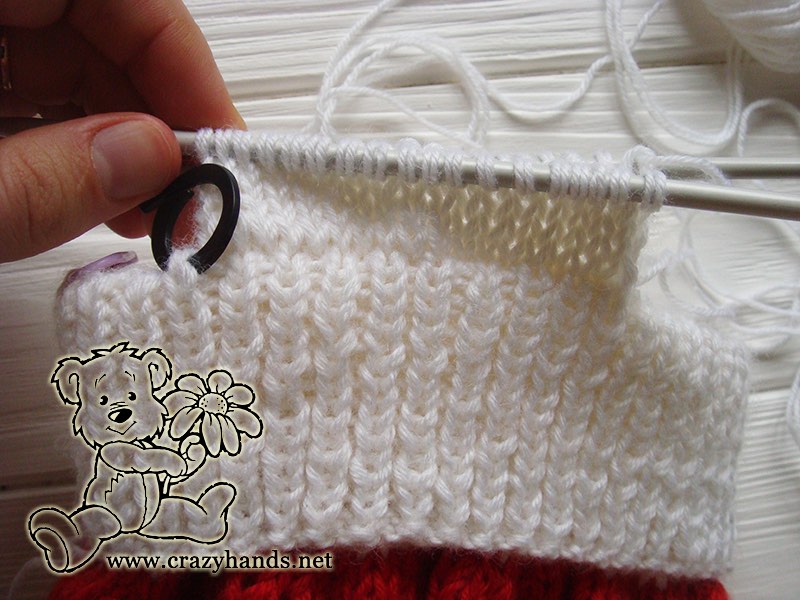
Round 5: [k1, skpo, k12, k2tog, k1], turn work, repeat again part in the brackets.
Round 6: [k1, skpo, k10, k2tog, k1], turn work, repeat again part in the brackets.
Round 7: [k1, skpo, k8, k2tog, k1], turn work, repeat again part in the brackets.
Round 8: [k1, skpo, k6, k2tog, k1], turn work, repeat again part in the brackets.
Round 9: [k1, skpo, k4, k2tog, k1], turn work, repeat again part in the brackets.
Round 10: [k1, skpo, k2, k2tog, k1], turn work, repeat again part in the brackets.
Round 11: [k1, skpo, k2tog, k1], turn work, repeat again part in the brackets.
Round 12: [skpo, k2tog], turn work, repeat again part in the brackets.
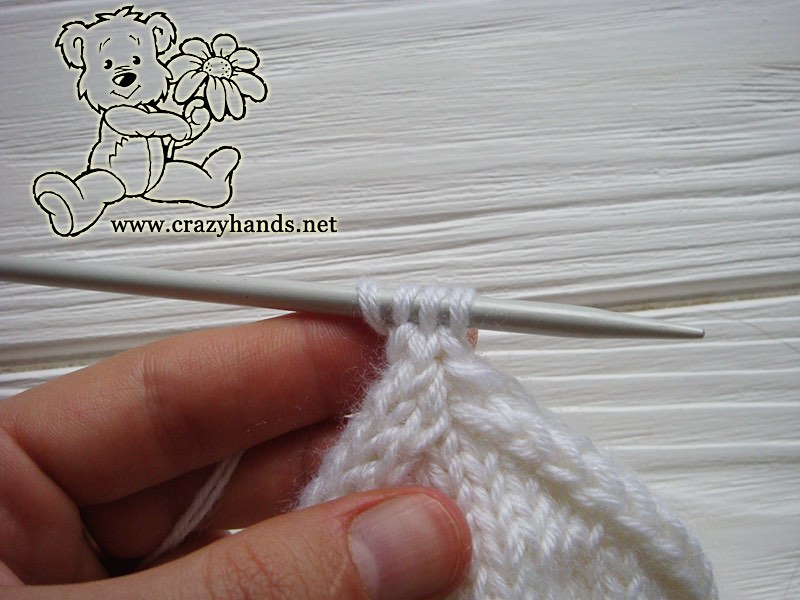
When there are 4 stitches on the needles we are ready to start knitting an I-cord.
Slip all stitches on one double pointed needle as it is shown in the picture. Slide all stitches to the other end of the needle. Working yarn from the left side.
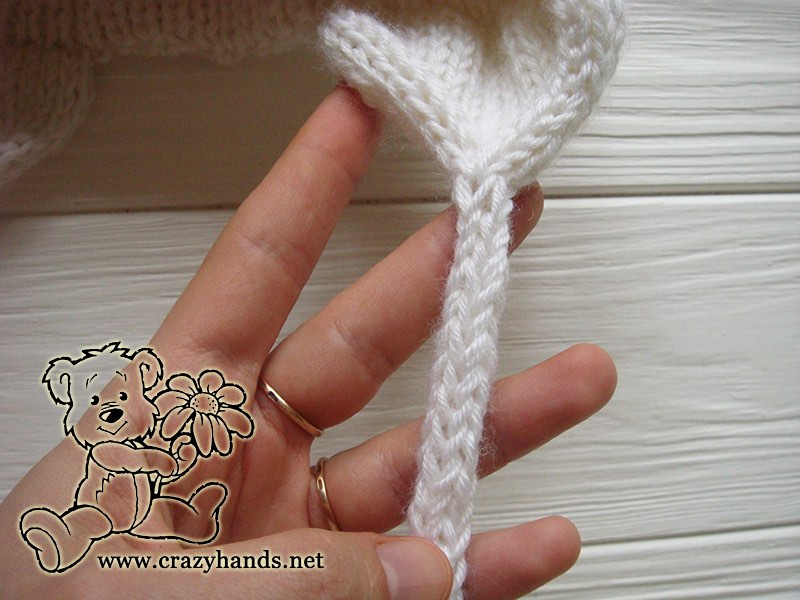
Knit one row bringing the yarn behind the row. Do not turn the work. Slide stitches again to the other end and repeat previous steps. Knit until the length of the cord reaches at least 25 cm or 9-10 inches. Bind of as usually.
Repeat all steps for second earflap.
Stay tuned for the matching baby knit scarf.
8 comments
Loves your patterns i like to have a pattern for ladies leg warmers Thanks
Thank you, Ann, for the patterns! Very generous!
On Round 7 where the cables start, do you K4 stitches after every completed cable?
In other words, slip 4 to extra needle, hold in back, K4 from left hand needle, K4 from extra needle, AND K4 AGAIN before starting next cable?
Hi, yes and k4 again. In total you repeat pattern every 12 stitches
Hi Ann , when your doubling your wool to knit the gradient colour does this not alter size / stitches used etc or do you use a lighter weight yarn ?
Ps I love your site
Hi Karen. I remove one thread and add new one. I am usually use the same yarn weight. I hope I have answered your question.
Is ‘K3’ same as ‘3K’? Just wanna make sure I’m reading the abbreviations correctly. Thank you!
yeah, you are right 🙂