Contents
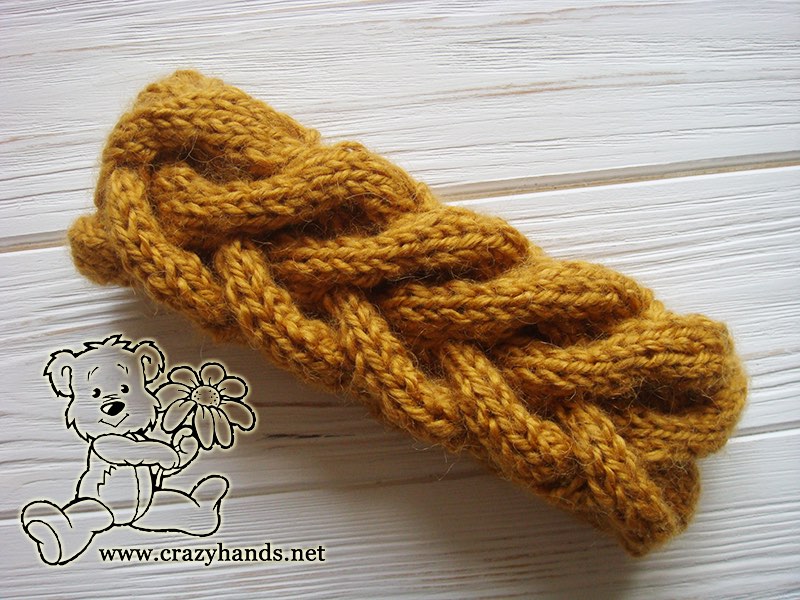
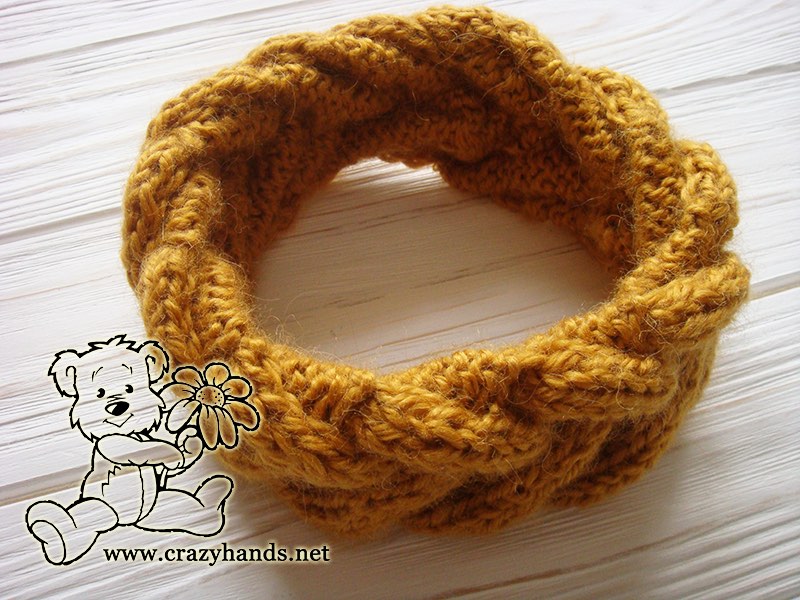
As a knitting addict I keep experimenting with different techniques and patterns to create an item with unique and appealing look. This honey-butterscotch chunky ear warmer with cables is a comfy accessory you can use in a mildly cold weather without ruining your hairstyle. Use chunky yarn to finish this ear warmers in almost no time, and consider creating at least a couple of them for your kids, friends or relatives.
Knitting materials and tools:
<> Knitting Needles 4.5 mm (US/UK 7);
<> Alpacana Lanoso Yarn: 35% wool, 40% acrylic, 25% alpaca. Sandy color <0.5 skein
Common abbreviations of knitting stitches:
k – knit
p – purl
sel s – selvage stitch: always slip the first stitch purlwise, work to the last stitch, purl the last stitch
Cable 4 Back (C4B): Slip 4 knit stitches to the extra needle and hold in back of work, k4 from the left hand needle, k4 from the extra needle.
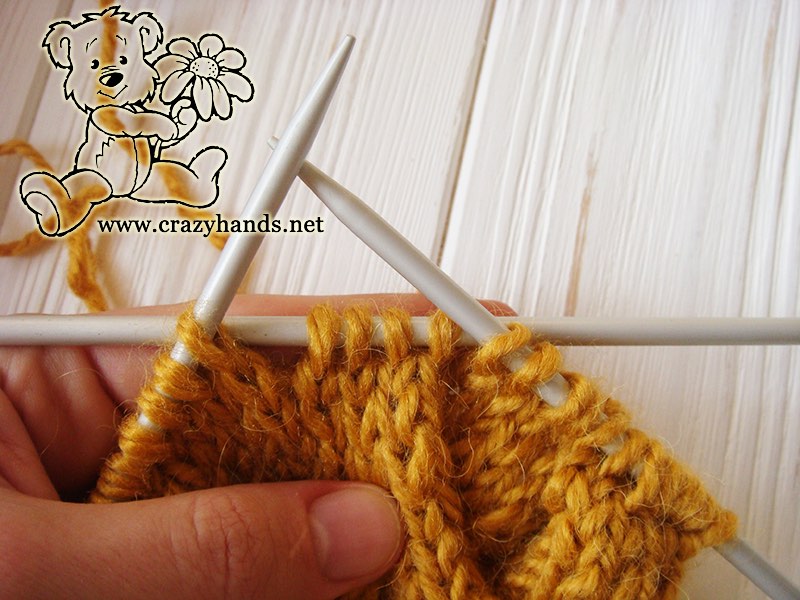
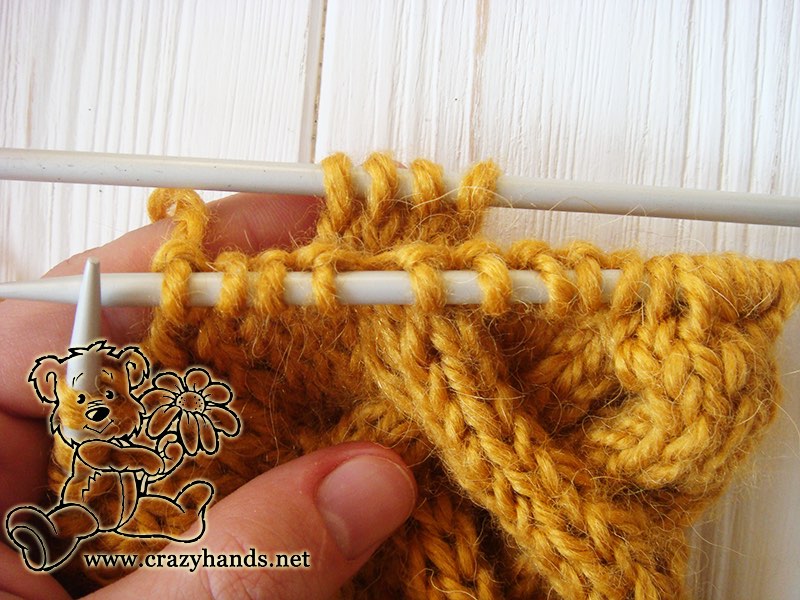
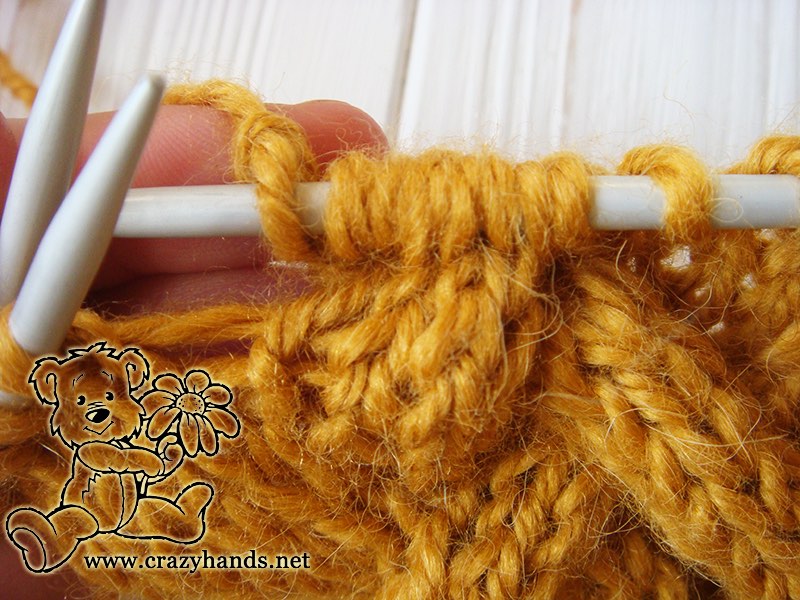
Cable 4 Front (C4F): Slip 4 knit stitches to the extra needle and hold in front of work, k4 from the left hand needle, k4 from the extra needle.
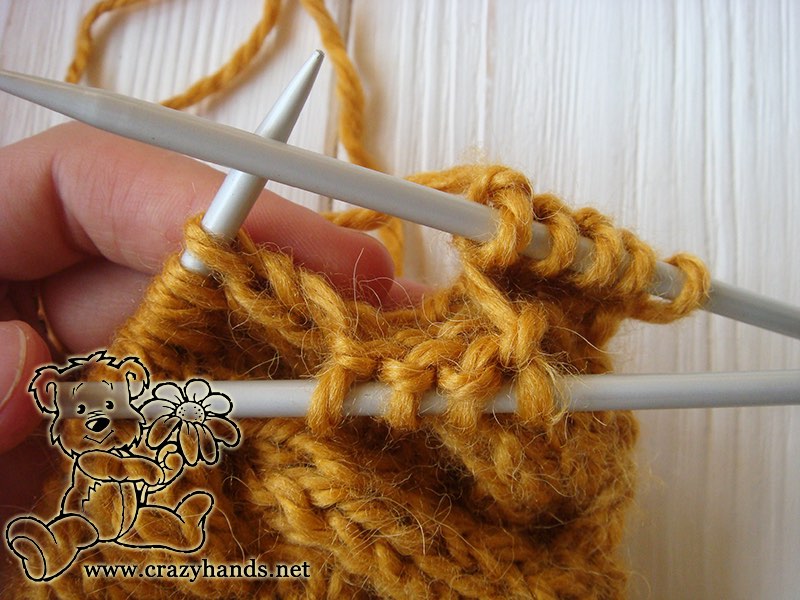
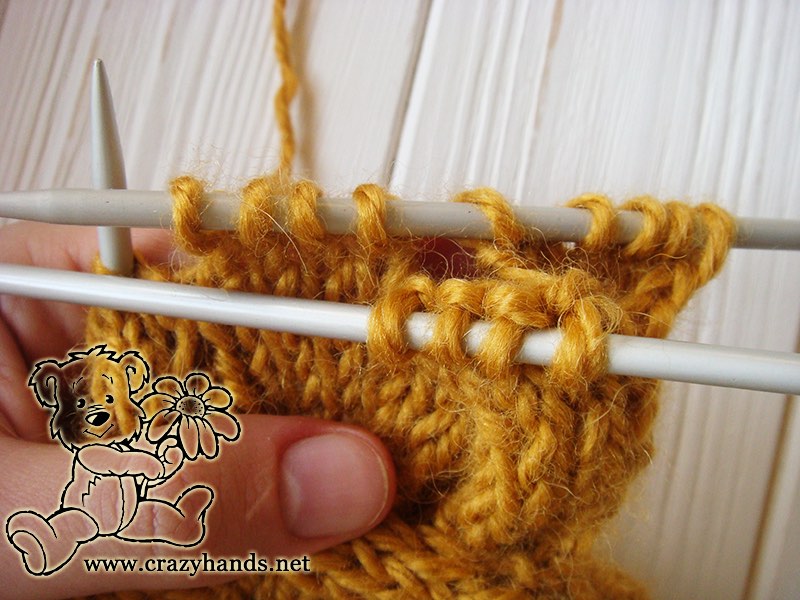
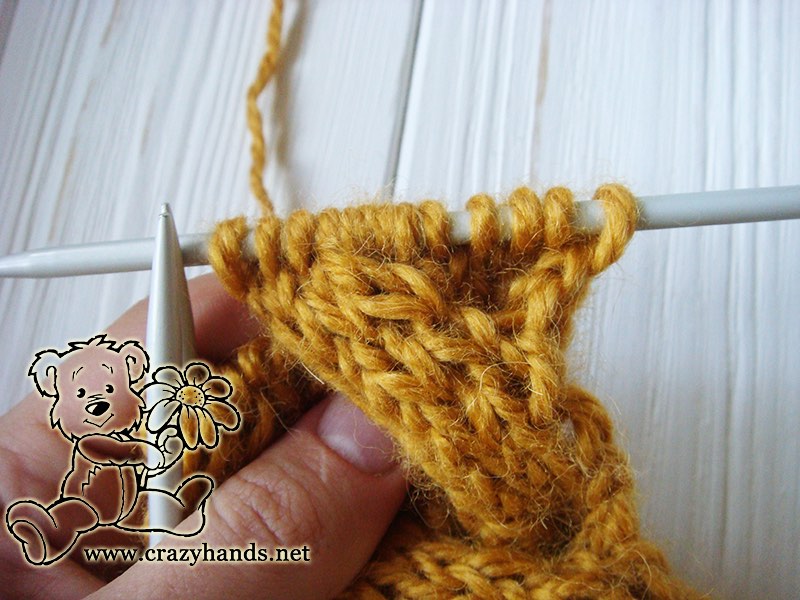
Note for knitters:
<> Each Row has a selvage stitches.
Chunky knit cable ear warmer size:
Length folded in half: 22 cm (8.6”).
Width: 7.5 cm (3”).
Chunky knit cable ear warmer pattern:
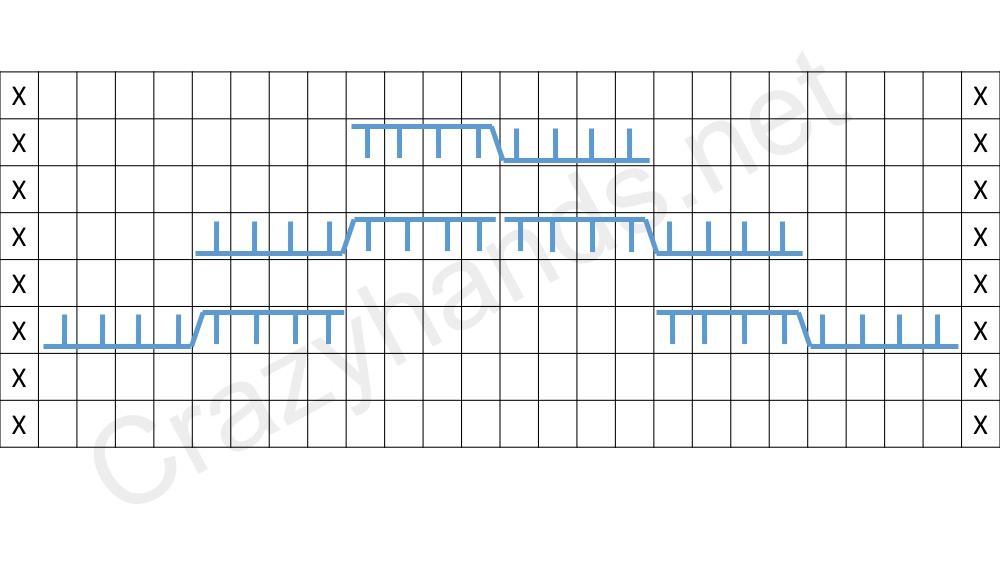
Cast on 26 stitches (24 stitches cable pattern + 2 selvage stitches).
Row 1: sel s, knit all stitches, sel s.
Row 2: sel s, purl all stitches, sel s.
Row 3: sel s, C4F, k8, C4B, sel s. (In this Row while knitting C4F stitch I would suggest to slip 5 knit stitches to the extra needle and hold in front of work (k4 stitches + sel s), then k4 from the left hand needle, k5 from the extra needle. While knitting C4B stitch I would suggest to slip 4 knit stitches to the extra needle and hold in back of work, k5 from the left hand needle (k4+ sel s), then k3 and sel s from the extra needle.
Row 4: sel s, purl all stitches, sel s.
Row 5: sel s, k4, C4F, C4B, k4, sel s.
Row 6: sel s, purl all stitches, sel s.
Row 7: sel s, k8, C4F, k8, sel s.
Row 8: sel s, purl all stitches, sel s.
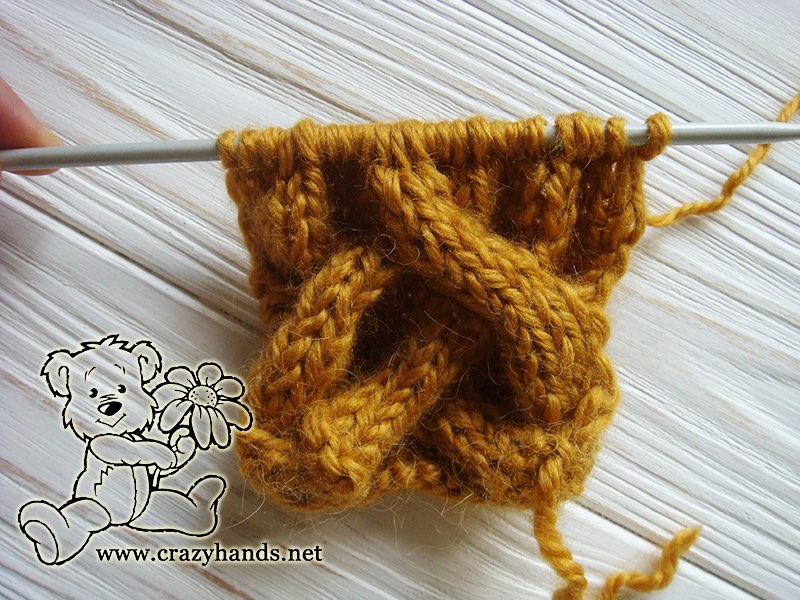
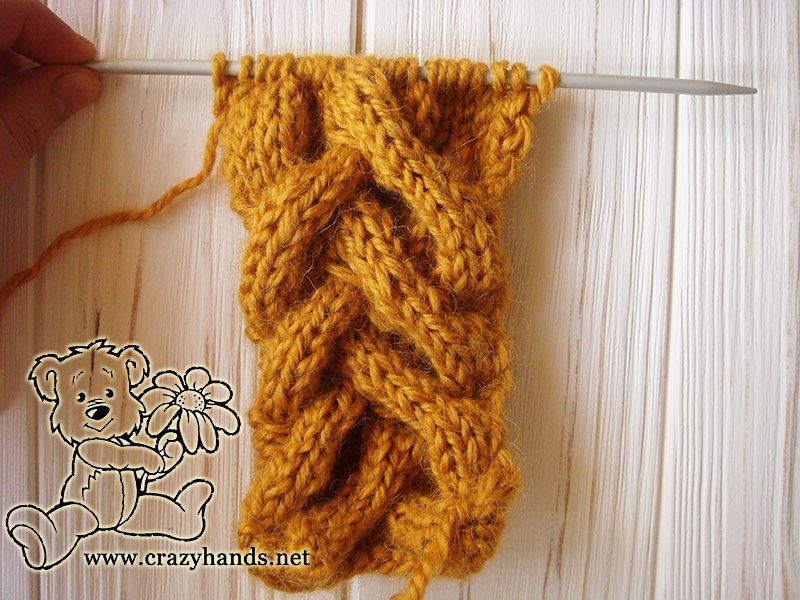
Repeat Rows 1-8 until headband measures slightly smaller than circumference of your head. Like this it will fit perfectly. Finish knitting with Row 1. Do not purl Row 2. Cut yarn leaving 10-15 cm (4-6 inches) tail. Using the method of horizontal invisible seam sew two ages of the headband together.
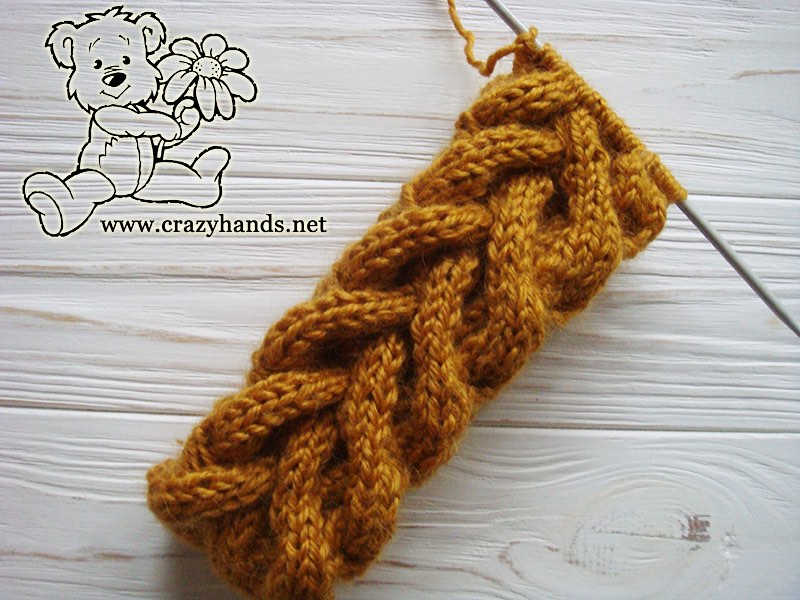
Headband is ready. I think that decorating our headband with small fur pom poms makes it look different.
Cheers, Ann
