
Contents
Knitting materials and knitting tools:
<> 5 Double Pointed Knitting Needles 4.5 mm (UK7 / US 7). You can use 16” Circular Knitting Needles and magic loop technique to knit in the round;
<> Nashua IVY (Aran) – 50% Alpaca, 45% Merino, 5% Polyamide. 50 grams -137 yards per skein – in total less than 2 balls;
<> Crochet hook 4.5 mm and waste yarn for provisional cast on.
<> 9 stitch markers.
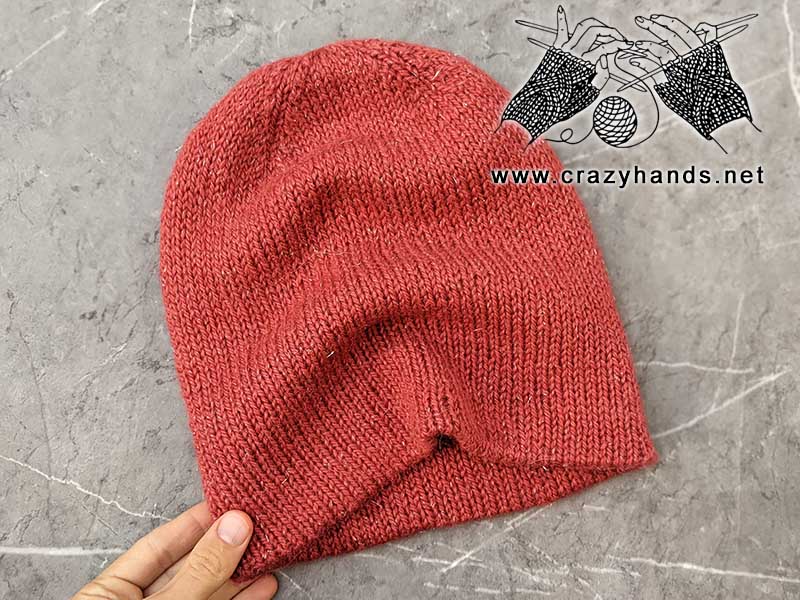
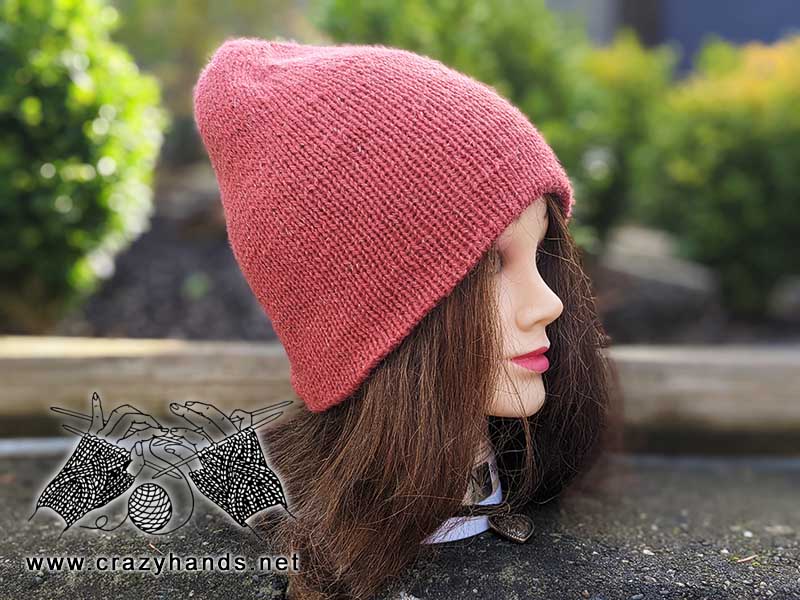
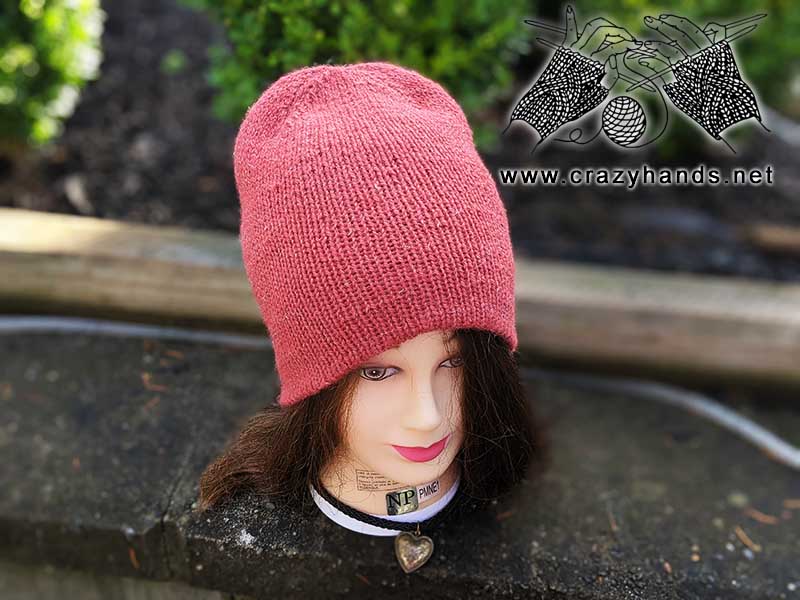
Knit double layer reversible hat size:
Adult: 53-57 cm
Gauge: 17-18 sts – 4 inches (10 cm) in stockinette stitch
Common abbreviations of knitting stitches:
k – knit
p – purl
k2tog – knit two together
skpo - Slip, Knit, Pass Over: Slip one stitch to the right needle knitwise, knit in the next stitch, and drop this stitch off the left needle, insert the left needle into the slipped stitch, pass it over the knit stitch and it’s done.
pm – place marker
Body pattern of the reversible knit hat:
With waste yarn and crochet hook, chain 85. Cut the waste yarn. Take the knitting needles and pick up 81 stitches through the back ridge of chain. Use 1 stitch to join and knit in rounds. Please check video tutorial below for the detailed guidance.
Round 1: knit all stitches around.
Repeat Round 1 until hat reaches 21-23 cm.

Shaping the crown of reversible knit hat:
Before shaping the crown place stitch markers in the following way:
9 sts, pm, 1 sts, pm, 19 sts, pm, 1 sts, pm, 19 sts, pm, 1 sts, pm, 19 sts, pm, 1 sts, pm, 10 sts
Round 1: k7, skpo, k1, k2tog, k15, skpo, k1, k2tog, k15, skpo, k1, k2tog, k15, skpo, k1, k2tog, k8.
Round 2: knit all stitches around.
Round 3: k6, skpo, k1, k2tog, k13, skpo, k1, k2tog, k13, skpo, k1, k2tog, k13, skpo, k1, k2tog, k7.
Round 4: knit all stitches around.
Round 5: k5, skpo, k1, k2tog, k11, skpo, k1, k2tog, k11, skpo, k1, k2tog, k11, skpo, k1, k2tog, k6.
Round 6: knit all stitches around.
Round 7: k4, skpo, k1, k2tog, k9, skpo, k1, k2tog, k9, skpo, k1, k2tog, k9, skpo, k1, k2tog, k5.
Round 8: knit all stitches around.
Round 9: k3, skpo, k1, k2tog, k7, skpo, k1, k2tog, k7, skpo, k1, k2tog, k7, skpo, k1, k2tog, k4.
Round 10: knit all stitches around.
Round 11: k2, skpo, k1, k2tog, k5, skpo, k1, k2tog, k5, skpo, k1, k2tog, k5, skpo, k1, k2tog, k3.
Round 12: knit all stitches around.
Round 13: k1, skpo, k1, k2tog, k3, skpo, k1, k2tog, k3, skpo, k1, k2tog, k3, skpo, k1, k2tog, k2.
Round 14: knit all stitches around. (24 sts)
You can knit one more round of decreases to get in total 16 sts.
Cut the yarn leaving 10 cm tail. Using hook or a yarn needle thread the tail through remaining 24 (16) stitches. Weave in ends.
Now it is time to get rid of a provisional cast on. Find the end of the crochet chain that has a small knot. Cut the knot and unravel the chain. Place the live loops onto your needle, one at a time. Double count your stitches to make sure you picked up all 80.
Place the stitch marker, attach the yarn, and start knitting again in stockinette stitch. You can opt in for using a different color for second layer to make it look unique.
Round 1: knit all stitches around.
For the smooth transition from the first to the second round we have to knit the first stitch below.
Round 2: knit one below, knit all other stitches.
Round 3: knit all stitches around.
Repeat Round 3 for the same number of rounds or the same length as for the first layer.
Pay attention that you must weave in all ends before you close the second crown.
As we are knitting in the opposite direction now the stitch markers for the crown must be placed in the following way:
10 sts, pm, 1 sts, pm, 19 sts, pm, 1 sts, pm, 19 sts, pm, 1 sts, pm, 19 sts, pm, 1 sts, pm, 9 sts
Round 1: k8, skpo, k1, k2tog, k15, skpo, k1, k2tog, k15, skpo, k1, k2tog, k15, skpo, k1, k2tog, k7.
Round 2: knit all stitches around.
Go on making decreases as for the first layer. Close hat’s crown and weave in end on the right side, inserting the needles underneath remaining stitches at least two or three times. You can also use the tail to attach the inner and the upper layers.
Once you finish knitting the hat it might look perfectly nice, just wash it and dry flat to even out tension between all the stitches.
Thank you for watching and knitting double layer reversible hat together with me. Leave comments if you have any questions or suggestions, subscribe to my YouTube channel, Instagram, Pinterest, and always be the first one to get the latest patterns.
22 comments
I love this pattern, I’m hoping to make some for Christmas presents.
Thank you and wish you good luck! 🙂
Is there a way to print this
there is only paid ads-free pattern https://crazyhands.net/shop/knitting-patterns/ads-free-double-layer-reversible-hat-knitting-pattern/
Do you know how many stitches to cast on for a hat for a 4 yr old? Or is there a version of the pattern for a child size?
About 72 – 76 sts. But usually after 4-5 years kids have an adult circumference. The difference only is depth.
Great tutorial !
Glad that I don’t have to use DPN.
Is there a way to make this just a little larger, like 90 stitches instead of 80? My boyfriend has a large head, lol.
Hi Lola. Yes. But cast on multiple of 4. For example 88 or 92 sts
Thanks so much! I postponed starting this project until I was ready and based on your guidance I cast on 92 and finished the body and ready to start shaping the crown. I am unsure where to place the stitch markers to adjust for the extra cast on and how you determine this. Can you help?
Great pattern! Thank you! Do you have a modified decrease section for this pattern if one would want to knit the hat in 1×1 ribbing?
I do not have but I have really cool ribbed hat with catchy crown. It is not double layer but still is very cool
I guess maybe add 3 stitches so 9 becomes 12 pm and 19 becomes 22 pm? And so instead of 20 x 4 it becomes 23 x 4 = 92? And this is why you said increase by multiples of 4. And then 3 more rounds of decreases?
Place stitch markers in this order 11-1-22-1-22-1-22-1-11
Hi, 👋 have wanted to make one of these for a long time. Have some yarn that have a gauge of 17-18 sts per inch on a size 5 or 6 mm. If I get either of these gauges how many sts. do I cast on and can K follow the pattern for shaping. Thank you 🙏 for your response.
Yes you follow the pattern for the crown. You need to cast on multiple of 4. You can follow the pattern or cast on 80 sts
Thanks so much. Appreciate your response.
Hi! Would like to ask another question. 🙋🏿♀️ Am making a scarf using size 6 mm needles. Am making it with the 1 by 1 rid. I would like to make the hat using the rib pattern. What suggestions would you suggest? Smaller needles, more or same sts. suggested in your earlier response? Would like a snug fit. Would like it longer but that’s not a problem. Thanks so much. Made a hat from your site before and loved it. Thanks for your kind response.
Sharon
Hi what yarn you are going to use?
does it matter when you decrease, to slip the stitch knit or purl-wise?
Start decreases as you reach desired length of the hat. Slip stitches in a way to stay you do not twist them