
Contents
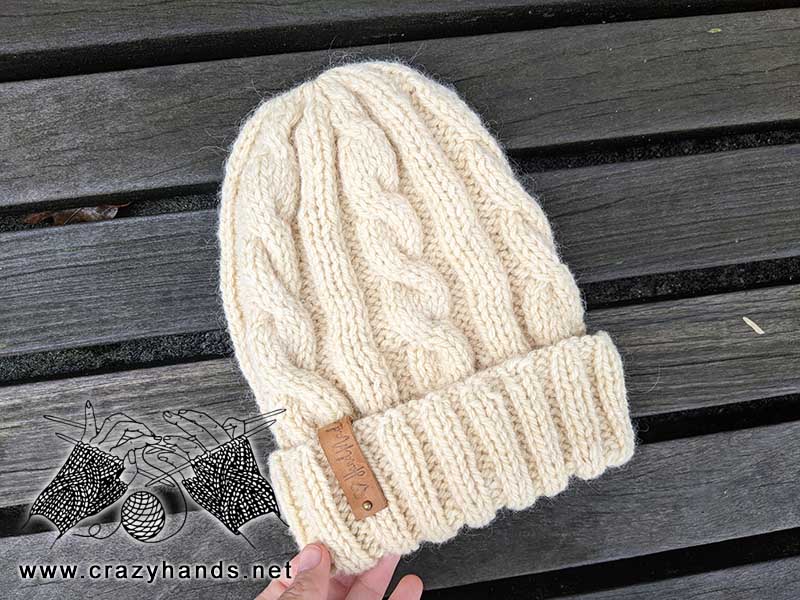
Today on the knit menu is a super sweet cable hat 🙂 Crème Brûlée hat can be made with two straight needles and seamed up at the end. This hat is knitted in rows to make things easier for folks who aren’t fans of knitting in the round. Here you go my friends, enjoy knitting this hat!
Knitting materials and knitting tools:
<> Straight needles, size 5 mm (US 8/UK 6)
<> Loch Oirbsen (bulky) – 100% pure wool.
Ribbed bubble knitting hat size:
Adult/Adult Plus: 53-58 cm
Gauge: 14-15 stitches in = 4 inches in stockinette

Common abbreviations of knitting stitches:
k – knit
p – purl
inc – increase: knit one stitch below.
k2tog – knit two together
skpo – Slip, Knit, Pass Over: Slip one stitch to the right needle knitwise, knit in the next stitch and drop this stitch off the left needle, insert the left needle into the slipped stitch, pass it over the knit stitch and it’s done.
C3F – Cable 3 Front: Slip 3 knit stitches to the extra needle and hold in front of work, k3 from the left-hand needle, k3 from the extra needle.
C2F – Cable 2 Front: Slip 2 knit stitches to the extra needle and hold in front of work, k2 from the left-hand needle, k2 from the extra needle.
sel s – selvage stitch: always slip the first stitch purlwise, work to the last stitch, purl the last stitch.
Note for knitters:
<> Each Row has a selvage stitch.
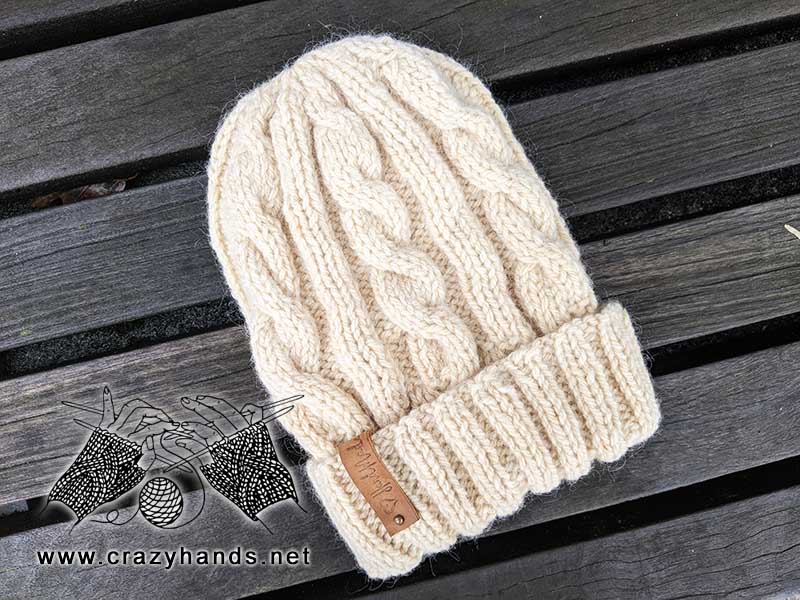
Crème Brûlée cable hat knit pattern:
Ribbing of the hat
Using long tail method cast on 70 stitches.
Row 1: sel s, k1, p2 [k2, p2] – repeat till the end of row, k1, sel s, turn.
Row 2: sel s, p1, k2 [p2, k2] – repeat till the end of row, p1, sel s, turn.
Repeat Rows 1 and 2 until piece measures 14 cm if you want a folded brim.
Body part of the hat:
In the next row we need to add 7 sts. I suggest distributing stitches evenly by placing stitch markers every 10 sts and add 1 stitch in the middle. Check video tutorial for visual clues.
Row 1: sel s, k1, p2, k1, inc, k1,p2, k2 – p2, k1, inc, k1, p2, k2 p2 – k2, p2, inc, k1, k1, p2, k2 – p2, k1, inc, k1, p2, k2, p2 – k2, p2, inc, k1, k1, p2, k2 – p2, k2, p2, inc, k1, k1, p2 – .k2, p2, inc, k1, k1, p2, k1, sel s. (77 stitches)
Row 2: sel s, k2, p3, k6, p3, [k3, p3, k6, p3] – repeat four times, k1, sel s.
Row 3: sel s, p1, [k3, p6, k3, p3] – repeat 4 times, k3, p6, k3, p2, sel s.
Row 4: Repeat Row 2.
Row 5: Repeat Row 3.
Row 6: Repeat Row 2.
Row 7: Repeat Row 3.
Row 8: sel s, k2, p3, C3F, p3, [k3, p3, C3F, p3] – repeat four times, k1, sel s.
Row 9: sel s, p1, [k3, p6, k3, p3] – repeat 4 times, k3, p6, k3, p2, sel s.
Row 10: sel s, k2, p3, k6, p3, [k3, p3, k6, p3] – repeat four times, k1, sel s.
Row 11: Repeat Row 9.
Row 12: Repeat Row 10.
Row 13: Repeat Row 9.
Row 14: Repeat Row 10.
Row 15: Repeat Row 9.
Row 16: Repeat Row 8.
Repeat rows 9-16 one more time, after that repeat rows 9-13. At this stage your hat’s length should be about 25 cm.
Shaping crown of the hat:
Row 1: sel s, k2, p3, skpo, k2, k2tog, p3, [k3, p3, skpo, k2, k2tog, p3] – repeat four times, k1, sel s.
Row 2: sel s, p1, [k3, p4, k3, p3] – repeat 4 times, k3, p4, k3, p2, sel s.
Row 3: sel s, k2, p2tog, p1, C2F, p1, p2tog, [k3, p2tog, p1, C2F, p1, p2tog] – repeat four, k1, sel s.
Row 4: sel s, p1, [k2, p4, k2, p3] – repeat 4 times, k2, p4, k2, p2, sel s.
Row 5: sel s, k2, p2tog, k1, skpo, k1, p2tog, [k3, p2tog, k1, skpo, k1, p2tog] – repeat four, k1, sel s.
Row 6: sel s, p1, [k1, p3, k1, p3] – repeat 4 times, k1, p3, k1, p2, sel s.
Row 7: sel s, [k2tog] – repeat till the end of row, sel s.
Row 8: sel s, purl all stitches, sel s.
Cut the yarn leaving long tail. To seam up the hat I am going to use a Mattress Stitch. Thread the tail with a large yarn needle. Pull the tail through remaining 22 stitches. Now line up two sides by pinching them together with right side facing out. Use stitch markers to help yourself. Make sure you have found first stitch on each side otherwise you may end up with lopsided seam.
Insert your needle underneath the two bars between sel s and next knit stitch on the right side and draw yarn through, after that insert the needle underneath the two bars between sel s and next knit stitch on the left side and draw the yarn through again. Go on seaming up picking up bars on the right and on the left sides until you reach a ribbing part. To stitch up ribbing on the right side you need to pull the tail on the wrong side of the hat and continue seaming up as for the body part. Fold a brim. Weave in ends. Attach pom pom.
41 comments
beautiful hat. I notice when you knit you are knitting through the back of the loop. I continental knit as you do. Usually a pattern will specify if you are to knit through the back loop. should it be normal knit or back loop? thank you in advance.
it is just a normal knit stitch, knit it as you did before. At the end you will get the same result – a beautiful hat 🙂
Hi there,
I have just got the the body part but am a little confused s row 8 (where you cable), isn’t repeated and there is not cabling for the rest of the body? I’m a little confused as to how it will appear as to me it seems it will be ribbed at the end?
Hi Evy. Check Row 16. It is written Repeat Row 8. Let me know if it is still unclear
I love the Creme Brulee hat. I would like to make the hat with worsted weight yarn. How many stitches would you cast on with worsted weight yarn?
Hi. It can be up to 100 sts. DEpends on your gauge. Just to know finial number has to be divisible by 15 plus 2 selvage sts.
Looks lovely. How many stitches do I caast on for a man size hat please?
hi, thank you. To make a bigger size you can increase the number or purl stitches between cables, you can also increase the cable instead of 6 sts make 8. The last but not least option is to add one more cable.
I I want to use DK weight yarn, how many stitches would I cast on? My swatch measures 2″ = 11 st
What do you mean by final number divisible by 15 plus 2 selvage sts. Is the final number after the increase? So would Icast on 100 and increase to a number divisible by 15, like 105 + 2 =107? Sorry I’m confused!
Hi, you are right, after increases the number of stitches has to be divisible by 15 + 2 sel s. You are right 107 is a perfect number
Thank you so much!
Good luck!
I want to knit this in the round. Do you have a pattern for circular needles?
I am already working on it, please stay tuned
How much bulky yarn do I need – weight – yards?
100-120 grams depends on the size you are doing. Normally 100 grams is enough (105 max)
I have taken 140 stitches. How many stitches should I increase.7 or 14?
Hi. The total number of stitches after increases has to be divisible by 15 + 2 sel s. 152 sts in your case
hi, I really like this pattern, but since I haven’t knitted anything in years, I’m a bit rusty. Please can you tell me, if I cast on 100 stitches, how many stitches do I increase?tks for sharing this lovely pattern.
You will need to add 5 sts. You need to get the number multiple of 15
tks so much. I hope I’ll get it right
Love this pattern! I like knitting in the round, would you include instructions for that?
yes I will do it soon. I have got many requests for this hat already
Thank you for the beautiful pattern. I’m new to knitting but the first hat came out perfect. I’m making one larger but a little confused on where to start row 1 when doing increases when doing the repeat. Do I start with salvage st again or skip salvage st and knit 1. 🧶ty Shelly
Hi Shelly. You do not knit Row 1 when you start doing repeat. Start all repeats from Row 9. Yes you always start with sel s.
I learned to knit at my grandmothers knee when I was 8 years old, I will be 86 in May and I love the circular needles, I hardly ever pull out the straight needles. I can go back and forth on circulars and not be afraid of dropping a needle. I am knitting hats for the needy in my spare time for this next winter. Love to knit, never got the hang of crocheting!
This pattern looks beautiful. What ply wool is used?
Hi, I knit it was only bulky yarn (5), I am not sure about ply
I just made this hat and it only took me 3 days 😀 I was literally hooked. Came out quite small though, but it fits my daughter (4) perfectly. Thanks so much for the instructions and pattern! Love it 😀
Happy to hear Tanju. Thank you for your feedback!
I am kinda new to knitting. Don’t know what the Sel s. is used for? Do I need to use it? Thanks
Hi. You will need them when you are going to make a seam
My gauge is measuring at 3.5” not 4”. I’m using medium (4) weighted yarn and not bulky. Can I still make this hat or do I need to get bulky yarn? Should I just plan on knitting an extra cable to make sure it fits?
TIA
Hi. Yes I would definitely add extra cable and purl stitches in between
Your Creme Brulee hat is so strikingly beautiful . Thank you very much for the instructions. I have made two for my grandchildren.
Hi Sushilla, I’m so happy you liked the Creme Brulee hat pattern and knitted it for your grandkids. Your appreciation is the very rewarding. Thank you very much for supporting me!
From Sushilla.Thank you again for this wonderful pattern and the very clear demostration.
Please let me know if Row 6 in Shaping the Crown is fine as it is .I find 1sts missing at the end I might have made a mistake
Hi, Do you have 1 missing or stitches do not coincide?
I think you are right, Row 6 will look like Row 6: sel s, p1, [k1, p3, k1, p3] – repeat 4 times, k1, p3, k1, p2, sel s.
hi, I really like this pattern, but since I haven’t knitted anything in years, I’m a bit rusty. so can you please tell me, if I cast on 100 stitches,how many stitches do I need to increase? tks for sharing this pattern.
You will need to add 5 sts. You need to get the number multiple of 15