
Contents
Knitting materials and tools:
<> Straight, DPN or circular knitting needles 2.5 or 3 mm (UK 11) for the ribbing and 3.5 mm (US 4) – for the main pain.
<> GuoBao, Knitting Wool (3) – 100% wool.
<> Yarn needle and stitch markers, crochet hook 3.5 mm.
Knit flat kid’s mittens size:
Age: 4-6 years
Gauge: 21 sts –10 cm (4 inches).
Common abbreviations of knit stitches:
k – knit
p – purl
p2tog – purl two together
st(s) – stitch(es)
sel s – selvage stitch: always slip the first stitch knitwise, work to the last stitch, purl the last stitch
pm – place marker
M1 (twisted loop): make 1 stitch by twisting the yarn and placing it onto the right-hand needle.
skpo – Slip, Knit, Pass Over: Slip one stitch to the right needle knitwise, knit in the next stitch and drop this stitch off the left needle, insert the left needle into the slipped stitch, pass it over the knit stitch and it’s done.
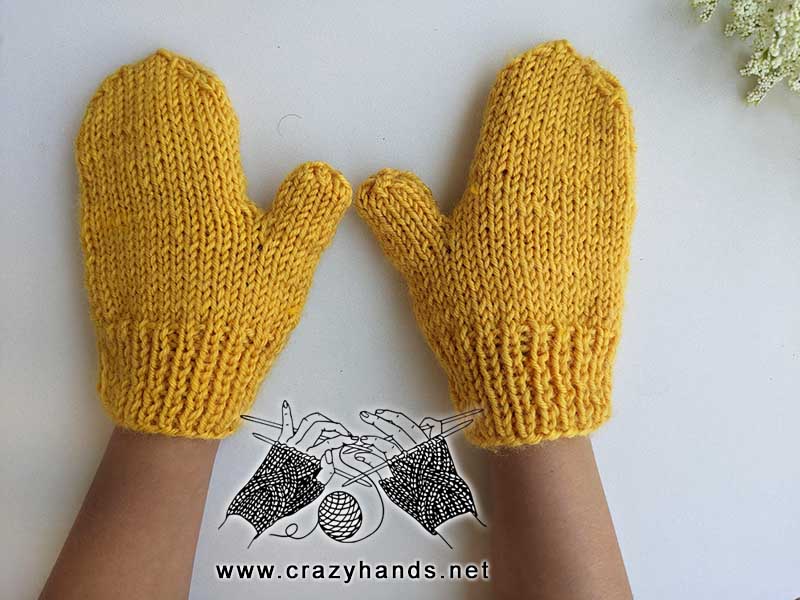
Flat knit kid’s mittens pattern:
Knitting the body of the mitten
Using smaller knitting needles and the long-tail cast-on method, cast on 40 stitches.
Rows 1-11: sel s, [k1, p1] – repeat till the end, sel s. Turn. Knit additional rows if needed, but make sure to knit an odd number of rows.
Switch to larger knitting needles.
Row 12: sel s, knit all stitches, sel s.
Row 13: sel s, purl all stitches, sel s.
Row 14: sel s, knit all stitches, sel s.
Row 15: sel s, purl all stitches, sel s.
Row 16: sel s, knit all stitches, sel s.
Row 17: sel s, purl all stitches, sel s.
Row 18: sel s, knit all stitches, sel s.
Row 19: sel s, purl all stitches, sel s.
Row 20: sel s, k14, M1, k10, M1, k14, sel s. (42 sts)
Row 21: sel s, purl all stitches, sel s.
Row 22: sel s, k14, M1, k12, M1, k14, sel s. (44 sts)
Row 23: sel s, purl all stitches, sel s.
Row 24: sel s, k14.Take an extra needle of the same size, as you will be knitting the thumb only. k14. Turn. For easier handling, slip the last 15 stitches onto the first needle.
Rows 25, 27, 29: sel s, p12, sel s. Turn.
Rows 26, 28: sel s, k12, sel s. Turn.
Row 30: sel s, [skpo] – repeat 6 times, sel s.
Row 31: sel s, [p2tog] – repeat 3 times, sel s.
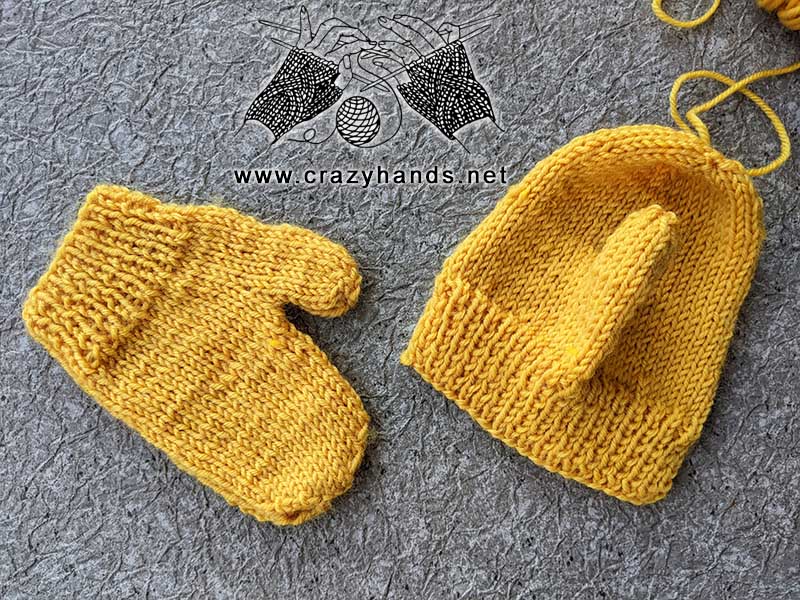
Slip the remaining 5 stitches onto the crochet hook, yarn over, and pull through all the stitches on the hook. Do not cut the yarn. With 1 loop on the hook, pull it until there is enough space to pull the entire yarn ball through. Pull the working yarn to make a knot.
Fold the thumb part wrong side out and seam along it using the same 3.5 mm hook, making single crochet stitches by inserting the hook underneath both loops of the stitches on each side. To eliminate any gap between the thumb and the main part, seam until there is no space left between the seam and the stitches on the needle. As before, pull the last loop until there is enough space to pull the yarn ball through again. Pull the working yarn to make another knot.
Finish Row 24 of the main part: k14, sel s.
Knit the next 13 rows in stockinette stitch.
Shaping the top of the mitten
Row 1: sel s, skpo, k10, skpo, pm, skpo, k10, skpo, sel s.
Row 2: sel s, p2tog, p8, p2tog, p2tog, p8, p2tog, sel s.
Row 3: sel s, skpo, k6, skpo, pm, skpo, k6, skpo, sel s.
Row 4: sel s, p2tog, p4, p2tog, p2tog, p4, p2tog, sel s.
Row 5: sel s, skpo, k2, skpo, pm, skpo, k2, skpo, sel s.
This may be the most challenging part for some, so please refer to the video tutorial if the following instructions are not clear. Slowly remove the needle, allowing all the stitches to fall. Fold the mitten inside out.
Pick up all the stitches again, starting from the center. Pick up one stitch before the stitch marker and one stitch after the stitch marker, repeating this until you have returned all 10 stitches.
Using the hook, slip the first stitch, then pull the second stitch through the first one. Insert the hook into the next stitch and pull it through the stitch on the hook. Repeat this process until only one stitch remains. Chain 1.
From this point, start seaming the entire mitten in the same manner as the thumb. Cut the yarn and weave in all ends.
Repeat for the second mitten.