Contents
Knit i-cord side edge
An I-cord side edge is a great way to add a neat and professional finish to your knitting projects. Ideal for finishing edges on scarves, shawls, and blankets, adding both structure and a polished look.This technique incorporates the I-cord directly into the edge of your fabric, creating a clean and sturdy border. Learn how to knit a 3-stitch I-cord side edge, and explore other I-cord variations.
Knitting materials and tools:
<> DPN 4.5 mm (US 7 / UK 7)
<> Yarn
Common abbreviations of knit stitches:
k – knit
yo – yarn over
sel s – selvage stitch: always slip the first stitch knitwise, work to the last stitch, purl the last stitch
Knit i-cord side edge pattern:
Begin by casting on your required stitches plus 6 additional stitches (3 for each side’s I-cord edge)
Start Knitting:
-
- Bring the working yarn in front, slip 1st stitch purlwise, k1, slip 3rd stitch purlwise holding working yarn in front.
- Knit the middle stitches according to your pattern
- k1, slip next stitch purlwise holding working yarn in front, k1. Tur.
Continue previous 3 steps for every row.The 3 stitches at the beginning and end of each row form the I-cord edges on both sides.

Knit an i-cord edge around a square
Adding an I-cord edge around a square, such as a blanket, creates a polished and professional finish. This technique involves knitting an I-cord that attaches directly to the edges of your square project. Follow these steps to add a neat I-cord edge around your blanket or any square knitting project.
Start Knitting:
-
- Using DPN, cast on 3 stitches.
- With the right side facing, pick up one stitch along the edge of your square using the same needle. You now have 4 stitches on your needle.
- Slip the 3rd stitch over the 4th one (the one you picked up).
- Slide the remaining 3 stitches back to the other end of the DPN without turning your work. The working yarn will be coming from the leftmost stitch and knit the 3 stitches.
- Pick up the next stitch along the edge of your square and repeat steps 3 to 5 until you have completed the I-Cord edge around the entire square.
Corner transition:
-
- At each corner, pick up stitches three times from the same corner stitch.
- After picking up stitches each time, knit them into the I-Cord edge using steps 3 and 4.
Joining the I-Cord Ends: When you reach the starting point, graft the I-Cord ends together using the Kitchener stitch for a seamless finish.
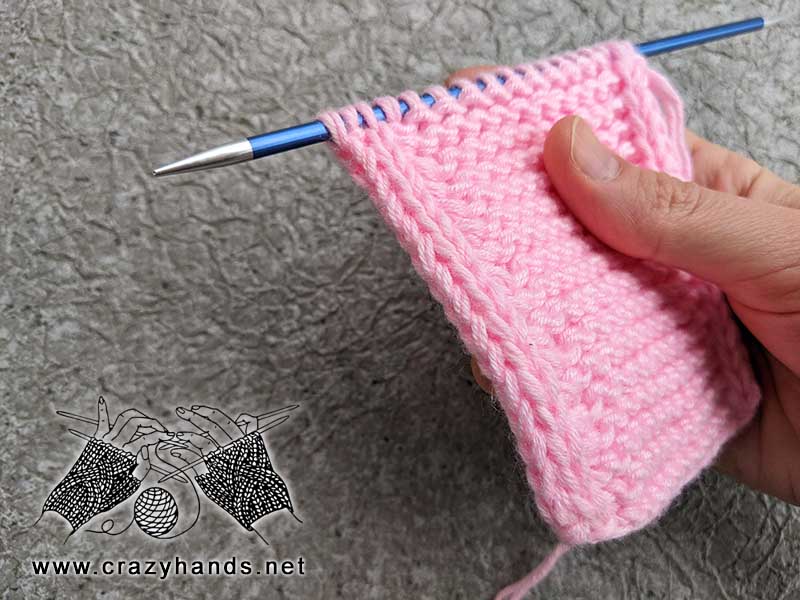
Knit i-cord with 3 stitches
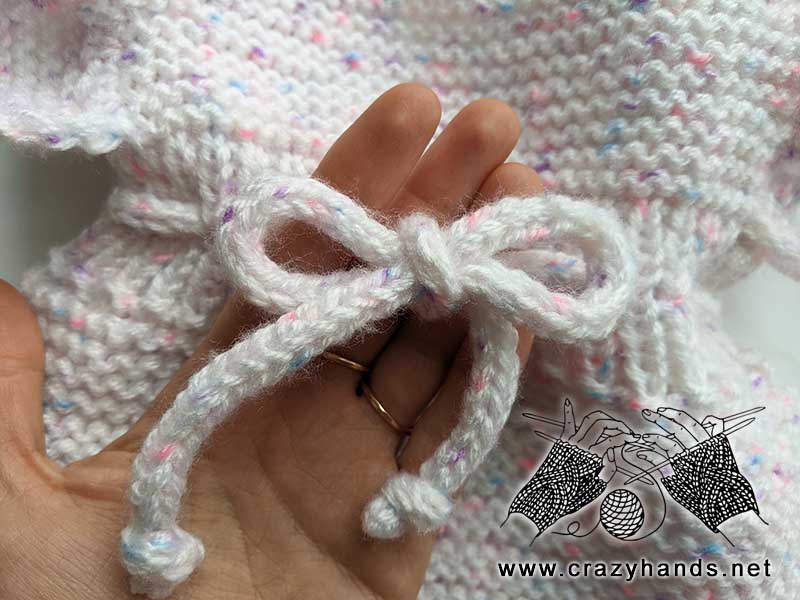
An I-cord is a versatile knitting technique that creates a narrow tube of fabric. It’s perfect for edging, drawstrings, and decorative elements. Learn how to knit a 3-stitch I-cord side edge and explore variations like 2-stitch I-cords.
How to knit i-cord with 3 stitches:
-
- Casting On:
- Cast on 3 stitches using your preferred method.
- Starting the I-Cord:
- Knit: Knit 3 stitches.
- Slide: Instead of turning your work, slide the stitches to the other end of the double-pointed needle.
- Casting On:
Repeat: Pull the yarn tightly across the back of the work and knit the 3 stitches again.