
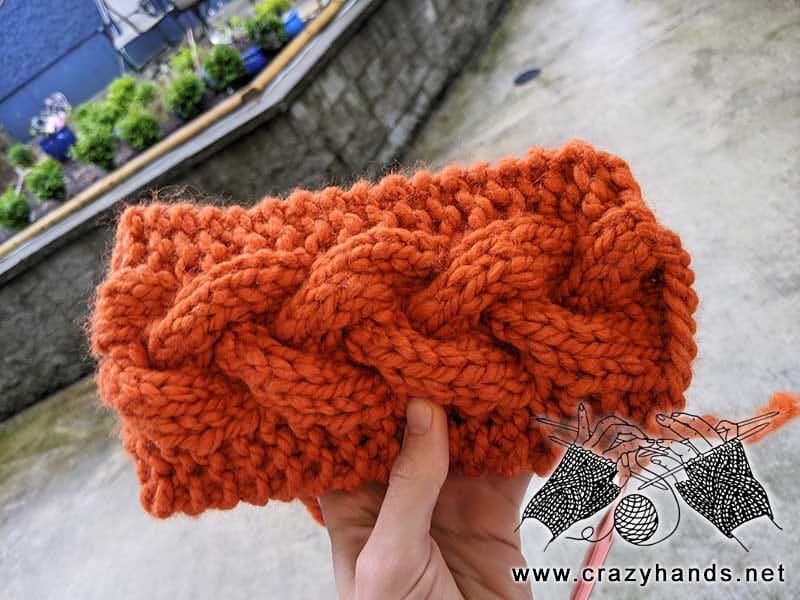
Hello spring and those one who are waiting for something new from me. Today I’d like to share an exciting news – after a long time of hesitation I finally decided to open Crazy Hands Knitting YouTube channel and make free video tutorials with knit and crochet tips and tricks. I hope it will be helpful for folks taking first steps learning crochet and knitting art, but also for those who might find reading the pattern a bit cumbersome and would rather watch an easy to follow video. It is a bit hard to start anything from the scratch, but I am excited and determined to do it. As I keep shooting and uploading videos, I will try my best to improve the quality of each tutorial. Almost every single day I get asked questions about cables that I often use in my projects. Therefore, I decided to make this simple cable knit headband and show you how to make those lovely twists.
Knitting materials and knitting tools:
<> Knitting Needles 9 mm (US 13/ UK00);
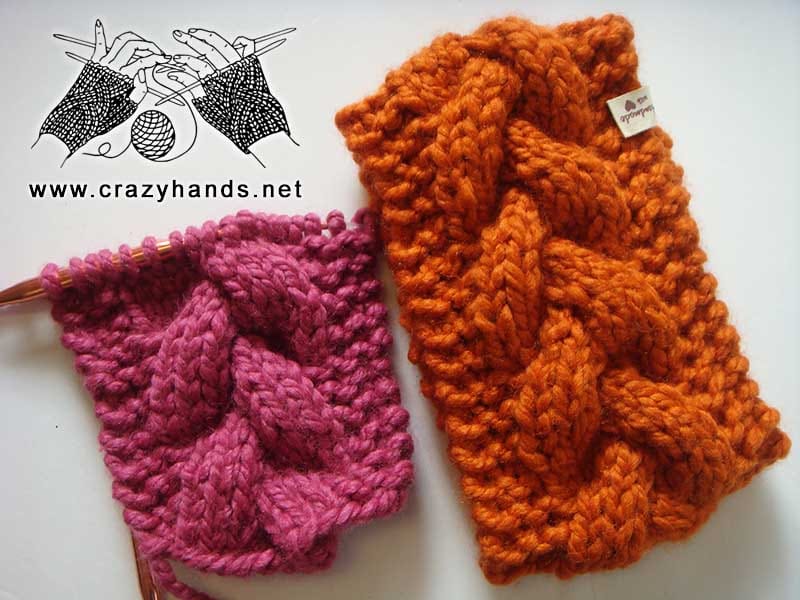
<> Super chunky yarn – Lion Brand Wool, Ease Thick & Quick – 20% wool, 80% acrylic. Color of your choice. In total half of the skein
Common abbreviations of knitting stitches:
k – knit
p – purl
sel s – selvage stitch: always slip the first stitch purlwise, work to the last stitch, knit the last stitch
Cable 4 Back (C4B): Slip 4 knit stitches to the extra needle and hold in back of work, k4 from the left hand needle, k4 from the extra needle.
Cable 4 Front (C4F): Slip 4 knit stitches to the extra needle and hold in front of work, k4 from the left hand needle, k4 from the extra needle.
Note for knitters:
<> Each Row has selvage stitches
<> Gauge: 10stitches – 4 inches (10 cm)
<> Head circumference 53-58 cm
Cable knit headband pattern:
Cast on 18 stitches.
Row 1: sel s, k2, p12, k2, sel s.
Row 2: sel s, k16, sel s.
Row 3: sel s, k2, p12, k2, sel s.
Row 4: sel s, k2, C4F, k6, sel s.
Row 5: sel s, k2, p12, k2, sel s.
Row 6: sel s, k16, sel s.
Row 7: sel s, k2, p12, k2, sel s.
Row 8: sel s, k6, C4B, k2, sel s.
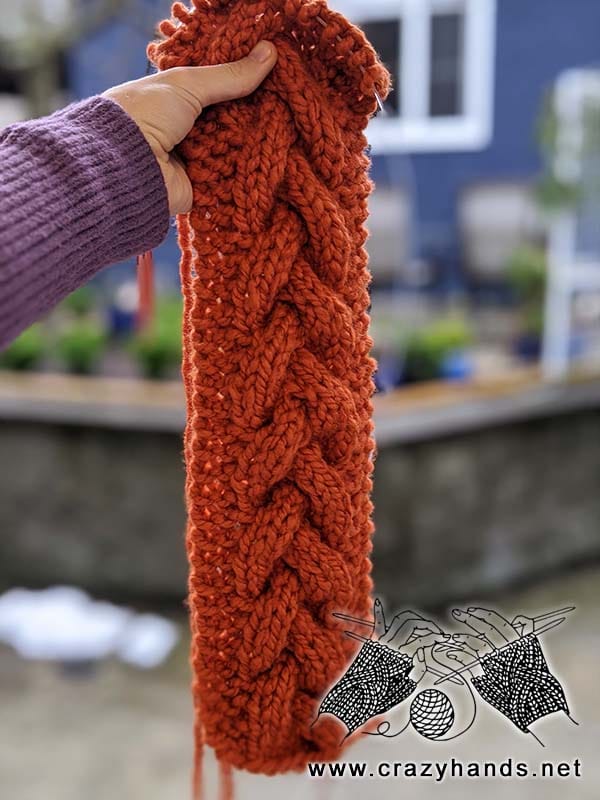
Repeat Rounds 1-8 for 7 more times or until headband reaches desired length. After that repeat Rounds 1 and 2 again.
Cut the yarn leaving 15 cm tail. Using the method of horizontal invisible seam sew two ages of the headband together.
Please check full video tutorial of Bulky Cable Knit Headband on my YouTube Chanel.
I hope you liked this tutorial, please feel free to subscribe and share your projects with me.
14 comments
Hi I love this pattern. I am a beginner and I am following your video. Do you mind showing how you started the horizontal invisible seam? Thank you!
Hi Joe, plz check this knit cowl tutorial where you can find some pics https://crazyhands.net/sandy-cable-knit-cowl-pattern/. I hope it will help you
Hi there,
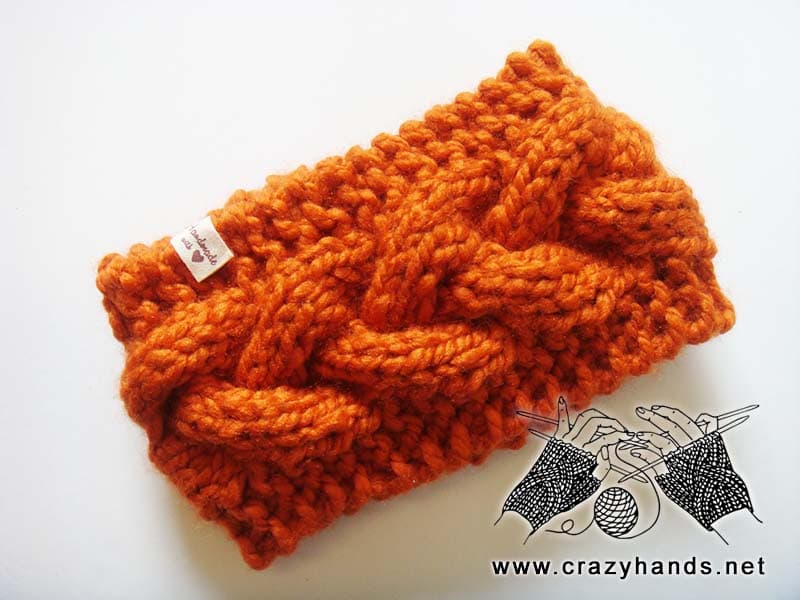
This pattern looks adorable! I was just curious- did you attach a ribbon that says “handmade with love”?? If so, where did you get it? I would love to purchase some! Thanks!
Hi. I think I have answered you on Fb already
Do you have any elegant cable fine knitting headbands…thanks
Hi Carlotte. I have beautiful free cable headband pattern here https://crazyhands.net/cable-knit-cowl-and-ear-warmer-pattern/, and I have couple of paid patterns, you can find them here https://crazyhands.net/product-category/knitting-patterns/. Thank you
Hi I am making some mistake since one cable comes in front of the work and the other cable comes on the back of the work.
So I am not sure what I am doing wrong i your opinion ? I am following the pattern step by step but working with straight needles. Might be that the reason?
Thanks
Hi Manu. Needles does not matter. Why don’t you follow the video instruction and then repeat it watching over and over again until you reach desired length. You can also write down when you do right leaning cable and when left
Thank you for so generously sharing this beautiful pattern. Binding off with the horizontal invisible seam was new to me, and your video tutorial was very helpful. 🙂
Thank you for your kind feedback Rita!🙂
What is your row gauge or the finished length of your headband? I’m using larger needles and don’t know the length goal. Thank you.
This is my gauge in stockinette 10stitches – 4 inches (10 cm). I usually make the headband 4-6 cm less from desired head circumference
This is a great pattern! I’m going to make one for myself.
Thank you and good luck!