Contents
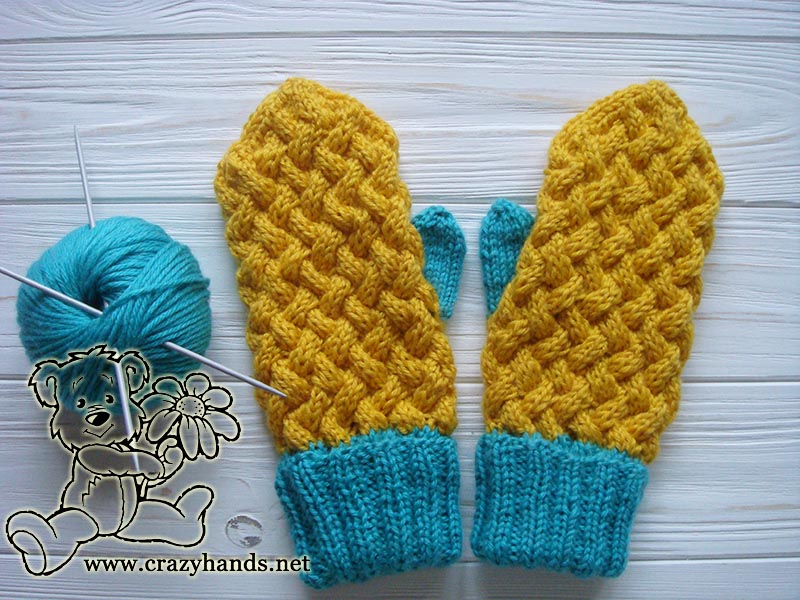
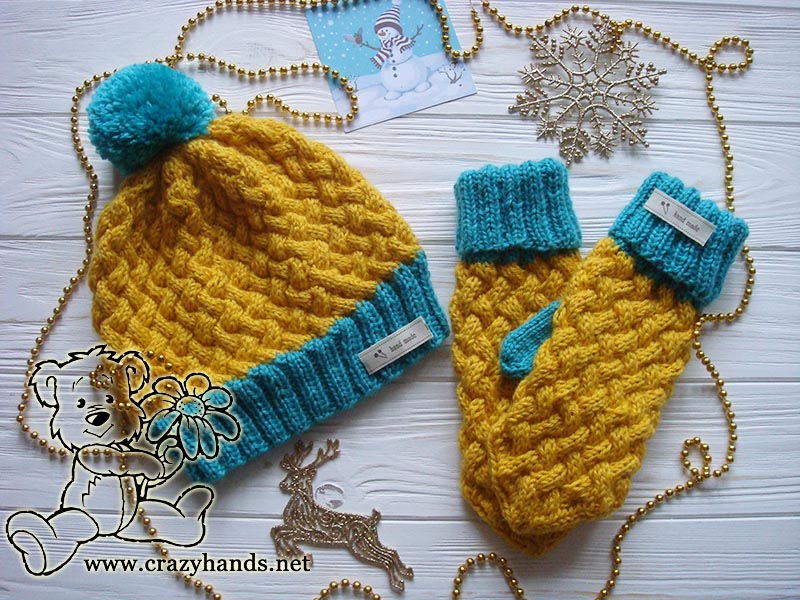
Knit mittens are great for keeping your hands warm during the winter, but who told that they can’t be beautifully styled? :). Now we have complete wicker set that consists of a knit hat and knit mittens designed in the national colors of Sweden. Choose colors of your country or make a surprise to your friends and knit mittens in the national colors of their country. I would truly enjoy getting the photos of your knitting projects and making a dedicated post with them along with short story behind it :). Let’s get started!
Knitting materials and knitting tools:
<> 2 sets of 5 Double Pointed Knitting Needles 2.5 mm (US 2) and 3.5 mm (US 4) ;
<> Gazzal yarn (baby wool) Medium 40% Lana Merino, 20% Cashmere Pa, 40% acrylic. Teal blue and yellow colors: 50 grams -100 m per skein – 0.5 ball – teal blue and 1.5 balls yellow;
Swedish knit mittens size:
Wrist size 16-20 сm
Gauge: 20 stitches = 4 inches in stockinette (body)
26 stitches = 4 inches in ribbing – not stretched (cuff)
Common abbreviations of knitting stitches:
k – knit
p – purl
k2tog – knit two together
skpo – Slip, Knit, Pass Over
Cable 3 Back (C3B): Slip 3 knit stitches to the extra needle and hold in back of the work, k3 from the left-hand needle, k3 from the extra needle.
Cable 3 Front (C3F): Slip 3 knit stitches to the extra needle and hold in front of the work, k3 from the left-hand needle, k3 from the extra needle.
Note for knitters:
The left mitten is identical to the right one until you reach the thumb gusset.
Swedish-style knit mittens pattern
Knitting cuff of the mittens:
Using 2.5 mm needles cast on 44 stitches, redistribute evenly between 4 needles, place marker and join to knit in round being careful not to twist stitches. Work k2, p2 ribbing for 32 rounds or 13 cm.
Knitting main part of the mittens:
Change yarn color from teal blue to yellow and needle size from 2.5 to 3.5 mm.
Increase round:
1st needle: k5, inc, k1, inc, k3, inc, k1, inc, k1
2nd needle: k2, inc, k1 inc, k3, inc, k1, inc, k4
3rd needle: k3, inc, k1, inc, k3, inc. k1, inc, k3
4th needle: inc. k1, inc, k3, inc. k1, inc, k6
At the end you will have 60 stitches or any number of stitched multiple of 6.
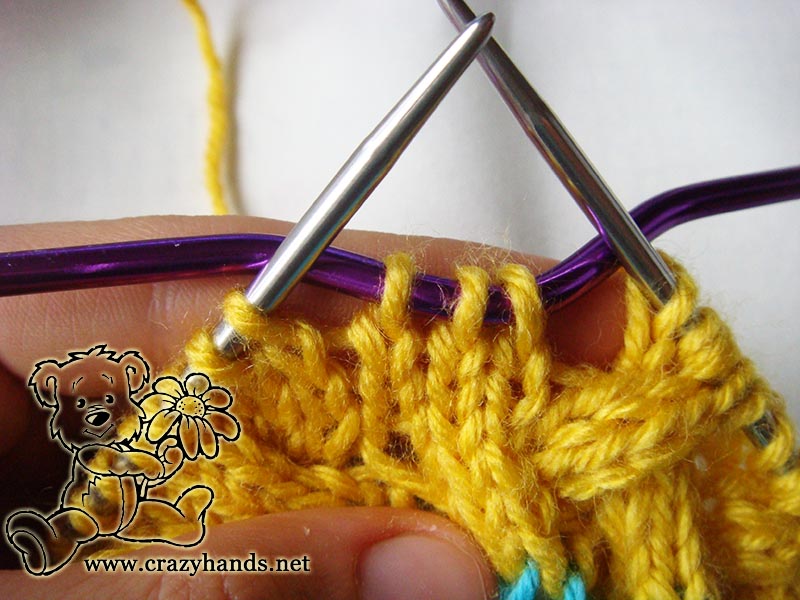
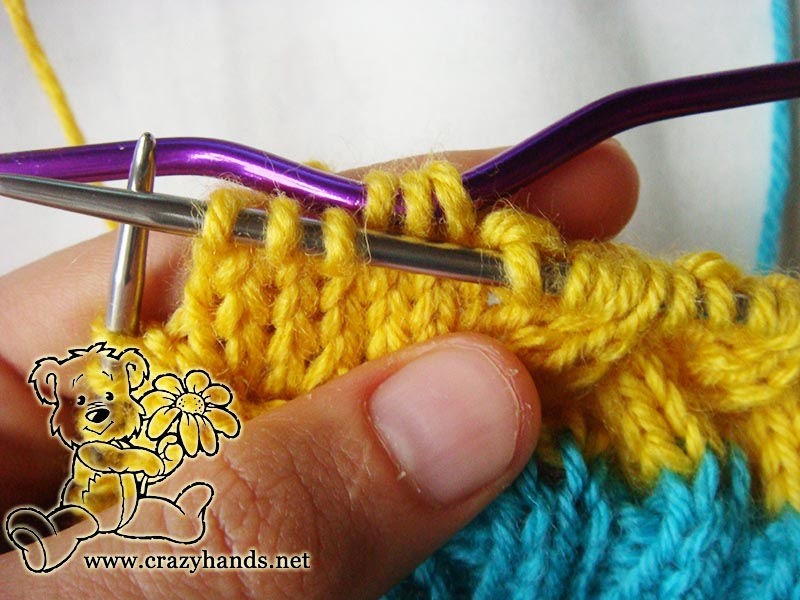
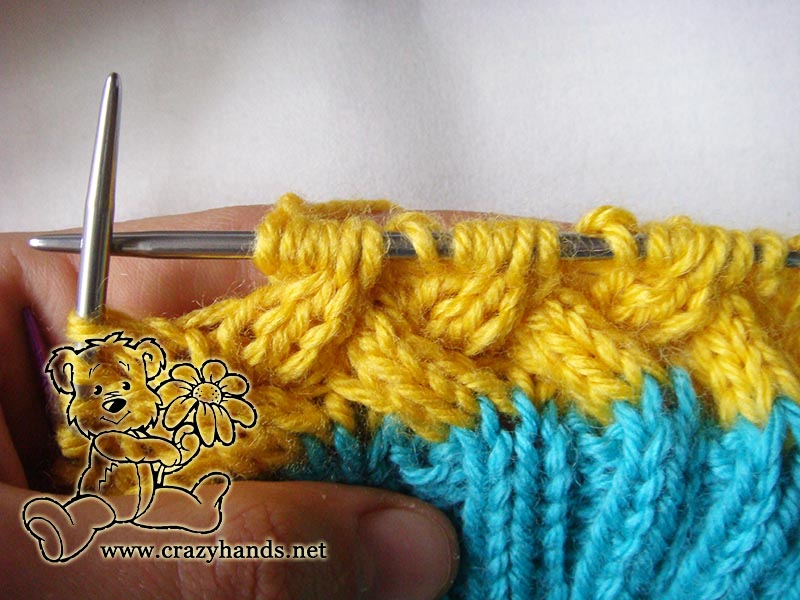
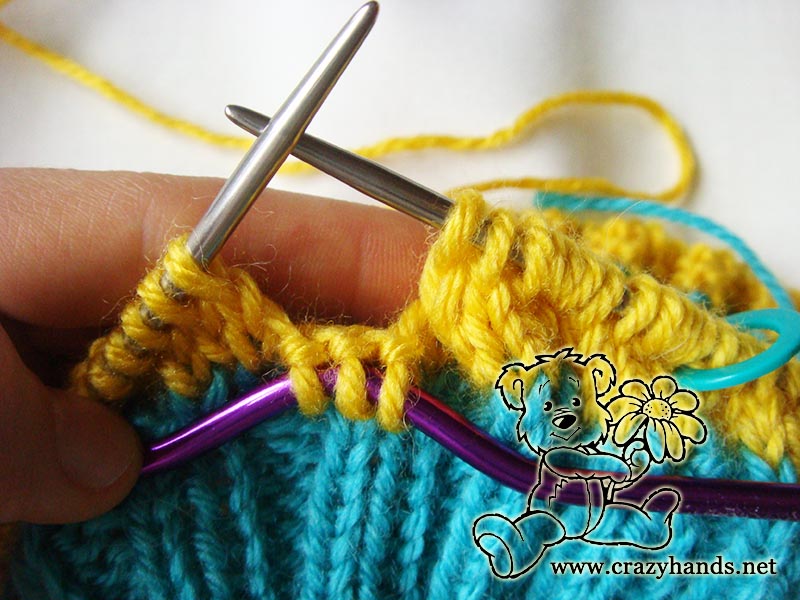
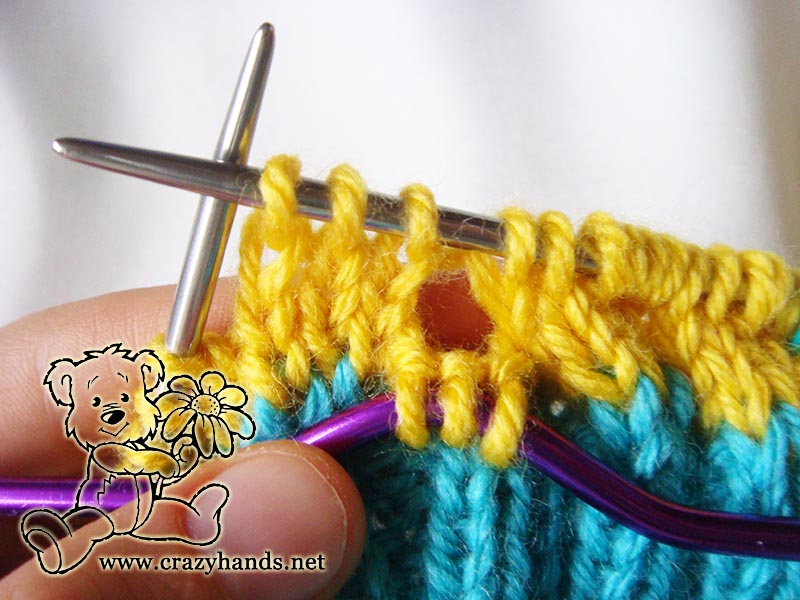
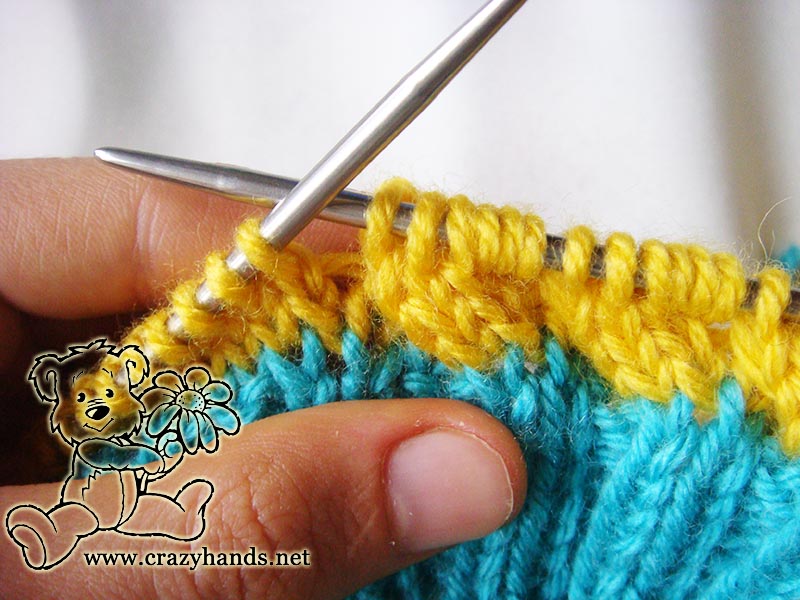
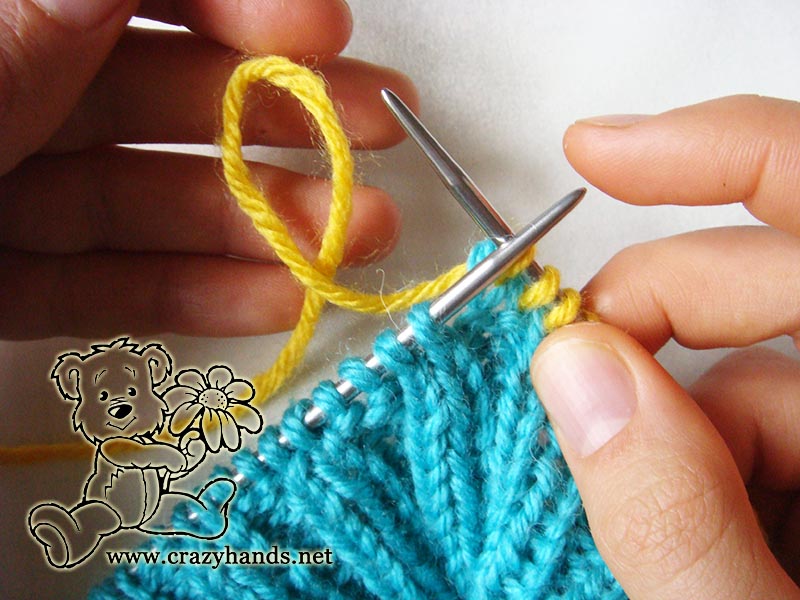
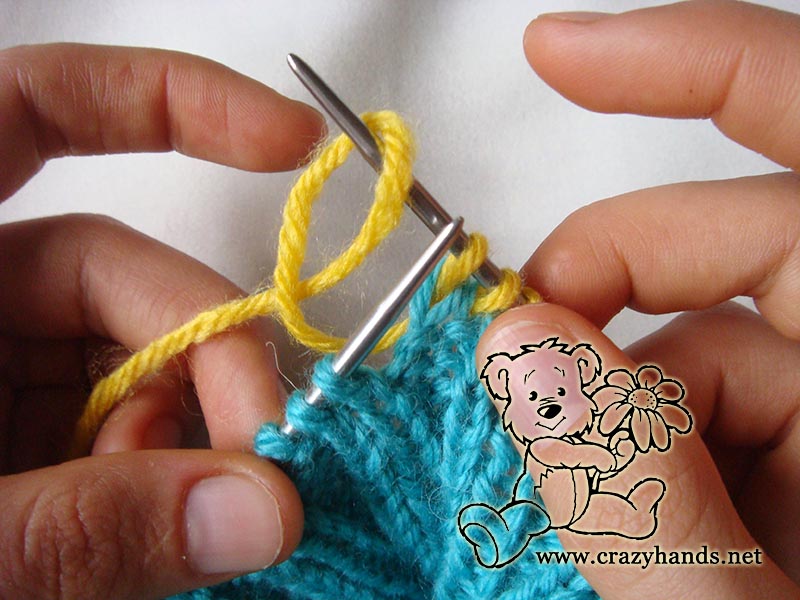
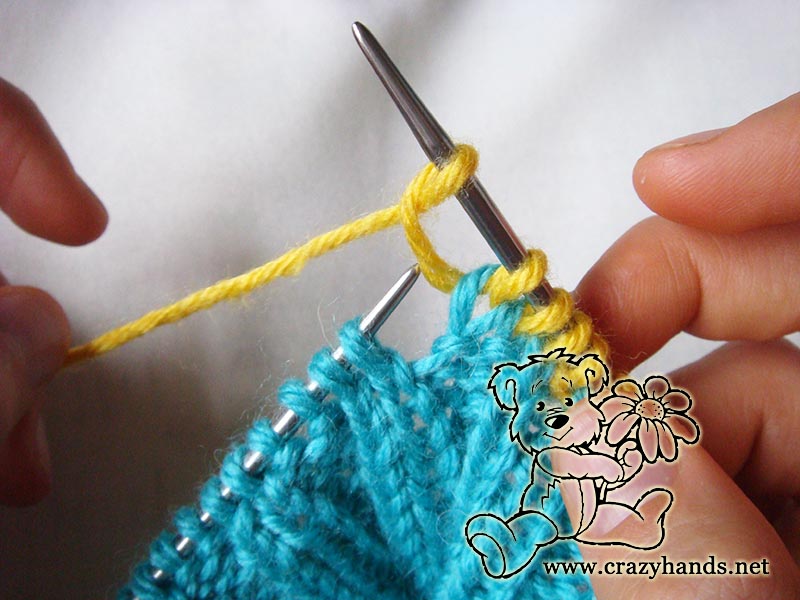
Please use any suitable method to increase or check picture of how I did it.
Take working yarn, and twist it clockwise.
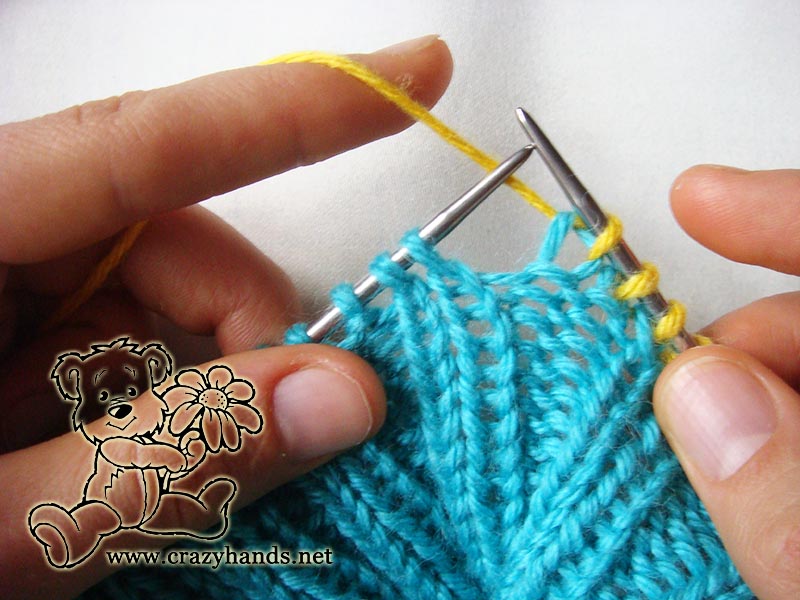
Received loop put on the right needle.
Pull working yarn.
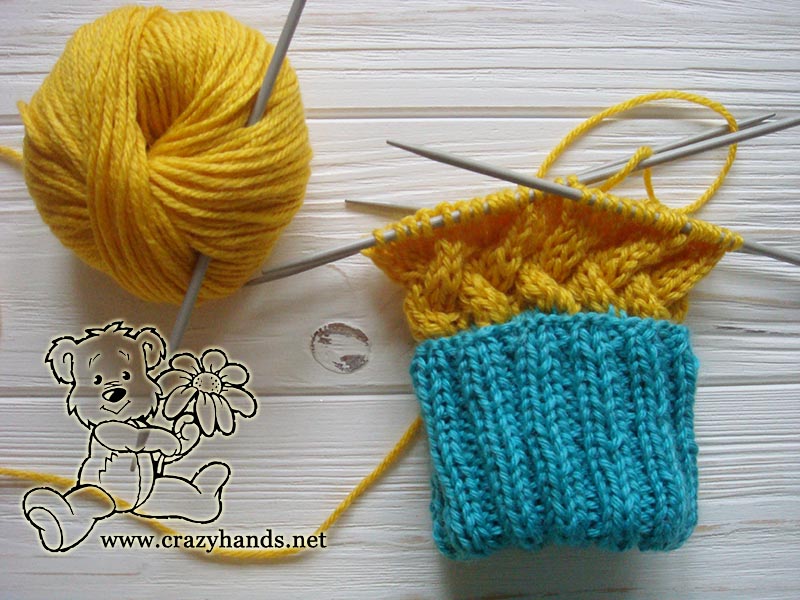
Rounds 1-3: knit in stockinette stitch;
Round 4: [C3F] – 10 times;
Rounds 5-7: knit in stockinette stitch;
Round 8: k3, [C3B]- 9 times, slip 3 knit stitches to the extra needle and hold them in the back of the work, k3 (it means that you start already knitting stitched from the Round 9), place marker.
Round 9: k3 from the extra needle and continue working in stockinette stitch;
Rounds 10-11: knit in stockinette stitch;
Repeat rounds 4-9 one more time.
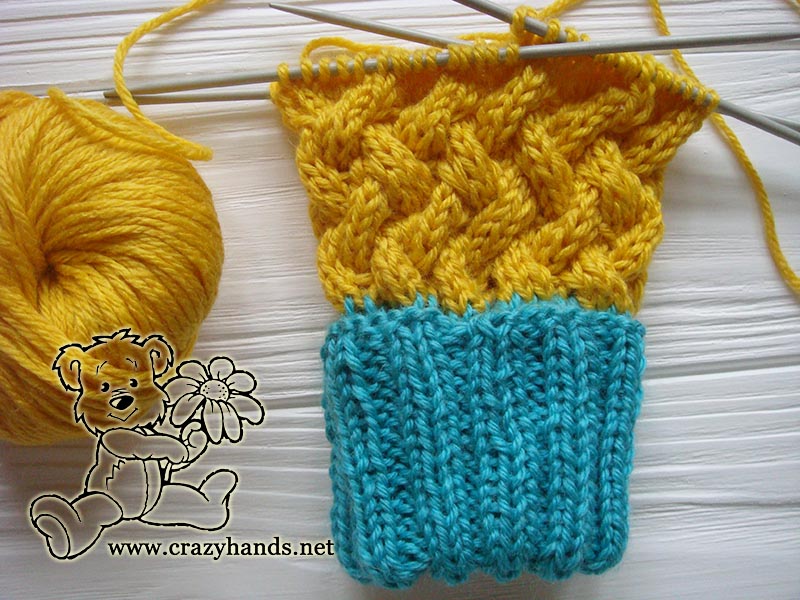
Knitting the thumb gusset:
Right hand:
1st needle: k15
2nd needle: k1, slip 7 sts onto holder, now cast on new 7 sts using the same method as for increase part above, k7
3rd needle: k15
4th needle: k15
Left hand:
1st needle: k15
2nd needle: k15
3rd needle: k7, slip 7 sts onto holder, now cast on new 7 sts, k1
4th needle: k15
Knit one more round in stockinette stitch.
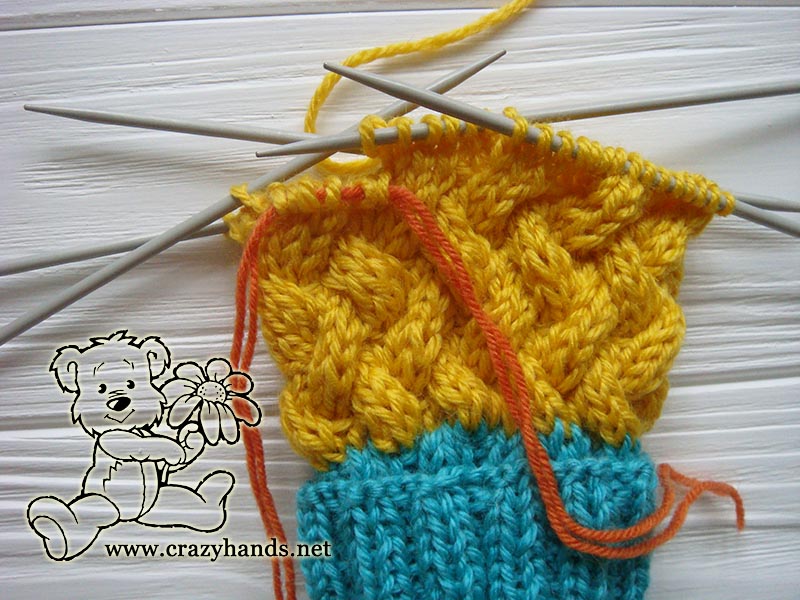
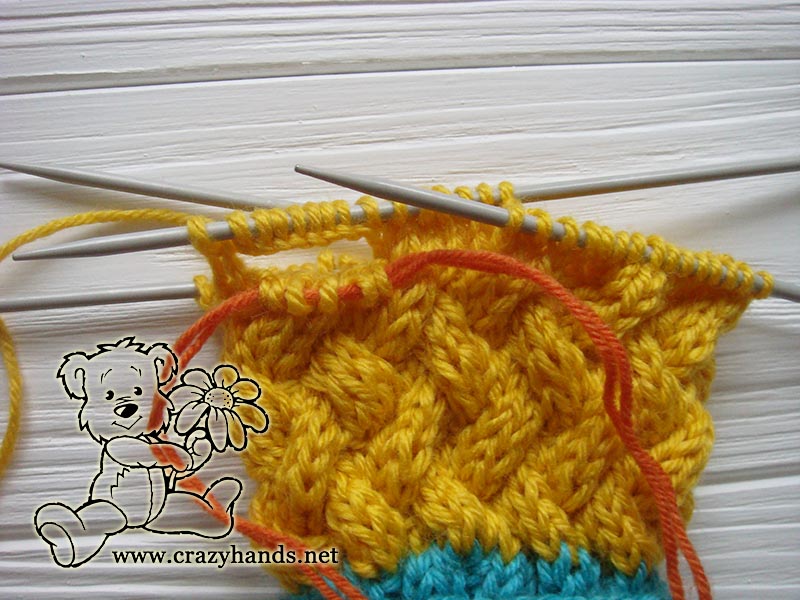
Repeat rounds 4-11 three more times. Knit round 4 one more time and start decreasing rounds.
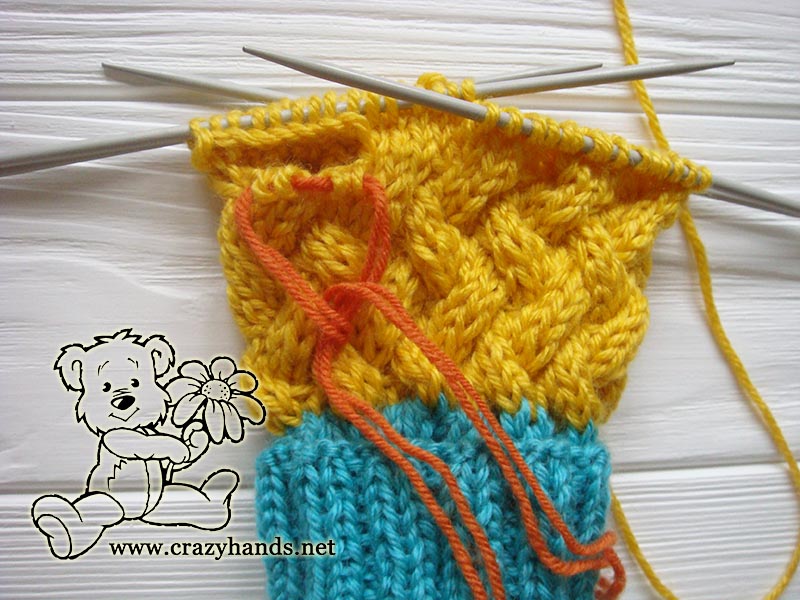
Shaping top of the mittens:
Round 1:
1st needle: k12, skpo, k1
2nd needle: k1, k2tog, k12
3rd needle: k12, skpo, k1
4th needle: k1, k2tog, k12
Round 2:
1st needle: k11, skpo, k1
2nd needle: k1, k2tog, k11
3rd needle: k11, skpo, k1
4th needle: k1, k2tog, k11
Round 3:
1st needle: k10, skpo, k1
2nd needle: k1, k2tog, k10
3rd needle: k10, skpo, k1
4th needle: k1, k2tog, k10
Round 4:
1st needle: k3, C3B, skpo, k1
2nd needle: k1, k2tog, C3B, Slip 3 knit stitches to the extra needle and hold in back of the work, k3 from the 3rd needle
3rd needle: k3 from the extra needle, C3B, skpo, k1
4th needle: k1, k2tog, C3B, Slip 3 knit stitches to the extra needle and hold in back of the work, k3 from the 1st needle
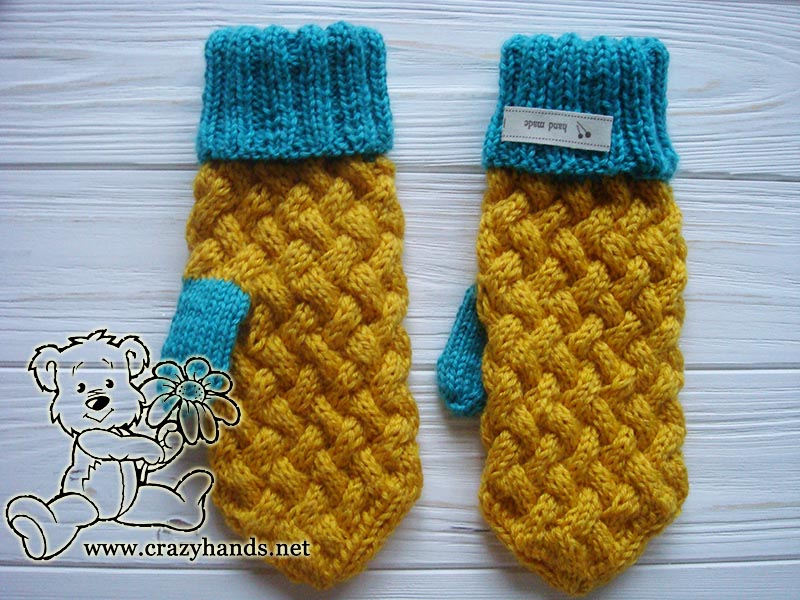
Round 5:
1st needle: k3 from the extra needle, k5, skpo, k1
2nd needle: k1, k2tog, k8
3rd needle: k3, k5, skpo, k1
4th needle: k1, k2tog, k8
Round 6:
1st needle: k7, skpo, k1
2nd needle: k1, k2tog, k7
3rd needle: k7, skpo, k1
4th needle: k1, k2tog, k7
Round 7:
1st needle: k6, skpo, k1
2nd needle: k1, k2tog, k6
3rd needle: k6, skpo, k1
4th needle: k1, k2tog, k6
Round 8:
1st needle: Slip 3 knit stitches to the extra needle and hold in front of the work, k2 from the left-hand needle, k3 from the extra needle, skpo, k1
2nd needle: k1, k2tog, slip 3 knit stitches to the extra needle and hold in front of the work, k2 from the left-hand needle, k3 from the extra needle
3rd needle: Slip 3 knit stitches to the extra needle and hold in front of the work, k2 from the left-hand needle, k3 from the extra needle, skpo, k1
4th needle: k1, k2tog, slip 3 knit stitches to the extra needle and hold in front of the work, k2 from the left-hand needle, k3 from the extra needle
Round 9:
1st needle: k4, skpo, k1
2nd needle: k1, k2tog, k4
3rd needle: k4, skpo, k1
4th needle: k1, k2tog, k4
Round 10:
1st needle: k3, skpo, k1
2nd needle: k1, k2tog, k3
3rd needle: k3, skpo, k1
4th needle: k1, k2tog, k3
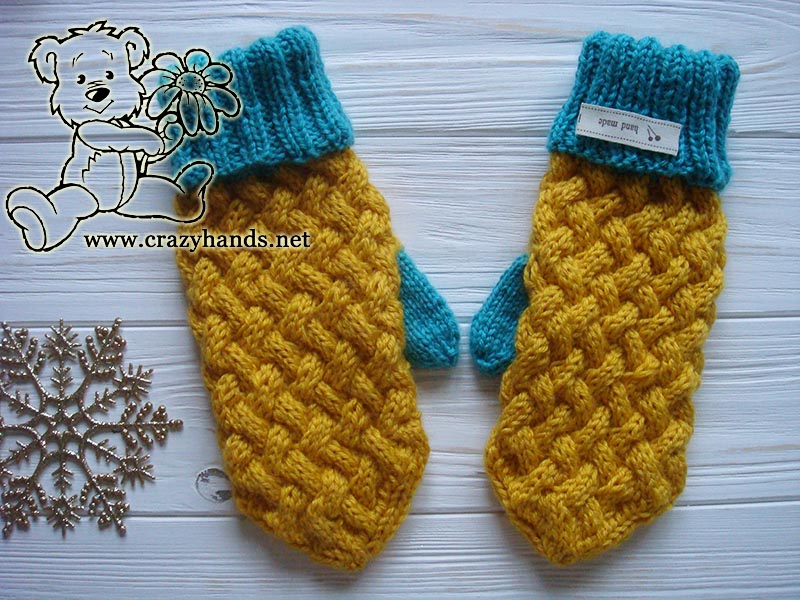
Round 11:
1st needle: k2, skpo, k1
2nd needle: k1, k2tog, k2
3rd needle: k2, skpo, k1
4th needle: k1, k2tog, k2
Round 12:
1st needle: k1, skpo, k1
2nd needle: k1, k2tog, k1
3rd needle: k1, skpo, k1
4th needle: k1, k2tog, k1
Round 13:
1st needle: skpo, k1
2nd needle: k1, k2tog
3rd needle: skpo, k1
4th needle: k1, k2tog
Round 14:
1st needle: skpo,
2nd needle: k2tog
3rd needle: skpo
4th needle: k2tog
Cut yarn and pull tail through the remaining stitches. Weave in ends
Knitting gusset section of the mittens:
Place 7 sts from holder onto 2.5 cm dpn needle. Using 2 dpn needles pick up 9 more stitches around gusset edge using teal color. Redistribute stitches next wait: 6-5-5.
Knit in stockinette stitch until thumb measures 5.5 cm.
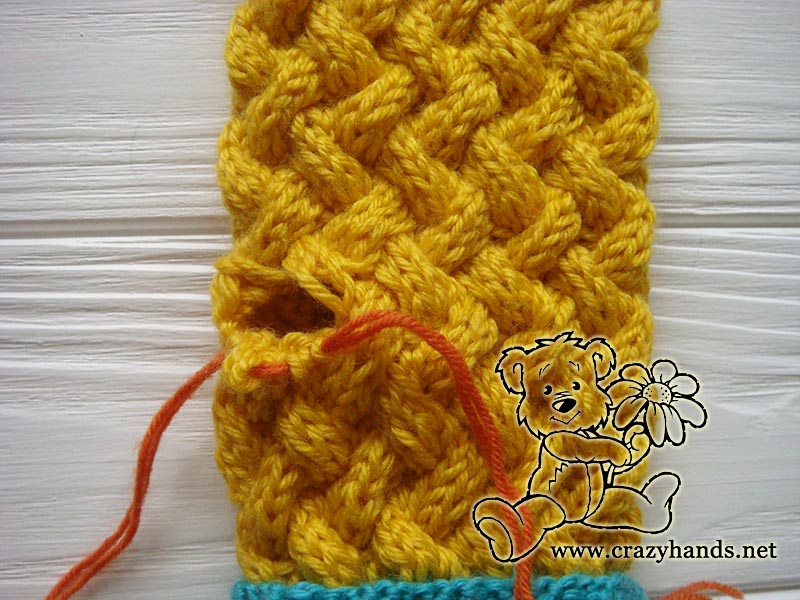
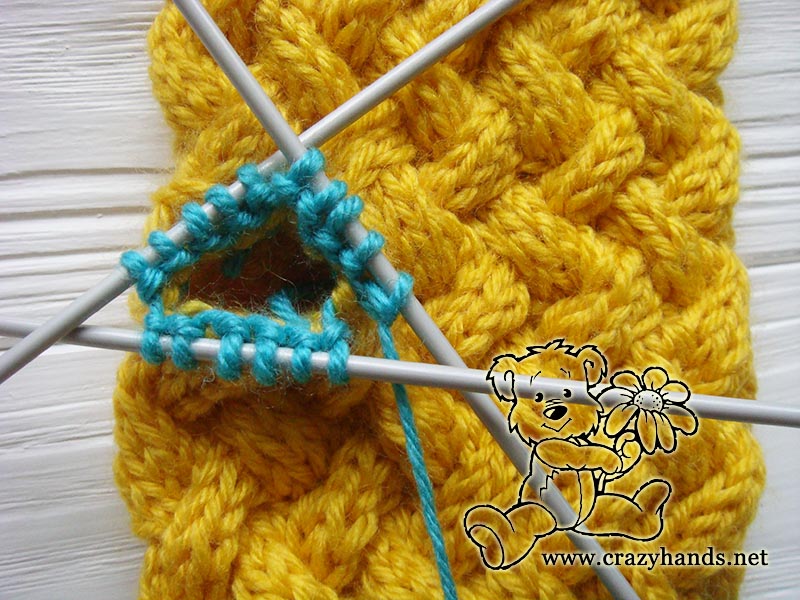
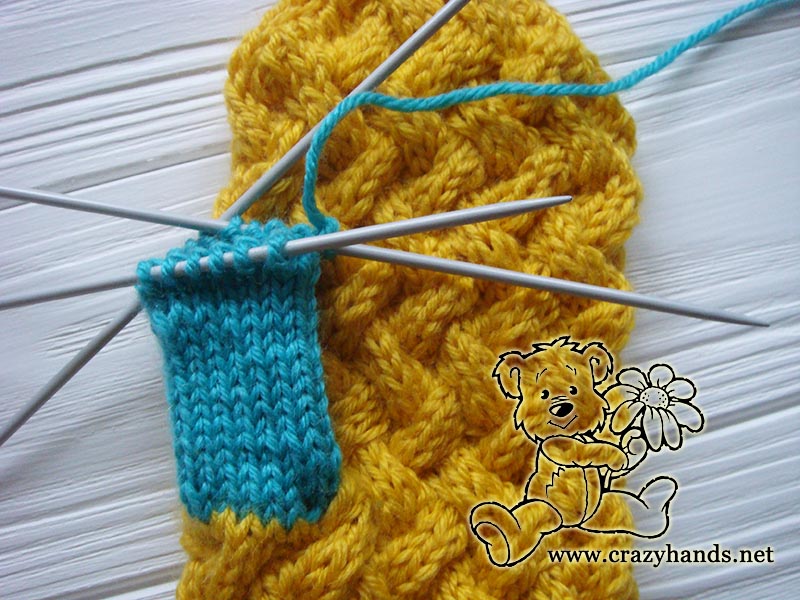
Start decreasing rounds.
Round 1: [k2tog] – 8 times
Round 2: [k2tog] – 4 times
Round 3: [k2tog] – 2 times
Round 4: [k2tog] – 1 time
Cut yarn and pull tail through the remaining stitches. Weave in ends
Repeat the same pattern for the left knit mitten, paying attention to the thumb gusset round.
Your wicker knitting set is finished and you are fully equipped with knit hat and knit mittens for a snowball fight 🙂
Ciao, Ann


8 comments
thank you for the pattern i really love it and i love how you made it easy to understand it thanks again
love your mitts! and thank you for pattern. started knitting, when you get to the decrease rows, row 1 decrease row works fine as well as f=row 2. At the end of row 2 you have 14 stitches on each needle. However, when you do row 3, it only accounts for 12 stitches, so that by the end of decrease needle four – you are left with 6 stitches. Yikes – please help. I’m clearly missing something. Thanks so much.
sorry, i meant by the end of row 2 you have 13 stitches (not 12), but you work 14 stitches on each needle, therefore left with 4 extra stitches.
Hi Mary, you are definitely right, I simply forgot one more decreasing row. Before each cable row you have to knit 3 rows without any cables, same as it was before in the main part of mittens. Thanks you for pointing this out.
What adjustments do you make these mittens using magic loop instead of 4 dpn’s?
I want to learn yo mske mittens but don’t use dpn’s.
Hi Patricia, you can use magic loop method and circular needles. No need to make any adjustments simply follow the pattern
Hi Ann, thank you for sharing your lovely patterns. I knitted the wicker hat that goes with these mittens for a friend and thought I’d do the mittens. Hat: you indicate that your gauge is 19 stitches with 4 mm needles. Mittens: you indicate the same gauge knitted with 3.5 mm needles. Shouldn’t it be more stitches? I have 24 stitches. Thanks for getting back to me. I can’t wait to start them. Mireille
You are right there might be about 20-21 stitches. It is fine that you have 24. Follow the pattern it should be fine. You can also decrease the cuff till 40 sts.