
Contents

Knitting materials and tools:
<> Circular (29” or 26”) knitting needles 5 mm (US 7 / UK7) or size needed to obtain gauge.
<> Crochet hook 4.5 mm (US 7);
<> Yarn – Red Heart COMFORT: 100% acrylic. Color of your choice
<> Weight Category – 4. Quantity – 300 grams. If you have difficulty to find the aforementioned brand of yarn, use something else that will have about 170-175 m (180 yards) per 100 grams skein.
<> 5-6 buttons, tapestry needle for weaving in ends and grafting, scissors, 10 stitch markers, scrap yarn or stitch holders.

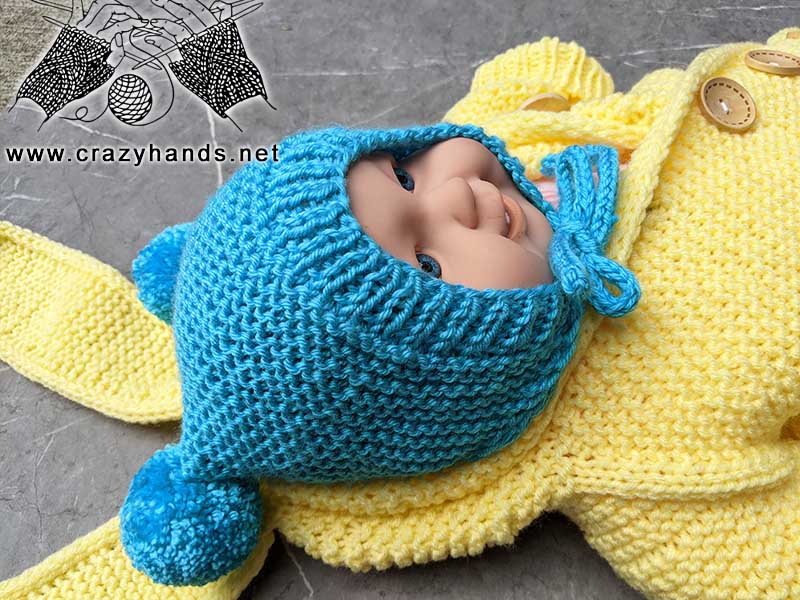
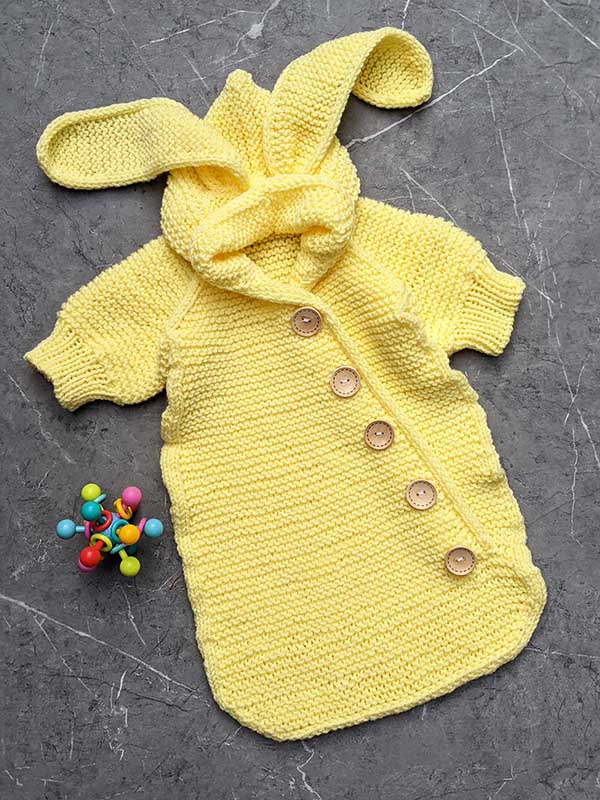
Knit baby cocoon size:
<> Age: newborn – 4 months
<> Width (bottom): 34 cm
<> Bunny ear length: 26 cm
<> Armpit to armpit length: 28 cm
<> Length to underarm: 42 cm
<> Sleeve length: 14 cm
<> Hood’s length: 15 cm
*All measurements are in centimetres if not mentioned otherwise.
<> Gauge: 15-16 stitches = 4 inches in stockinette
Common abbreviations of knitting stitches:
k – knit
kf – knit through the front loop
p – purl
st(s) – stitch(es)
pm – place marker
sel s – selvage stitch: always slip the first stitch purlwise, work to the last stitch, purl the last stitch
yo: yarn over – Lay the working yarn over the right needle from back to front.
k2tog – knit two together
k3tog – knit three together
p2tog – purl two together
kfb – knit front and back loop: make a knit stitch and don’t slide it off the left- hand needle, then knit into the back of the same stitch on the left-hand needle, slide the stitch off the left-hand needle. You have just increased one stitch.
kbpf – knit back and purl front loop: make a knit stitch though the back loop and don’t slide it off the left hand needle, then purl into the front of the same stitch on the left hand needle, slide the stitch off the left-hand needle. You have just increased one stitch.
M1R – make one right increase: pick up bar bringing left hand needle from the back to the front, then knit the bar through the front loop
skpo: Slip, Knit, Pass Over – Slip one stitch to the right needle knitwise, knit in the next stitch and drop this stitch off the left needle, insert the left needle into the slipped stitch, pass it over the knit stitch and it’s done.

Knit baby cocoon pattern:
To get started with baby romper we are going to use provisional cast on method. There are a couple of ways how to do it. Please use the one you know.
Suggested way: Using smooth piece of scrap yarn (preferably in a different color, so that you can identify it easily later), crochet chain 56. Take 4.5 mm knitting needles and pick up 52 stitches through the “bumps” on the back of the chain. Count your stitches when you are done.
And now let’s place stitch markers in the following way:
9 sts (front piece), pm, 2 sts (raglan line), pm, 7sts (sleeve), pm, 2 sts (raglan line), pm, 12 sts (back), pm, 2 sts (raglan line), pm, 7sts (sleeve), pm, 2 sts (raglan line), pm, 9 sts (front piece.
Because human body is not shaped exactly the same front to back, with a help of short rows, we are going to knit yoke that will have the front neckline lower than the back one.
*While knitting slip stitch markers always keeping 2 stitches between them.
Row 1(short row 1): sel s, k8, yo, k2, yo, k7, yo, k2, yo, k12, yo, k2, yo, k7, yo, k2, yo, k1, turn.
Row 2 (short row 2): bring the working yarn in front, slip the first stitch purlwise, then pull the working yarn to the back of your work over the top of right-hand needle and distort just slipped stitch, making it look like two stitches instead of one( let’s call it double stitch), kf, p2, kf, k7, kf, p2, kf, k12, kf, p2, kf, k7, kf, p2, kf, k1, turn.
Row 3 (short row 3): again, slip the first stitch purlwise and create a double stitch, k1, yo, k2, yo, k9, yo, k2, yo, k14, yo, k2, yo, k9, yo, k2, yo, k1, k2tog (knit both loops of the double stitch together), k2, turn.
Row 4 (short row 4): slip the first stitch purlwise and create a double stitch, k3, kf, p2, kf, k9, kf, p2, kf, k14, kf, p2, kf, k9, kf, p2, kf, k1, k2tog (double stitch), k2, turn.
Row 5: slip the first stitch purlwise and create a double stitch, k4, yo, k2, yo, k11, yo, k2, yo, k16, yo, k2, yo, k11, yo, k2, yo, k4, k2tog (double stitch), k5, sel s.
Row 6: sel s, k10, kf, p2, kf, k11, kf, p2, kf, k16, kf, p2, kf, k11, kf, p2, kf, k4, k2tog (double stitch), k5, sel s.
Row 7: sel s, k11, yo, k2, yo, k13, yo, k2, yo, k18, yo, k2, yo, k13, yo, k2, yo, k11, sel s.
Row 8: sel s, k11, kf, p2, kf, k13, kf, p2, kf, k18, kf, p2, kf, k13, kf, p2, kf, k11, sel s.
Row 9: sel s, k12, yo, k2, yo, k15, yo, k2, yo, k20, yo, k2, yo, k15, yo, k2, yo, k12, sel s.
Row 10: sel s, k12, kf, p2, kf, k15, kf, p2, kf, k20, kf, p2, kf, k15, kf, p2, kf, k12, sel s.
In the next row we are going to make first buttonhole and we will make it after every 18 rows. Also starting from this row and every other 6 rows we are going to decrease one stitch at the beginning and increase one stitch at the end. Place stitch marker as it shown in the video tutorial, it will help you to track rows easily.
Row 11(buttonhole): sel s, skpo, k11, yo, k2, yo, k17, yo, k2, yo, k22, yo, k2, yo, k17, yo, k2, yo, k10, yo, k2tog, kfkb, sel s.
Row 12: sel s, k3, kf, k10, kf, p2, kf, k17, kf, p2, kf, k22, kf, p2, kf, k17, kf, p2, kf, k12, sel s.
Row 13: sel s, k13, yo, k2, yo, k19, yo, k2, yo, k24, yo, k2, yo, k19, yo, k2, yo, k15, sel s.
Row 14: sel s, k15, kf, p2, kf, k19, kf, p2, kf, k24, kf, p2, kf, k19, kf, p2, kf, k13, sel s.
Row 15: sel s, k14, yo, k2, yo, k21, yo, k2, yo, k26, yo, k2, yo, k21, yo, k2, yo, k16, sel s.
Row 16: sel s, k16, kf, p2, kf, k21, kf, p2, kf, k26, kf, p2, kf, k21, kf, p2, kf, k14, sel s.
After 6 rows we are going again to decrease and increase at the beginning and at the end of row.
Row 17: sel s, skpo, k13, yo, k2, yo, k23, yo, k2, yo, k28, yo, k2, yo, k23, yo, k2, yo, k16, kfb, sel s.
Row 18: sel s, k18, kf, p2, kf, k23, kf, p2, kf, k28, kf, p2, kf, k23, kf, p2, kf, k14, sel s.
Row 19: sel s, k15, yo, k2, yo, k25, yo, k2, yo, k30, yo, k2, yo, k25, yo, k2, yo, k19, sel s.
Row 20: sel s, k19, kf, p2, kf, k25, kf, p2, kf, k30, kf, p2, kf, k25, kf, p2, kf, k15, sel s.
Row 21: sel s, k16, yo, k2, yo, k27, yo, k2, yo, k32, yo, k2, yo, k27, yo, k2, yo, k20, sel s.
Row 22: sel s, k20, kf, p2, kf, k27, kf, p2, kf, k32, kf, p2, kf, k27, kf, p2, kf, k16, sel s.
How to separate the body and arms of the knit baby sleep sack:
In order to knit the body, you need to separate the total stitches of the yoke into stitches that will become the body, and the stitches that will become the arms.
Row 23: sel s, skpo, k15, k1, take scrap yarn or stitch holder and slip next 31 stitches, cast on 4 stitches, k36, take scrap yarn or stitch holder and slip next 31 stitches, cast on 4 stitches, k21, kfb, sel s.
Row 24: sel s, k23, p4, k 36, p4, k17, sel s.
Row 25: sel s, knit all stitches, sel s.
Row 26: sel s, k23, p4, k 36, p4, k17, sel s.
Row 27: sel s, knit all stitches, sel s.
Row 28: sel s, k23, p4, k 36, p4, k17, sel s.
In the next row we are going to make not only increases and decreases at the beginning and at the end, but also the next buttonhole.
Row 29 (buttonhole): sel s, skpo, knit all sts until you have 4 sts, yo, k2tog, kfb, sel s.
Row 30: sel s, k3, kf, k20, p4, k36, p4, k16, sel s.
Row 31: sel s, knit all stitches, sel s.
Row 32: sel s, k24, p4, k36, p4, k16, sel s.
Row 33: sel s, k16, yo, k4, yo, k36, yo, k4, yo, k24, sel s.
Row 34: sel s, k24, kf, p4, kf, k36, kf, p4, kf, k16, sel s.
Row 35: sel s, skpo, k85, kfb, sel s.
Row 36: sel s, k26, p4, k38, p4, k16, sel s.
Row 37: sel s, k88, sel s.
Row 38: repeat Row 36.
Row 39: repeat Row 37.
Row 40: repeat Row 36.
Row 41: sel s, skpo, k85, kfb, sel s.
Row 42: sel s, k27, p4, k38, p4, k15, sel s.
Row 43: sel s, k15, yo, k4, yo, k38, yo, k4, yo, k27, sel s.
Row 44: sel s, k27, kf, p4, kf, k38, kf, p4, kf, k15, sel s.
Row 45: sel s, k92, sel s.
Row 46: sel s, k28, p4, k40, p4, k16, sel s.
Row 47(buttonhole): sel s, skpo, k87, yo, k2tog, kfb, sel s.
Row 48: sel s, k3, kf, k25, p4, k40, p4, k15, sel s.
Row 49: sel s, k92, sel s.
Row 50: sel s, k29, p4, k40, p4, k15 sel s.
Row 51: repeat Row 49.
Row 52: repeat Row 50.
Row 53: sel s, skpo, k13, yo, k4, yo, k40, yo, k4, yo, k28, kfb, sel s.
Row 54: sel s, k30, kf, p4, kf, k40, kf, p4, kf, k14, sel s.
Row 55: sel s, k96, sel s.
Row 56: sel s, k31, p4, k42, p4, k15, sel s.
Row 57: repeat Row 55.
Row 58: repeat Row 56.
Row 59: sel s, skpo, k93, kfb, sel s.
Row 60: sel s, k32, p4, k42, p4, k14, sel s.
Row 61: sel s, k96, sel s.
Row 62: repeat Row 60.
Row 63: repeat Row 61.
Row 64: repeat Row 60.
Row 65 (buttonhole): sel s, skpo, k91, yo, k2tog, kfb, sel s.
Row 66: sel s, k3, kf, k29, p4, k42, p4, k13, sel s.
Row 67: sel s, k96, sel s.
Row 68: sel s, k33, p4, k42, p4, k13, sel s.
Row 69: repeat Row 67.
Row 70: repeat Row 68.
Row 71: sel s, skpo, k93, kfb, sel s.
Row 72: sel s, k34, p4, k42, p4, k12, sel s.
Row 73: sel s, k96, sel s.
Row 74: repeat Row 72.
Row 75: repeat Row 73.
Row 76: repeat Row 72.
Row 77: sel s, skpo, k93, kfb, sel s.
Row 78: sel s, k35, p4, k42, p4, k11, sel s.
Row 79: repeat Row 73.
Row 80: repeat Row 78.
Row 81: repeat Row 73.
Row 82: repeat Row 78.
Row 83 (buttonhole): sel s, skpo, k91, yo, k2tog, kfb, sel s.
Row 84: sel s, k3. Kf, k32, p4, k42, p4, k10, sel s.
Row 85: sel s, k96, sel s.
Row 86: sel s, k36, p4, k42, p4, k10, sel s.
Row 87: repeat Row 85.
Row 88: repeat Row 86.
Row 89: sel s, skpo, k93, kfb, sel s.
Row 90: sel s, k37, p4, k42, p4, k9, sel s.
Row 91: sel s, k96, sel s.
Row 92: repeat Row 90.
Row 93: repeat Row 91.
Row 94: repeat Row 90.
Row 95: repeat Row 89.
Row 96: sel s, k38, p4, k42, p4, k8, sel s.
Row 97: repeat Row 91.
Row 98: repeat Row 96.
Row 99: repeat Row 91.
Row 100: repeat Row 96.
Row 101(NO buttonhole needed): repeat Row 89.
Row 102: sel s, k39, p4, k42, p4, k7, sel s.
Row 103: repeat Row 91.
And now we are going to join stitches and knit in rounds.
Slip first 6 stitches of the left part to the extra needle or scrap yarn. The working yarn is coming from the right side now. Start knitting in rounds holding 6 sts behind the work.

Round 1: k6, p42, k4, k34. When you have 6 sts left, *slip 1 st from the left-hand needle and then 1 sts from the extra needle (or a scrap yarn) – repeat from * 6 times. Return 12 sts to the left-hand needle. [P2tog] – 6 times. P2. Place stitch marker.
Round 2: knit all stiches. (92 sts)
Round 3: k4, p42, k4, p42.
Round 4: knit all stitches.
Repeat Rounds 3-4 three more times.
Round 11: k3, skpo, p40, k2tog, k2, skpo, p40, k2tog.
Round 12: knit all stitches.
Round 13: k3, skpo, p38, k2tog, k2, skpo, p38, k2tog.
Round 14: knit all stitches.
Round 15: k3, skpo, p36, k2tog, k2, skpo, p36, k2tog.
Round 16: knit all stitches.
Round 17: k3, skpo, p34, k2tog, k2, skpo, p34, k2tog.
Round 18: knit all stitches.
Round 19: k3, skpo, p32, k2tog, k2, skpo, p32, k2tog.
Round 20: knit all stitches.
And now it is time to join bottom edges.
Row 1: k3, skpo, turn.
Row 2: sel s, p2, p2tog, turn.
Row 3: sel s, k2, skpo, turn.
Row 4: sel s, p2, p2tog.
Repeat Rows 3-4 until you have 4 stitches on the right and 4 sts on the left-hand needle. Cut the yarn, leaving 20 cm tail. Using yarn needle sew up last 8 stitches. For this you can use horizontal invisible seam method or any other methos you prefer.
How to knit the hood of the baby cocoon:
Unravel provisional cast-on and get live stitches back onto the needle – 52 stitches.
Attach new tail and start knitting on the wrong side (left side of cocoon)
Row 1: knit all stitches, sel s.
Row 2: sel s, knit all stitche, sel s.
Row 3: sel s, knit all stitche, sel s.
Row 4: sel s, k5, [k7 kfb] – repat 5 times, k5, sel s.
Row 5: sel s, knit all stitche, sel s.
Row 6: sel s, k5, [k8, kfb] – repeat 5 times, k5, sel s.
Row 7: sel s, knit all stitche, sel s.
Row 8: sel s, knit all stitche, sel s.
Row 9: sel s, knit all stitche, sel s.
Repeat Rows 8-9 until hood reaches 15 cm. Fold hood in half and sew it at the top with grafting/kitchener stitch: https://www.youtube.com/watch?v=LjJZFgQWP4s
And now we are going to knit an i-cord along right and left edges and along the hood. Please check video tutorial for detailed instructions https://youtu.be/FNRnxPH0vmQ?t=920
How to knit the sleeves of the baby cocoon:
Slip all stitches back to the circular or dpn (31 stitches). Pick up 5 more stitches underarm. Place stitch marker in the middle of four knit stitches underarm. (36 stitches)
Round 1: k3, pick up one more stitch, k31, pick up one stitch, k2. (38 stitches).
!!!Note!!!: you can decrease these two stitches that we have just added if you think the sleeve looks too wide.
Round 2: purl all stitches.
Round 3: knit all stitches.
Round 4: purl all stitches.
Repeat Rounds 3-4 until the sleeve reaches 9cm from the edge.
In the next round start knitting the cuff in ribbing k1, p1 and at the same time randomly decreasing 4 stitches. I did it by knitting 4 times k2tog.
Knit 11 rounds in ribbing and bind off all stitches using an elastic or traditional bind off method.
Repeat for the second sleeve.
How to knit the bunny ears of the baby cocoon:
Fold the hood edges and make 2 cm gap along the seam from the hood’s edge. From the seam count two ridge to the right (or to the left) and pick up 5 sts. Please leave tail at least 20 cm, we are going to use it later.
Row 1: make 3 stitches from 1: *knit front, yarn over, knit back, repeat from * 5 times.
Row 2: sel s, k1, slip next stitch holding working yarn in front, k10, slip next stitch holding working yarn in front, k1.
Repeat Row 2 until ear reaches desired length. In my case it is 23 cm.
Next row: sel s, k1, slip next stitch holding working yarn in front, skpo, k5, k2tog, k1, slip next stitch holding working yarn in front, k1.
Next row: sel s, k1, slip next stitch holding working yarn in front, k8, slip next stitch holding working yarn in front, k1.
Next row: sel s, k1, slip next stitch holding working yarn in front, skpo, k3, k2tog, k1, slip next stitch holding working yarn in front, k1.
Next row: sel s, k1, slip next stitch holding working yarn in front, k6, slip next stitch holding working yarn in front, k1.
Next row: sel s, k1, slip next stitch holding working yarn in front, skpo, k1, k2tog, k1, slip next stitch holding working yarn in front, k1.
Next row: sel s, k1, slip next stitch holding working yarn in front, k4, slip next stitch holding working yarn in front, k1.
Next row: sel s, k1, slip next stitch holding working yarn in front, k3tog, k1, slip next stitch holding working yarn in front, k1.
Next row: sel s, k1, slip next stitch holding working yarn in front, k2, slip next stitch holding working yarn in front, k1.
Cut the yarn leaving short tail. Pull it through remaining stitches then pull tight and make a knot.
Thread the tail that we left at the beginning and sew the ear to the hood working along the cast on to hide holes.
Repeat for the second ear.
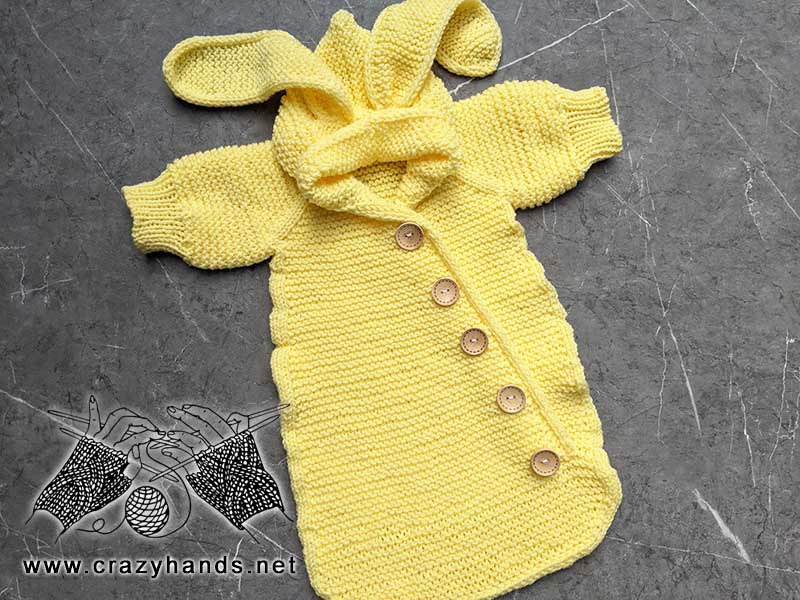
Weave in all ends. Sew buttons and smile 😊. You have finished and can enjoy this gorgeous baby cocoon.
2 comments
How can I get knitting patterns?
You can buy ads free version in my shop or use free version on my blog