
Knitting materials and knitting tools:
<> Straight or circular knitting needles US 4 (3.5 mm) for the bonnet and 3 mm for the ties.
<> Super Corfou – 100% Acrylic, Color # 45, 40 grams – 95 meters.
<> Stitch markers.
Baby knit bonnet size and calculations:
Gauge: 16 stitches = 4 inches in stockinette (corn stitch)
Head circumference: 40 cm (0-4 months).
Length from ear to ear over top: 30 cm (check the video how I did the measurements)
30*1.6 = 48 stitches. The finial number must be divisible by 2.
Hat height (depth): 12 cm. If you want to be more precise measure your baby’s head from the forehead till the crown.
Common abbreviations of knitting stitches:
k – knit
pm – place marker
k2togb – knit two together through the back loop
k2togf – knit two together through the front loop
sel s – selvage stitch: always slip the first stitch purlwise, work to the last stitch, purl the last stitch
LHN – left hand needle
RHN – right hand needle
yo – yarn over
p3tog – purl three together
p – purl
p2tog – purl two together
st(s) – stitch(es)
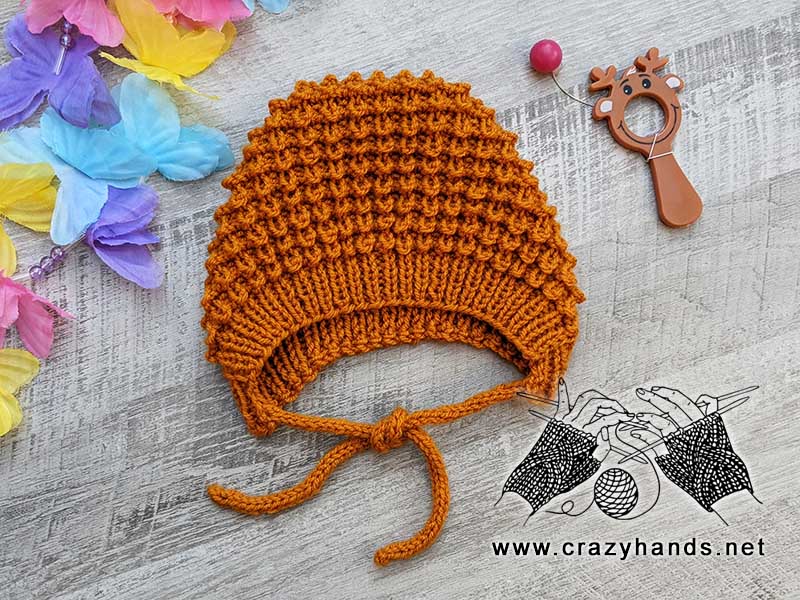
Ribbing of the baby knit bonnet:
Using 3.5 mm knitting needles cast on 48 stitches or any other number divisible by 2.
Row 1-6: sel s, [k1, p1] – repeat till the end of the row, sel s, turn. (about 2.5-3 cm/1 inch)
Row 7: sel s, [k1, p1] – repeat till the end of the row, sel s.
Row 8: sel s, *k1, yo, slip the next stitch holding working yarn in back – repeat from *, sel s
Row 9: sel s, *yo, slip together next stitch and yo st of the previous row, k1 – repeat from *, sel sl.
Row 10: sel s, k1, p3tog (purl together next stitch and two yo) – repeat from *, sel s.
Repeat Row 7-10 until piece measures 12 cm (depth).
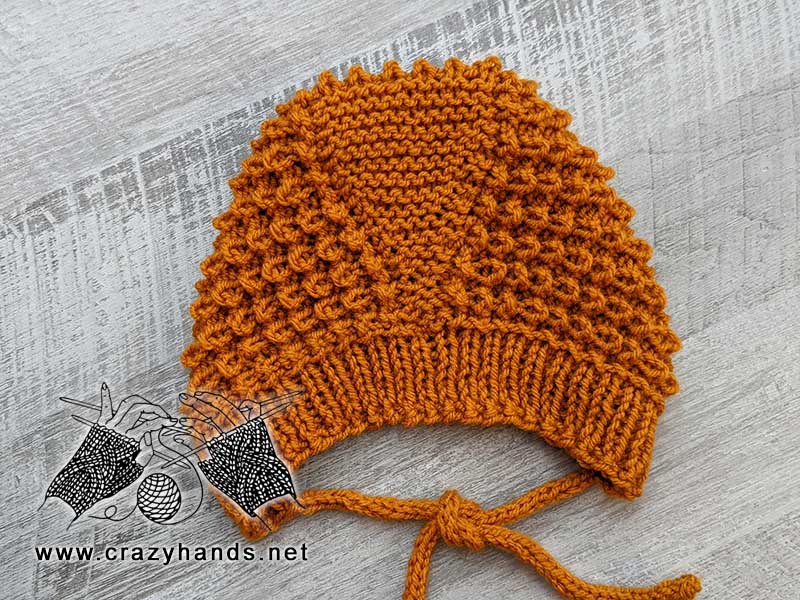
Shaping the crown of the baby knit bonnet:
Divide all stitches in 3. In my case it is 16/16/16. Make the central part a little bit smaller 17/14/17 and place stitch markers. Cut the working yarn (leave 10 cm tail) and move all stitches to the right side while the tail of working yarn in coming from the left. Divide sides where you have 17 sts again in 3. I did it in the following way starting from the beginning 5/6/6, place stitch markers. Repeat symmetrically on the other (left) side. Check video if it is unclear.
Slip to the LHN first 17 sts together with stitch markers.
Attach the yarn.
Row 1: k13, p2tog (purl two together one stitch before and after stitch marker), turn. You can remove stitch marker
Row 2: sel s, k12, k2togb, turn. You can remove stitch marker
Row 3: sel s, k12, p2tog, turn.
Row 4: sel s, k12, k2togb, turn.
Repeat Rows 3 and 4 – four more times or until you reach 1st stitch marker on the right and on the left sides.
Row 13: sel s, k2togf, k8, k2togf, p2tog, turn
Row 14: sel s, k10, k2togb, turn.
Row 15: sel s, k10, p2tog, turn.
Row 16: sel s, k10, k2togb, turn.
Row 17: sel s, k2togf, k6, k2togf, p2tog, turn
Row 18: sel s, k8, k2togb, turn.
Row 19: sel s, k8, p2tog, turn.
Row 20: sel s, k8, k2togb, turn.
Row 21: sel s, k2togf, k4, k2togf, p2tog, turn
Row 22: sel s, k6, k2togb, turn.
Row 23: sel s, k6, p2tog, turn.
Row 24: sel s, k6, k2togb, turn. Remove all stitch markers you do not need them anymore.
Row 25: sel s, k2togf, k2, k2togf, p2tog, turn
Row 26: sel s, k4, k2togb, turn.
Row 27: sel s, k4, p2tog, turn.
Row 28: sel s, k4, k2togb, turn.
Row 29: sel s, k2togf, k2togf, p2tog, turn
Row 30: sel s, k2, k2togb, turn.
Row 31: sel s, k2, p2tog, turn.
Row 32: sel s, k2, k2togb, turn.
Repeat Rows 31 and 32 – three more times.
Now you have only 4 stitches in the center. Bind them off and cut the yarn.
Pick up stitches along the edge through the back loop to make the seam thinner.
Turn.
Row 1: sel s, [k1, p1], sel s.
Repeat Row 1 until the back ribbing part will be longer the front one that will keep warm your baby’s neck. Knit at least 3.5-4.5 cm. Bind off all stitches. Check the video tutorial if you want to try an elastic bind off method.
Add ties to the baby knit bonnet
Do not break the yarn. Using 3 mm needles pick up 2 more stitches (3 in total) and knit an i-cord. Slide all stitches to the other end of the needle. Working yarn from the left side. K3. Slide stitches again to the other end and repeat previous steps. Knit until the length of the cord reaches at least 20-22 cm or 8-9 inches. At the end [k2tog, k1], slide stitches again, k2tog. Cut the yarn. Pick up 3 stitches from the other side and knit one more cord. Weave in ends.