
Contents
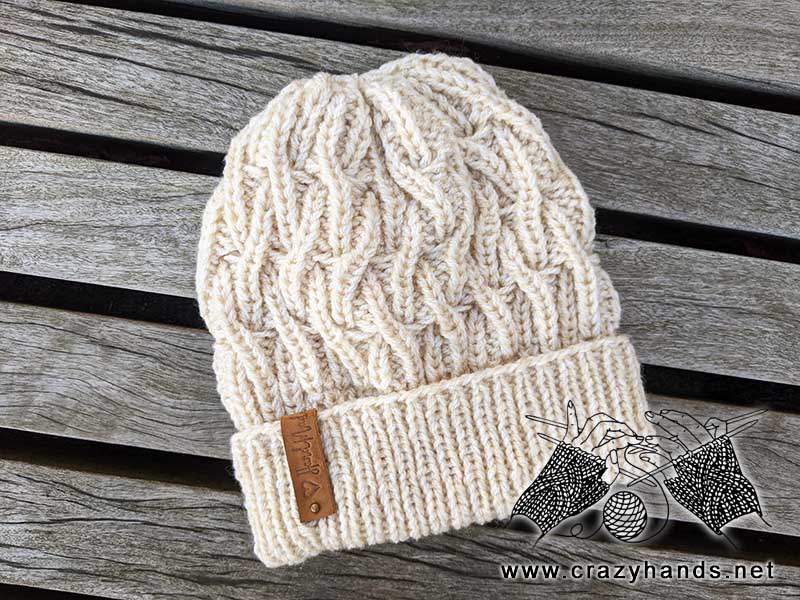
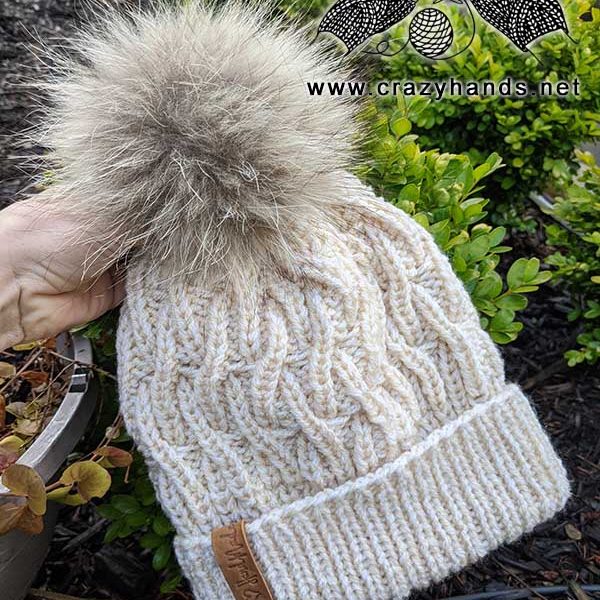
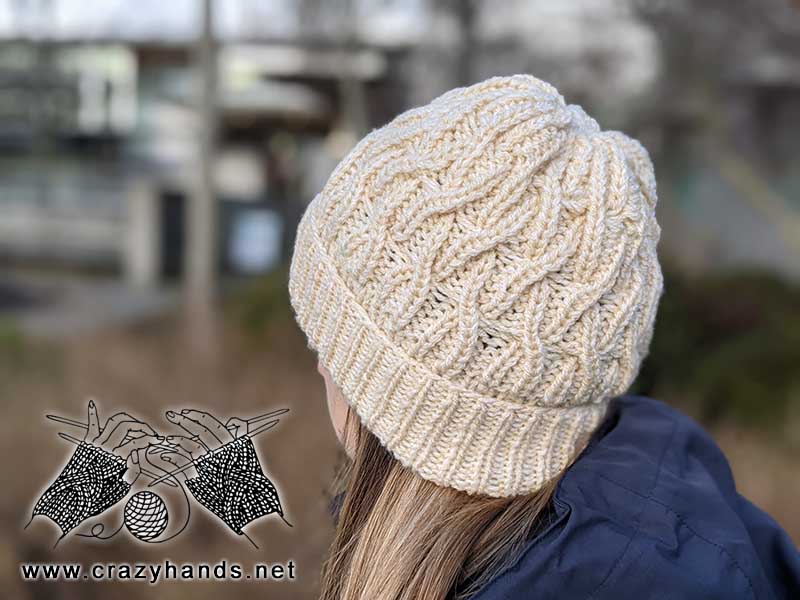
As you might have guessed Liana cable hat is based off of Liana stitch that I find so charming. Its elegant slim stitches twisting with each other remind of a sea horse and long overdue seaside vacation. Well, I don’t think it’s going to happen anytime soon with all the craziness around Covid, but we can at least dream about it. What these cables look like to you? Share your thoughts in the comments.
Knitting materials and tools:
<> 16” Circular Knitting Needles 4.5 mm (US7/UK7) for ribbing part and 5 mm (US8/UK6) for the body part;
<> Schaffhauser Wolle SUPERSTAR yarn (DK) – 83% Acrylic, 17% Viscose, Color # 82, 50 grams – 100 meters – in total 3 balls;
Bulky knit cable hat size:
Gauge: 16-17 sts – 4 inches (10 cm) – in stockinette
Adult / Teen – 53-56 cm
Note for knitters:
Knit in two strands of yarn.
Common abbreviations of knitting stitches:
k – knit
p – purl
st(s) – stitch(es)
k2tog – knit two together
p2tog – purl two together
sel s – selvage stitch: always slip the first stitch purlwise, work to the last stitch, purl the last stitch
Cable 3 Back (C3B): Slip next 3 stitches to the extra needle and hold in back of work, p1, k1, p1 from the left-hand needle, p1, k1, p1 from the extra needle.
Cable 3 Front (C3F): Slip next 3 stitches to the extra needle and hold in front of work, p1, k1, p1 from the left-hand needle, p1, k1, p1 from the extra needle.
skpo – Slip, Knit, Pass Over: Slip one stitch to the right needle knitwise, knit in the next stitch and drop this stitch off the left needle, insert the left needle into the slipped stitch, pass it over the knit stitch and it’s done
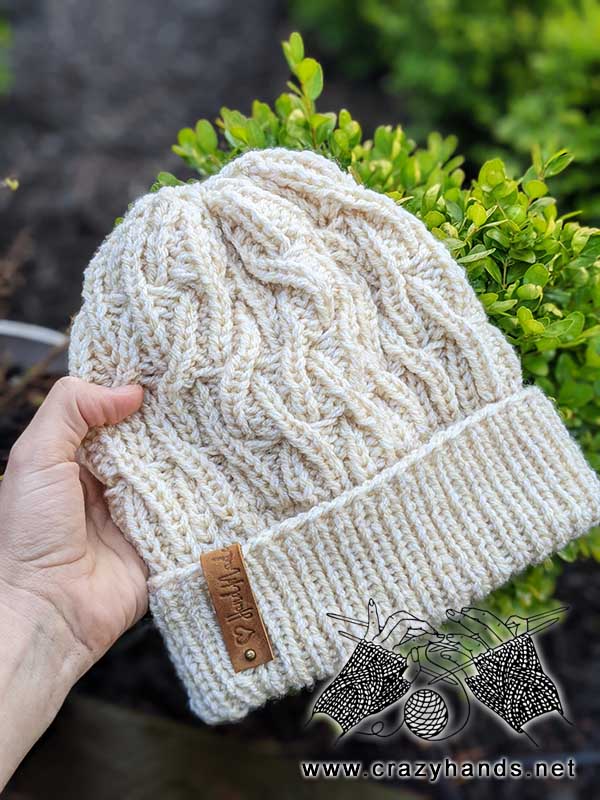
Liana bulky cable hat knitting pattern:
Using smaller size circular needles, cast on 76 stitches. Cast on 1 extra stitch if you are using invisible joining method.
Place marker and join in round. Rib k1, p1 until beanie reaches 14 cm if you want a folded brim, or 7 cm if you want a hat without brim.
Body of the bulky cable knit hat:
Change to larger needles. In the next round we are going to increase by adding 26 stitches evenly around. To do this I have divided the total number of stitches in 2 parts (use stitch marker as a helper) and added 13 stitches from one side and 13 stitches from other side. To increase use any technique you know. I am going to use knit one below increase.
The total number of stitches is 102. It could be less or more depending on the yarn weight but it should be divisible by 6.
Round 1: [p1, k1, p2, k1, p1] – repeat till the end of round.
Rounds 2-7: repeat Round 1.
Round 8: C3F– repeat till the end of round.
Round 9: [p1, k1, p2, k1, p1] – repeat till the end of round.
Rounds 10-15: repeat Round 9.
Round 16: p1, k1, p1, [C3B] – repeat right leaning cable until you have 3 sts, slip next 3 stitches to the extra needle and hold in back of work, remove stitch marker, p1, k1, p1 from the left-hand needle, place marker back, p1, k1, p1 from the extra needle. (You have already knitted 3 stitches of the next round).
Repeat Rounds 1-16 until your work reaches desired length – 19 cm.
In my case I have repeated one more time Rounds 1-12 and reached the desired length.

Shaping the crown of bulky cable knit hat:
Round 1: [k2tog, p1] – repeat till the end of round.
Round 2-3: [k1, p1] – repeat till the end of round.
Round 4: [skpo, p2tog] – repeat till the end of round.
Round 5: [skpo] – repeat till the end of round.
Break the yarn leaving a long tail. Use hook or tapestry needle to thread this tail through remaining Pull tight and weave in ends.
21 comments
Why can’t i print or download the patterns???
Hi Arlene. The ads Free version is paid. Thanks you for understanding
when you are purling why are you purling in the back? is this normal for knitting in the round?
I have answered you above, it is an ordinary purl stitch. Do it in your usual way
I am watching the video and am confused. Sometimes you are knitting in the front and others in the back. Same with the purl. Why?
It depends how I grab the yarn in the previous round. I am using a continental way of knitting. No worries and go on, it is just a normal knit and purl stitches.
HI I LOVE this design and want to make it in an adult large size. Are their different sizes in the paid for pattern or how can I figure this out please?
Thanks
HI ELysia. Paid pattern is only Ads free version. If you want to make hat bigger you can use heavier yarn and bigger size knitting needles or increase initial number of stitches. Pay attention that number of stitches after the ribbing part has to be divisible by 6.
Hi I LOVE this pattern and would like to make an Adult large? Do you have recommendations for number of stitches to cast on for different sizes please?
just answered you 🙂
Hi I love this pattern and want to knit it for a three year old but don’t know how to work out how many stitches to cast on, work and to what length – any ideas?
Hi Lisa. Usually at this age kids have same head circumference as an adults (53 cm). You can take lighter yarn and do not change the pattern. The length has to be about 18 cm before you start shaping crown. I hope it helps. Let me know if you have other questions
A question. On row 16, when you place the marker back, are you now considering the marker has moved the whole pattern over 3 stitches and you now start row 1 of the pattern again only in a new place?
Hi Joyce. If you check video and count stitches you will see that the stitch marker is still in its place. Because I did a cable twist in that place I took 3 sts from the next row, but last 3 stitches from the Row 16 became the first stitches of the next row. Sound complicated maybe. You do not move the pattern over 3 stitches. Consider 3 sts after the stitch marker as first 3 sts of Row 1. Let me know if it is still unclear
Hi,
When working the crown of the hat, do we just keep repeating rows 1-5 with double pointed needles? I’m new to hats and that seems to be the way in other patterns, but those pattern didn’t mention DPNs or twisting the crown rows.
Thanks.
It is always easier to shape a crown with DPN, especially if you are beginner. I usually manage to close it on circular. Choose what works better for you
Such a beautiful yet easy pattern! I made two hats already and for sure there will be more. Thank you so much for putting this together for us!
Thank you for your warm comment!
loved making it,looks great x
great, clear instructions, well written and easy to follow. especially like the way you shaped the crown.
I started the hat, but it seemed that 76 stitches creates a very stretched rib, which would not be that elastic. I also noticed that the rib is very stretched out in the photo. I measured it against another hat I have where the ribbing is not so stretched. It seems to me that 92 stitches for the initial cast on is better, particularly since smaller needles are used.