
Contents
Knitting materials and knitting tools:
<> Circular or DPN knitting needles 9 mm (US 13/UK 00); Use 10 mm if you think that you are tight knitter.
<> Super bulky yarn – Lion Brand Wool, Ease Thick & Quick – 20% wool, 80% acrylic. Color of your choice.
<> Crochet hook or tapestry needle and 5 stitch markers.
Size of the super bulky knit hat:
Adult: 53-56 cm
Gauge: 9-10 sts – 4 inches (10 cm)
Common abbreviations of knitting stitches:
k – knit
p – purl
yo – yarn over
pm – place stitch marker
k2tog – knit two together
k3tog – knit three together: Slip two stitch to the right needle knitwise, knit in the next stitch and drop this stitch off the left needle, insert the left needle into the two slipped stitches, pass them over the knit stitch and it’s done
st(s) – stitch(es)
slip – slip the next st holding working yarn in back
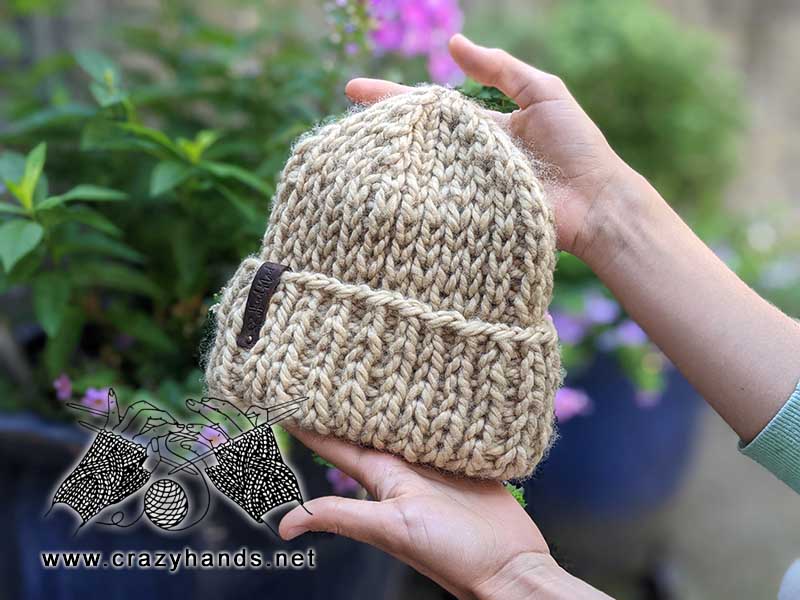
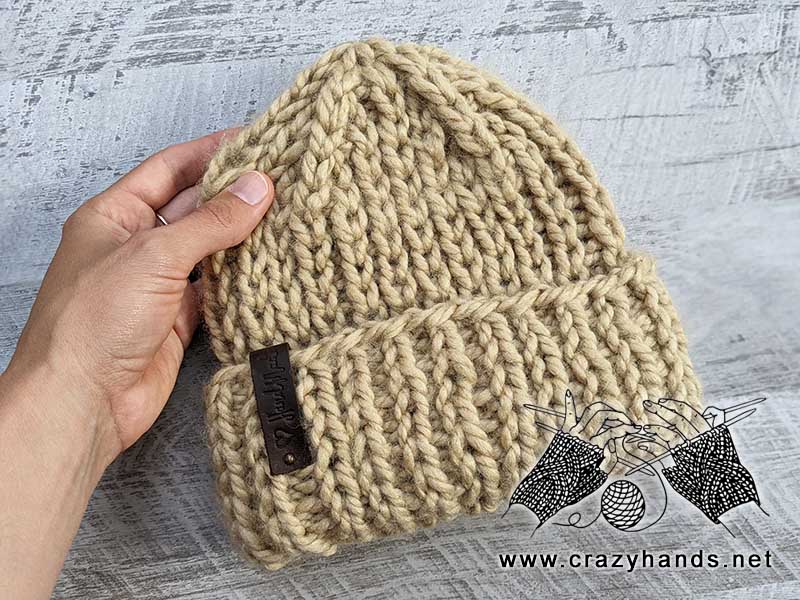
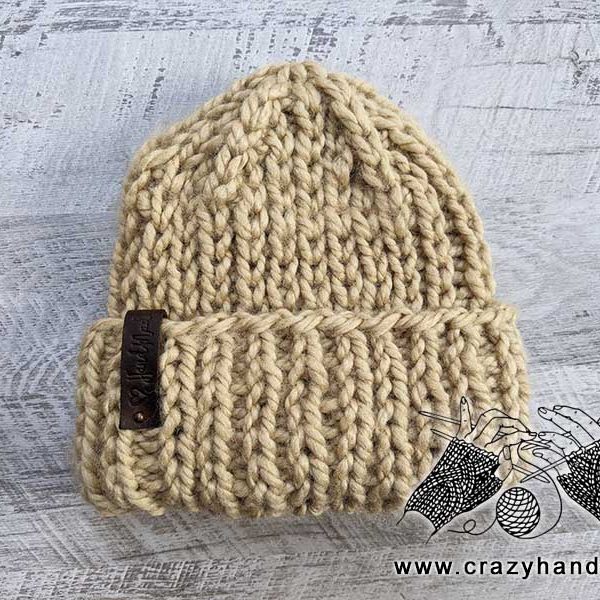
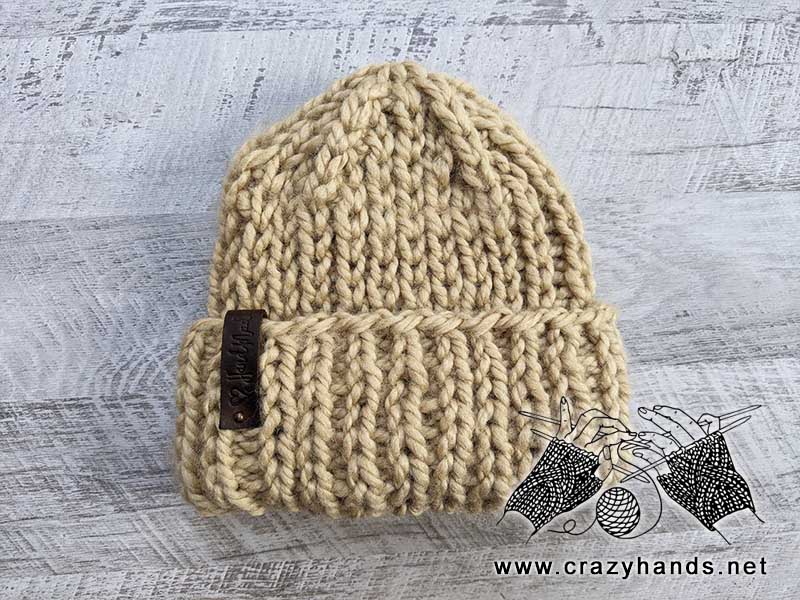
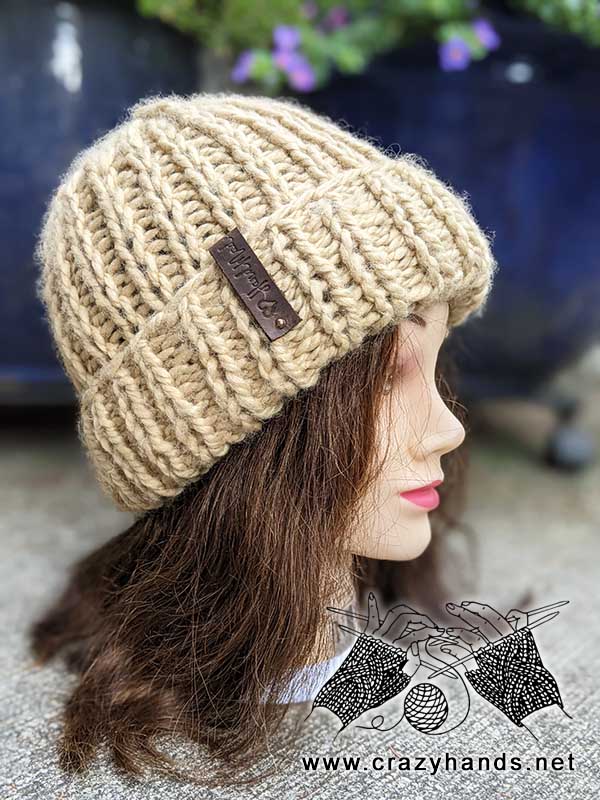
Body of the bulky knit hat pattern:
Сast on 48 (40) stitches or any other number that is divisible by 8. Join to knit in the round. Place marker.
Round 1: [p1, slip the next st holding working yarn in back] – repeat till the end of round.
Round 2: [p1, k1] – repeat till the end of round.
Repeat Rounds 1 and 2 seven more times to get in total 16 rounds or until piece reaches 9 cm.
Turn the hat wrong side out because we are going to knit in opposite direction. Check video tutorial for more instructions.
Round 17: yo, pm [p1, slip] – repeat till the end of round. When you reach last stitch, k2tog (last stitch and yo).
Rounds 18-19: [p1, slip] – repeat till the end of round.
Round 20: [p1, k1] – repeat till the end of round.
Round 21: [p1, slip] – repeat till the end of round.
Repeat Rounds 20-21 until hat reaches 23-25 cm
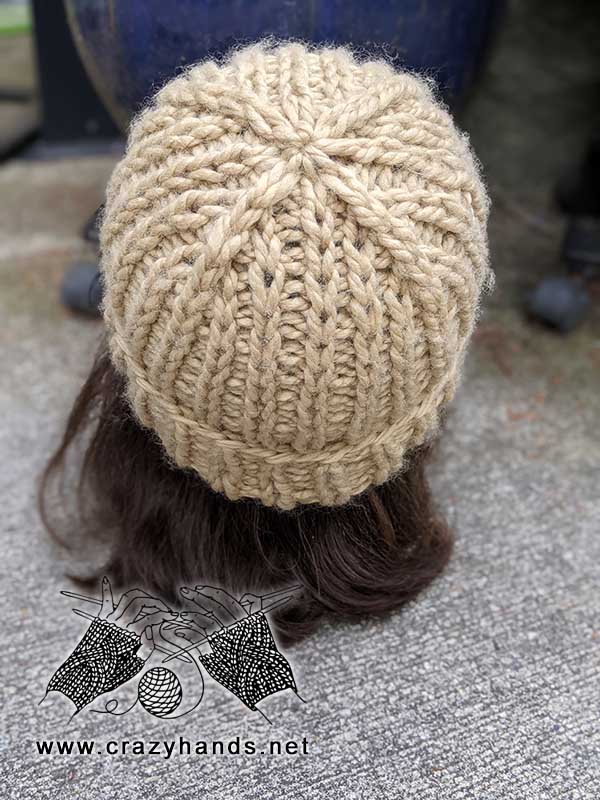
Shaping the crown of bulky double brim knit hat:
Now it’s time to place stitch markers for shaping the crown
6sts, pm, 12 sts, pm, 12 sts, pm, 12sts, pm, 6sts.
Round 1: *[p1, k1] – twice, k3tog, [k1, p1] – twice, k1: repeat from * 4 times.
Round 2: *p1, slip, p1, k1, slip, k1, [p1, slip] – twice: repeat from * 4 times.
Round 3: *p1, k1, p1, k3tog, [p1, k1] – twice: repeat from * 4 times.
Round 4: [p1, slip] – repeat till the end.
Round 5: [p1, k1, k3tog, k1, p1, k1] – repeat 4 times.
Round 6: [p1, k1, slip, k1, p1, slip] – repeat 4 times.
Round 7: [p1, k3tog, p1, k1] – repeat 4 times.
Round 8: [p1, slip] – repeat till the end.
Round 9: [k3tog, k1] – repeat till the end.
Round 10: knit all sts.
Cut the yarn leaving 10 cm tail and pull it through remaining 8 stitches by using hook or tapestry needle. Weave in ends.
Smile 😊 it is time to enjoy your masterpiece.
28 comments
I am going to make a hat for my grandson for Christmas using your pattern. Can you tell me where you get the leather “Handmade” labels you used on your ? That’s a nice touch.
Hi Karen. I order them online from shops offering custom made leather products such as purses and wallets. You can also order something similar from chinese side aliexpress
Can you tell me where you get the leather “Handmade” labels, like the one you use on your Double Brim Bulky Hat?
Thank you, Karen Clark
Hi Karen. I order them online from shops offering custom made leather products such as purses and wallets. You can also order something similar from chinese side aliexpress
Hey I’m a new knitter and find purling clockwise to be much easier. Can I use your pattern with a clockwise purl or will it not work? I find my counter clockwise purls are just a but looser and don’t come out looking as nice. Thanks
Oh whow just watched your video and saw that you are purling clockwise! Haha awesome thank you!
hahaha, now i hope it looks easy for you. Tension depends on what kind of knitter you are. Maybe you need just more practice
I am new to knitting, on round 17 you k2tog, which means I have one less stitch then when I started. When I get back to my stitch marker I have two purl stitches together. I have 47 stitches so I will not be able to add the stitch markers evenly when I get to the shaping of the crown. What am I doing wrong? Thank you for your help, this hat is so cute I’m determined to get it.
hi. When you k2tog you will not end up with 47 sts, but with same 48 sts. If you made yarn over at the beginning, just knit yo and last stitch together. I did not get about purl stitches. There is no p2tog
Thank you, third time was the charm, I did it! I knit English style so I’m really having a hard time understanding while watching you since your style is so different then mine. Now I’ll see if I can master the shaping of the crown.
I conquered the shaping of the crown!! I followed your pattern but don’t know why sometimes you knit and sometimes you slip. I would like to cast on 56 stitches to make the hat a little bigger, but don’t know what combination of stitches I would need to do for those two rows to get to your 48 stitches. Could you advise me? Thank you!
Hi Bobby. Cast on 56 sts. After follow the pattern. When you start shaping crown count 6 sts than place marker, then count 14 sts and pm and so on. Place stitch markers only in knit sts.
Thank you Ann I really appreciate your help. I understand that with 56 stitches I would place my markers at every 14 stitches. I don’t know how to work those first two rows when shaping the crown with 56 stitches. I know I will need to k3tog on the first row but don’t now when to knit, purl or slip before or after. What would I do on row 2? I think after these two rows I would be at 48 stitches and could then follow your pattern.
I do suggest you follow the video tutorial. Place stitch markers and repeat what I am doing. When you see that I stopped 1 stitch before a stitch marker and I make k3tog, you need to repeat the same. Same with Row 2. I hope it is clear
Your directions and videos are unclear as is the sound.. the directions should clearly state what specifically to do for different sizes .. im at 56 stitches: where do you place markers—every 14 or 6 then 14 , 14 , 14 , then 6 .. where are you decreasing?? I was following your directions and had a perfect result until crown shaping.. pleased advise..thanks ever so much.. the hat is really great so far would like to continue..
Hi. When you start shaping crown count 6 sts than place marker, then count 14 sts and pm and so on. Place stitch markers only in knit sts. start decreases when you reach 23-24 cm. Make decreases as I am doing the only difference you will have more stitches between stitch markers.
I cast on 40 stitches because I need a smaller size hat. When I got to the decrease, I was stumped. I watched the video and the knitter remarked that if one had cast on 40, there would be 10 stitches between markers. But if I do that, I’d have 5 stitches and the beginning and end of the first decrease round….and would that work? I am confused, so please clarify.
Why dont you place stitch markers in this way 6sts, pm, 10 sts, pm, 10 sts, pm, 10sts, pm, 4sts.
Hi! Can I knit this pattern with straight needles?
thanks
You can of course. But it will be hard to change it, I do not suggest
Thanks for your reply.. I did not get it when yo said it’s hard to change it? did you mean the pattern?
yes the pattern. But there is nothing impossible 🙂
Thank you for the pattern and video! I love this hat but I’m not sure how many stitches to cast on. I started with 48 but is seems too small.
What yarn weight do you use?
I’ve made many hats before but the directions not too clear. I’m not sure why the PO and from what I can tell so far, even with CO 48 stitches looks like it’s gong to be too small.
everything depends on how tight knitter you are. Add more stitches. If you read comments you can find more explanation for the crown with bigger number of stitches. Otherwise I have already seen many projects done with this pattern.
Is this a one skein project? How many grams of yarn is use for this hat?
Yes, 1 was enough