
Contents
Knitting materials and tools:
<> Circular or DPN knitting needles 3 mm (UK 11 or US 2.5);
<> Red Heart: Soft Touch (4) – 100% Acrylic. 3 different colors.
<> Yarn or tapestry needle
Size of flat knit slipper socks:
Size: US7-8 / EU 37-38. Information for size 8 is shown either in parentheses or there is clear note stating that additional row should be knitted for it.
Gauge: 19-20 sts – 4 inches (or 10 cm)
Common abbreviations of knitting stitches:
k – knit
p – purl
sel s – selvage stitch: always slip the first stitch purlwise, work to the last stitch, purl the last stitch.
yo – yarn over.
Mattress stitch: Pick up 1 or 2 bars right after the selvage stitch and pull the yarn through. On the other side, find opposing selvage stitch, pick up again 2 bars and pull the yarn through. Come to the other edge of your work, insert the needle into the same hole that the yarn came out from before and pick up the 2 bars again. Continue in this manner to the end adjusting the yarn tension as you go.
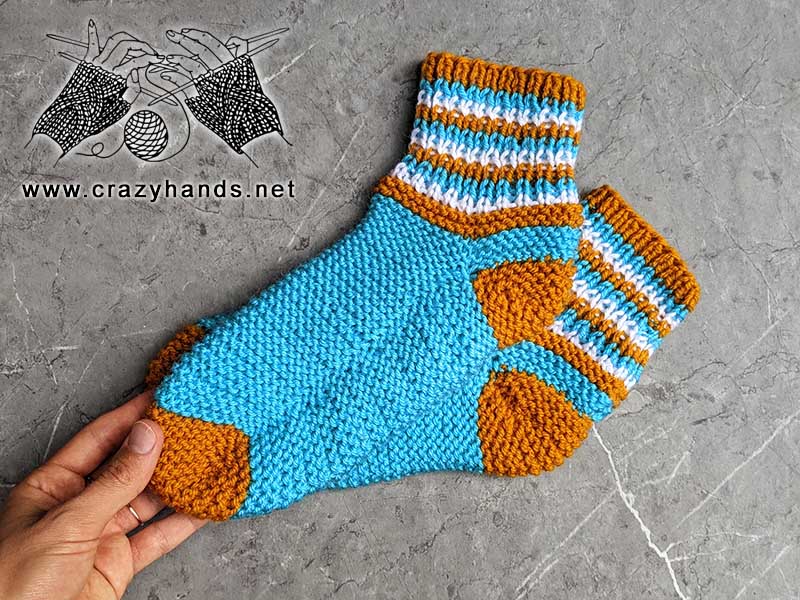
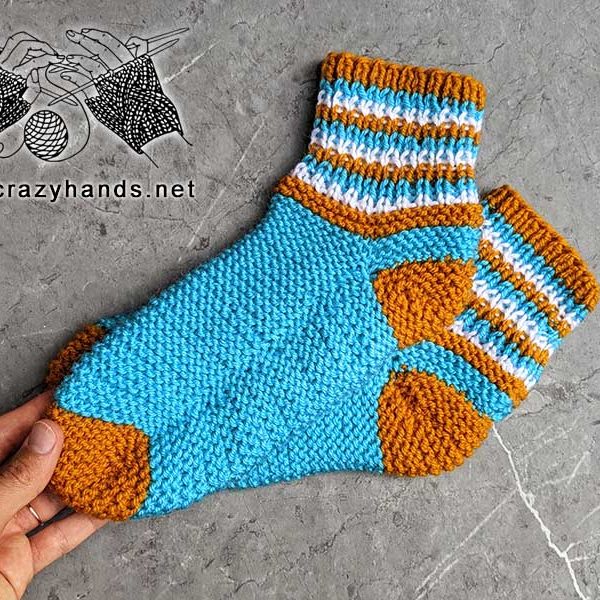
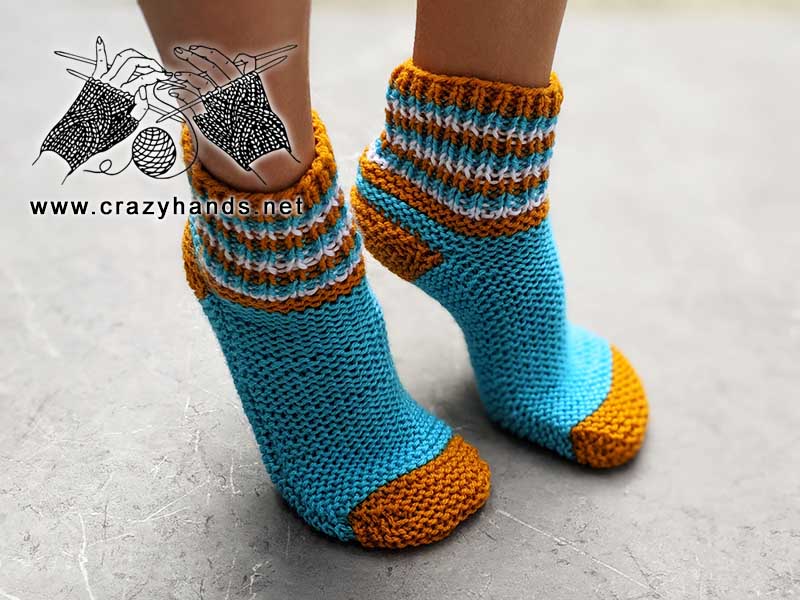
Knit two-needle slipper socks pattern:
MAKE TWO.
Using yellow yarn color cast on 44 (46). Please leave at least 15 cm tail, we will use it to stitch up a cuff.
Rows 1-3: sel s, [k1, p1] – repeat till the end, sel s.
Change yarn color from yellow to blue. In the next round after you change color, always knit the first stitch instead of slipping it. Doing it this way you will not have jogs when you start seaming up socks. Do not cut the yarn until I mention it.
Row 4: k1, [k1, p1] – repeat till the end, sel s.
Row 5: sel s, [k1, p1] – repeat till the end, sel s.
Change the yarn color from blue to white.
Row 6: k1, [k1, p1] – repeat till the end, sel s.
Row 7: sel s, [k1, p1] – repeat till the end, sel s.
Change the yarn color.
Row 8: k1, [k1, p1] – repeat till the end, sel s.
Row 9: sel s, [k1, p1] – repeat till the end, sel s.
Change the yarn color.
Row 10: k1, [k1, p1] – repeat till the end, sel s.
Row 11: sel s, [k1, p1] – repeat till the end, sel s.
Change the yarn color.
Row 12: k1, [k1, p1] – repeat till the end, sel s.
Row 13: sel s, [k1, p1] – repeat till the end, sel s.
Change the yarn color.
Row 14: k1, [k1, p1] – repeat till the end, sel s.
Row 15: sel s, [k1, p1] – repeat till the end, sel s.
Change the yarn color.
Row 16: k1, [k1, p1] – repeat till the end, sel s.
Row 17: sel s, [k1, p1] – repeat till the end, sel s.
Change the yarn color.
Row 18: k1, [k1, p1] – repeat till the end, sel s.
Row 19: sel s, [k1, p1] – repeat till the end, sel s.
At this point ribbing part measures 8 cm. Cut the white color. Change the yarn color.
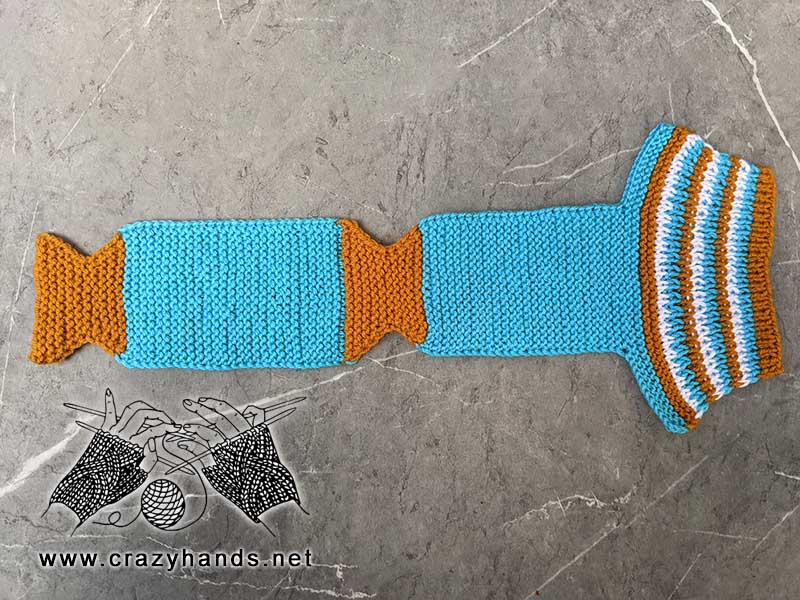
Rows 20-23: sel s, knit all stitches, sel s. Do not forget to knit the first stitch in Row 20. Cut the yellow yarn.
Rows 24-27: sel s, knit all stitches, sel s.
Find 20 (22) stitches in the center and place markers from both sides.
Row 28: bind off 12 sts, k31(k33), sel s.
Row 29: bind off 12 sts, k19(k21), sel s.
Row 30: sel s, k18 (k20), sel s.
Repeat Row 30 until central part reaches 13 cm starting from the 28th row.
Cut the yarn leaving long tail, so that later you can sew sock’s sides. Change the yarn color to the yellow and let’s start knitting toes.
Row 1: sel s, k2tog, k14 (k16), k2tog, sel s.
Row 2: sel s, knit all stitches, sel s.
Row 3: sel s, k2tog, k12 (k14), k2tog, sel s.
Row 4: sel s, knit all stitches, sel s.
Row 5: sel s, k2tog, k10 (k12), k2tog, sel s.
Row 6: sel s, knit all stitches, sel s.
Row 7: sel s, k2tog, k8 (k10), k2tog, sel s.
Row 8: sel s, knit all stitches, sel s.
Row 9: sel s, k2tog, k6 (k8), k2tog, sel s.
Row 10: sel s, knit all stitches, sel s.
Row 11 only for size US 8: sel s, k2tog, k6, k2tog, sel s.
Row 12 only for size US 8: sel s, knit all stitches, sel s.
Row 11 (for both sizes): sel s, yo, k8, yo, sel s.
Row 12: sel s, knit all stitches, sel s. Knit yo stitch through the back loop to get rid of a hole.
Row 13: sel s, yo, k10, yo, sel s.
Row 14: sel s, knit all stitches, sel s.
Row 15: sel s, yo, k12, yo, sel s.
Row 16: sel s, knit all stitches, sel s.
Row 17: sel s, yo, k14, yo, sel s.
Row 18: sel s, knit all stitches, sel s.
Row 19: sel s, yo, k16, yo, sel s.
Row 20: sel s, knit all stitches, sel s.
Row 21 only for size US 8: sel s, yo, k18, yo, sel s.
Row 22 only for size US 8: sel s, knit all stitches, sel s.
Cut the yarn leaving the long tail. Change to the blue color again and leave a long tail.
Repeat everything starting from the Row 30. After that cut the yarn leaving long tail. Change yarn color to yellow and repeat knitting toes.
Bind off all stitches. Cut the yarn leaving at least 15 cm tail.
Place the sock with the wrong side facing up, fold toe part, thread the tail through a yarn or tapestry needle, start stitching up toe from one side using mattress stitch method and then from other side. If the length of the tail that you have left is not enough, you will need to attach a new one. Weave in ends. After that find the tail that is corresponding to the main sock color, thread it and start stitching up the sock from one side using the same mattress stitch method. Repeat for another side. Do not cut the yarn. Now find the tail that corresponds to the heel color and stitch up the heel from both sides. Return to the tail that you we using to stitch up the sides and let’s join the heel and the ankle. IMPORTANT, while sewing the heel at times you are going to insert the needle twice into 1 stitch on the top. We are doing it because we have more stitches on the bottom than on the top and want to get a neat seam. Join the ankle and the heel till the center and repeat for the second side, using another tail. Finally, stitch up the ankle using either the tail you left at the very beginning or any nearest tail.
Check the video for helpful demonstration.
Cut the yarn and weave in ends.
25 comments
HI do you have a printer friendly version of this 2 needle slipper sock?
Hi. I do not have it now(
I have created a Microsoft Word document with one picture of the finished product, and the link for the video tutorial. If you can find a way to message me your email address, I will gladly share.
Hi there,
Can you email me the Microsoft word document, will be so gratefull.
Jean
Hi,
I would love a copy of your Word doc for this pattern! thanks so much for sharing your skills.
Please send to: [email protected]
thanks fo very nuch. You are turly appreciated!
Bev Rose
Hi Rose, I did not prepare yet the pdf version. Sorry
I eould love to make these for my grandson. He has a size 1 foot. Are you able to give me the instructions for that size
I need to calculate it, I believe baby booties are better for that age
looking good!
I would like to have these patterns in hard copy as that would be easier to complete the garments
you can buy ads free version and print it
I wrote down the instructions for my 85 yr old mom., she knits a lot. She was blown away by how easy it was to knit socks using your pattern.
Pattern has 4 sections amount of stiches and rib length. Cast off until you have middle section. Again set number of stiches and length. Shaping of the toes. And that’s repeated. The video was perfect in showing my mom how the socket needs to be assembled. She is on her 3rd pair of socks.
Thank you for sharing this wonderful pattern.
Wow, Best regards to your wonderful mother and many many knitting projects ahead.
What do you mean by, set number of stitches?
How do I increase the pattern for larger socks?
Cast on 48 or 50 sts if you want wide socks and knit the sole longer.
I have small feet, how many would I cast on?
what size to your have?
Please explain whether the wool is held in front or in back when doing the ‘sel s’ at the beginning of a row. So when slipping the stitch purl wise, is the wool in front or back? I appreciate a timelu answer so I can get started right away. Many thanks, Rita.
Hey Rita. We have discussed everything in DMs.
Hello Ann ~ Me again, I see in your video that I should purl the last stitch however you have written ‘sel s’ in the pattern directions. This causes needless confusion. May I kindly suggest that you correct your written pattern directions. This stitch changes the tension in the edging and matters to the outcome. This is a simple and lovely pattern and shouldn’t cause this much confusion.
Thank you.
Hi Rita. Stitch instruction says: sel s – selvage stitch: always slip the first stitch purlwise, work to the last stitch, purl the last stitch.
Do you think it is unclear? Let me know please
Hello Anne ~ the written instructions seem to advise that I sew the sock up on the wrong side, ( Place sock with wrong side facing up), however, the video shows the right side? What do you advise?
Thank you,
Rita
Hey Rita, yes you sew sock on the right side.
Thank you Anne!