Knitting materials and tools:
Circular 32 in/80cm 4.5 mm (US 7 / UK7).
Long mink wool (Cashmere) yarn – 75% wool, 25% nylon: 50 grams – 340 m per skein. Note: Knit with 2 strands of main and 1 strands of reinforcing (partner) yarn together. Quantity: 185 grams.
Stitch marker
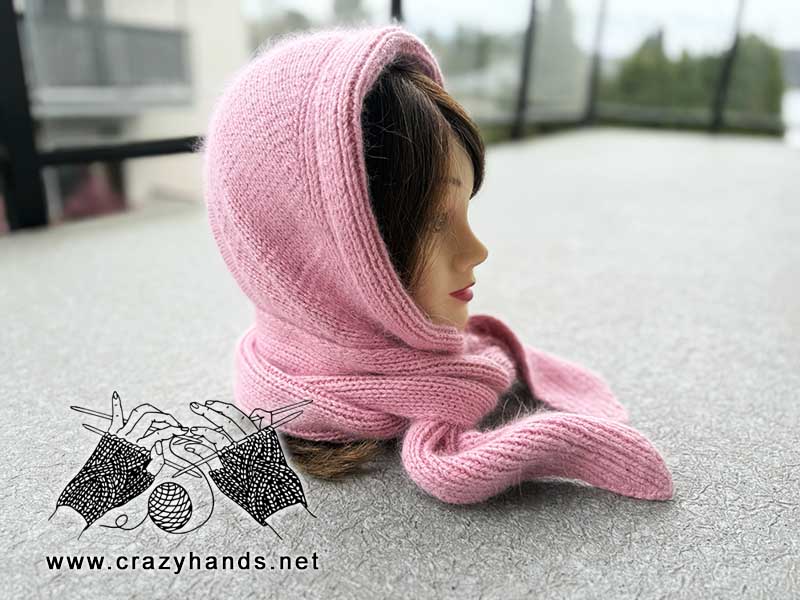
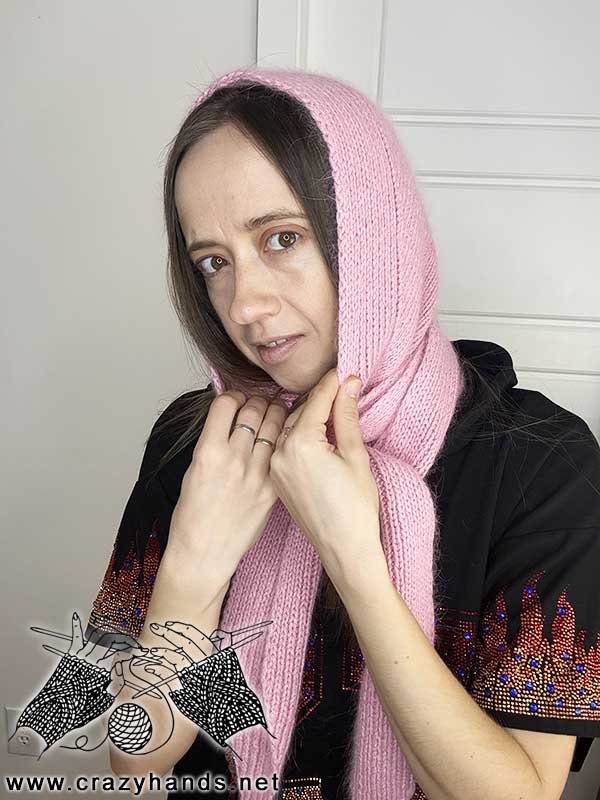
Knit hat-hood size:
The widest part of the hood: 40 cm (16 in)
Gauge: 21-22 stitches = 10 cm (4 in) in stockinette
Common abbreviations of knitting stitches:
k – knit
p – purl
k1 tbl – knit one though the back loop
p1 tbl – purl one though the back loop
sel s – selvage stitch: always slip the first stitch knitwise, work to the last stitch, purl the last stitch
yo – yarn over: Lay the working yarn over the right needle from front to back.
ryo – reverse yarn over: Lay the working yarn over the right needle from back to front.
Inc – increase
LLI – left lifted increase: inset the left-hand needle from back to front into the stitch two rows below the one you just knitted on the right-hand needle. Lift it to your left needle without twisting and knit it through the back loop.
RLI – right lifted increase: insert your right-hand needle from back to front into the stitch one row below the first stitch on your left-hand needle. Lift it to your left-hand needle and then knit it.
Slip 1p – slip one purlwise
K2tog – knit two together
P2tog – purl two together
k3tog – knit three together: Slip the next two stitches knitwise, k1, then pass two slipped stitches over the stitch you just knitted.
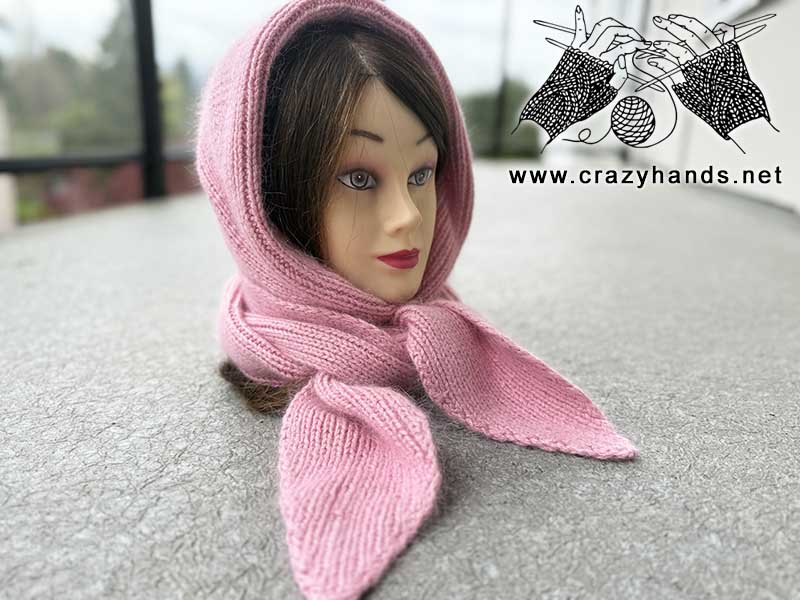
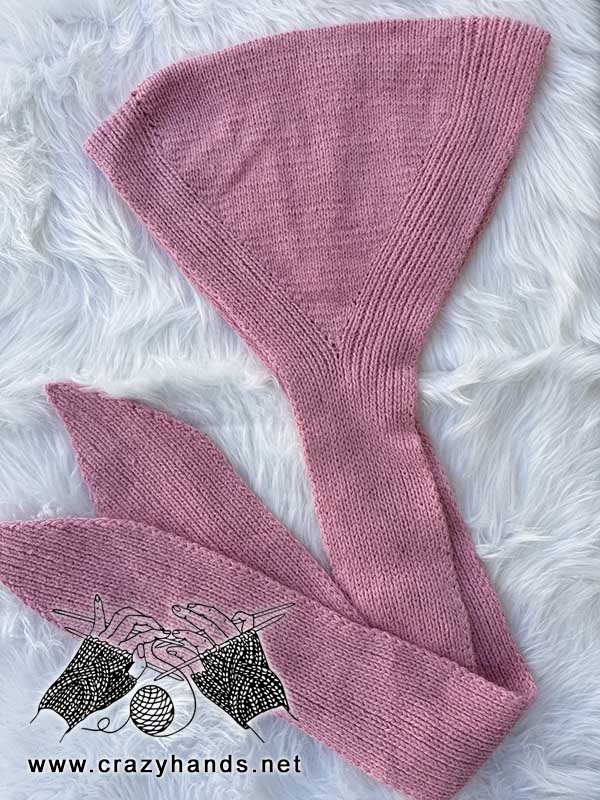
Hat-hood with ties knitting pattern:
Knitting the ties:
Cast on 3 sts.
Row 1: sel s, p1, sel s. (3)
Row 2: sel s, ryo, k1, yo, sel s. (5)
Row 3: sel s, k1 tbl , p1, k1, sel s. (5)
Note: Knit yarn over stitches through the back loop, while reverse yarn overs are knitted as usual.
Row 4: sel s, ryo, p1, k1, p1, yo, sel s. (7)
Row 5: sel s, p1 tbl, k1, p1, k1, p1, sel s. (7)
Note: Purl yarn over stitches through the back loop, while reverse yarn overs are purled as usual.
Look at the next stitch to determine whether to knit or purl the yo and ryo. If the next stitch is a purl stitch, then work yo/ryo as a knit stitch. If the next stitch is a knit stitch, then work yo/ryo as a purl stitch. Keep the main stitch pattern in k1, p1 ribbing throughout.
Row 6: sel s, ryo, k1, p1, k1, p1, k1, yo, sel s. (9)
Row 7: sel s, k1 tbl , p1, k1, p1, k1, p1, k1, sel s. (9)
Row 8: sel s, ryo, p1, k1, p1, k1, p1, k1, p1, yo, sel s. (11)
Row 9: sel s, p1 tbl, k1, p1, k1, p1, k1, p1, k1, p1, sel s. (11)
Continue making increases in the same way until you have 35 stitches on your needles, or until the piece measures 12–13 cm (4.5–5 inches) in width.
After that continue working in simple ribbing without increases until the tie measures 85-90 cm (35 in)
Knitting the hood:
Mark the 20th st with a stitch marker.
Row 1: sel s, [k1, p1] – 9 times. Inc 2 from st below: pick up and knit right leg of st 1 row below, k1, then pick up and knit left leg of same st below. [p1, k1] – 7 times, sel s. (37)
Row 2: sel s, [p1, k1] – 7 times, p3, [k1, p1] – 9 times, sel s. (37)
Row 3: sel s, [k1, p1] – 9 times. K1, LLI, k1, RLI, k1, [p1, k1] – 7 times, sel s. (39)
Row 4: sel s, [p1, k1] – 7 times, p5, [k1, p1] – 9 times, sel s. (39)
Row 5: sel s, [k1, p1] – 9 times. K1, LLI, k3, RLI, k1, [p1, k1] – 7 times, sel s. (41)
Row 6: sel s, [p1, k1] – 7 times, p7, [k1, p1] – 9 times, sel s. (41)
Continue making increases in the same way until you have 87 stitches on your needles, or until the hood part measures 20–23 cm (7,8–9 inches). The stitch count is not critical.
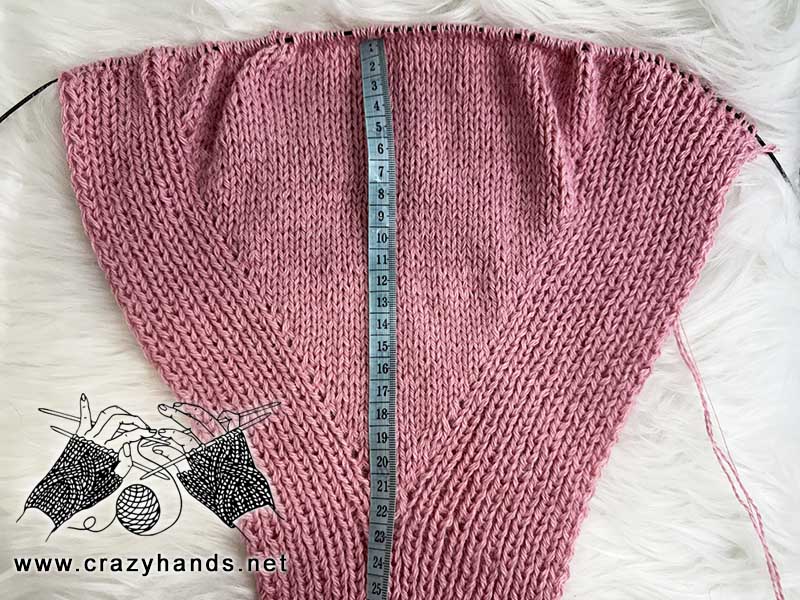
From this point work short rows to shape the back part of the hood, creating a gentle curve for the better fit.
Row 1: sel s, [k1, p1] – 9 times, k52. Turn. Knit to the last stitch of the central part, then turn.
Row 2: slip 1p, p51, [k1, p1] – 9 times, sel s.
Row 3: sel s, [k1, p1] – 9 times, k53, [p1, k1] – 7 times, sel s.
Row 4: sel s, [p1, k1] – 7 times, p53, [k1, p1] – 9 times, sel s.
Repeat the last 4 rows until this section measures 20 cm (7.8 in). I worked 56 rows.
From here, begin working decreases to shape the hood.
Row 1: sel s, [k1, p1] – 9 times, k2tog, k49, k2tog, [p1, k1] – 7 times, sel s. (85)
Row 2: sel s, [p1, k1] – 7 times, p51, [k1, p1] – 9 times, sel s. (85)
Row 3: sel s, [k1, p1] – 9 times, k2tog, k47, k2tog, [p1, k1] – 7 times, sel s. (83)
Row 4: sel s, [p1, k1] – 7 times, p49, [k1, p1] – 9 times, sel s. (83)
Continue making decreases in the same way until you have 37 stitches on your needles or 3 stitches remain in the central part.
Next Row: sel s, [k1, p1] – 9 times, k3tog, [p1, k1] – 7 times, sel s. (35)
Next Row: sel s, [p1, k1] – 16 times, p1, sel s. (35)
Continue working in simple ribbing without decreases, working the same number of rows (or centimetres) as for the 1st tie.
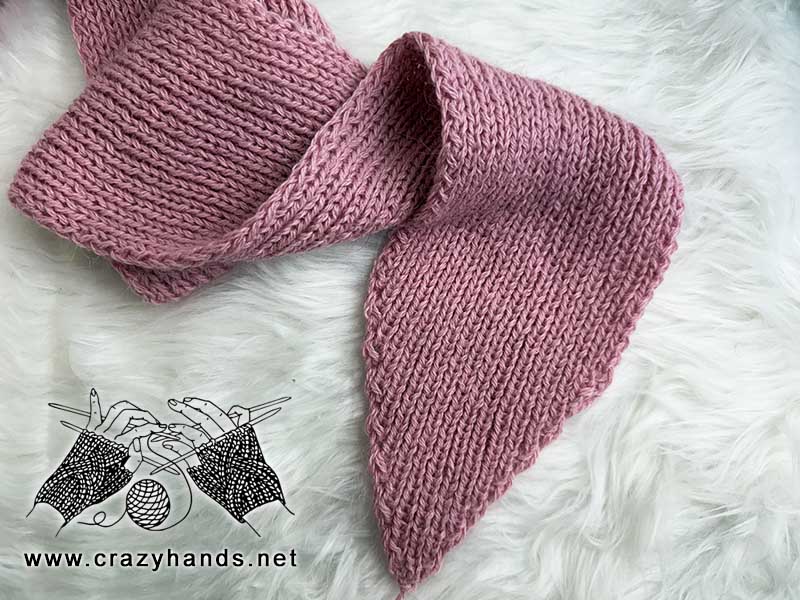
Tie shaping:
Row 1: sel s, p2tog, [k1, p1] – 14 times, k1, p2tog, sel s. (33)
Row 2: sel s, [k1, p1] – 15 times, k1, sel s. (33)
Row 3: sel s, k2tog, [p1, k1] – 13 times, p1, k2tog, sel s. (31)
Row 4: sel s, [p1, k1] – 14 times, p1, sel s. (31)
Row 5: sel s, p2tog, [k1, p1] – 12 times, k1, p2tog, sel s. (29)
Row 6: sel s, [k1, p1] – 13 times, k1, sel s. (29)
Continue making decreases in the same way until 5 stitches left.
Next Row: sel s, k3tog, sel s.
Bind off all stitches. Cut the yarn and weave in the ends. Wash the hood and shape it flat to dry.