
Contents
Knitting materials and tools:
<> Circular knitting needles 3.5 mm– 80 cm and dpn same size (US 4/ UK 9 or 10)
<> Crochet hook 3.5 mm
<> Bernat Premium (4) – 100% acrylic. Color of your choice. Less than 1 ball.
Knit baby overall size:
Baby: 6-9 months
Gauge: 15 stitches in = 4 inches in stockinette
Common abbreviations of knitting stitches:
k – knit
p – purl
p2tog – pirl 2 together
st(s) – stitch(es)
inc – increase
ryo– reverse yarn over: bring the yarn to the front over the top of the right needle
pm – place marker
sel s – selvage stitch: always slip the first stitch purlwise, work to the last stitch, purl the last stitch.
k2tog – knit two together
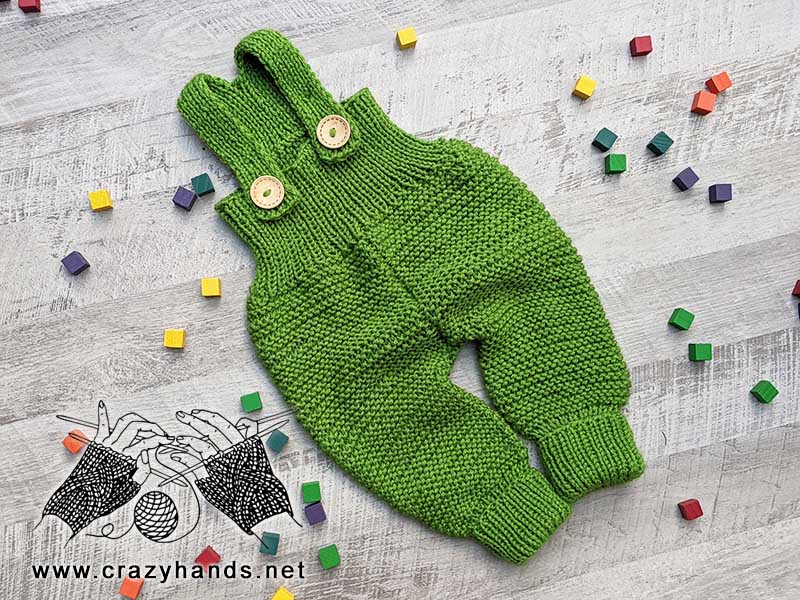
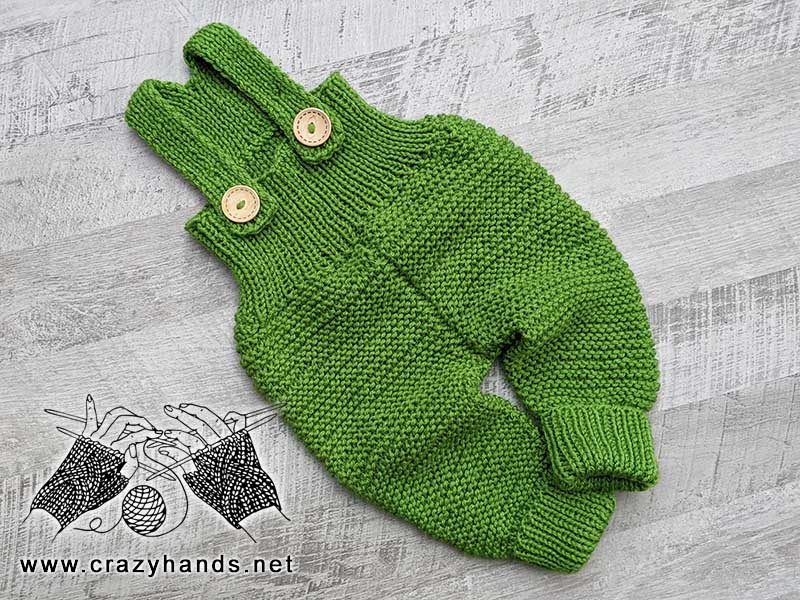
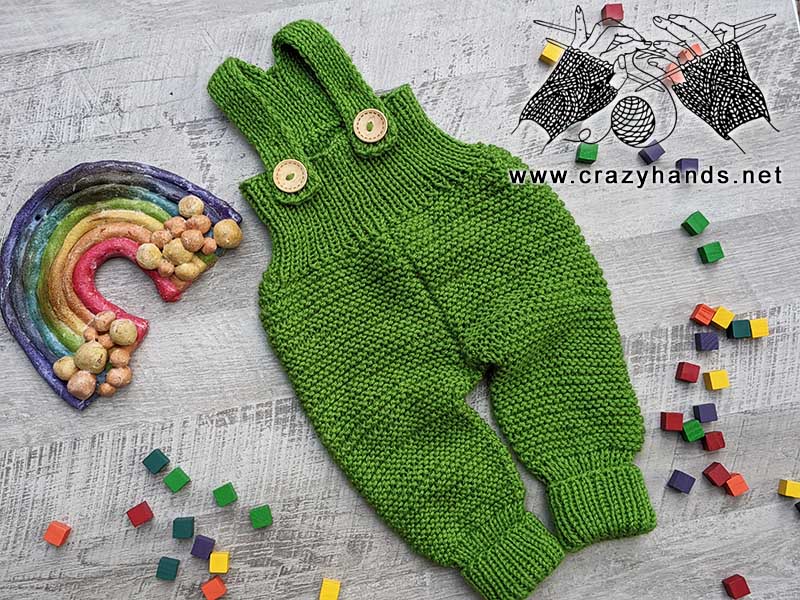
Baby overall knitting pattern
Knitting right and left leg of the overall:
Cast on 38 stitches and join to knit in round. If you are using invisible joining method, then cast on 39 stitches. Rib k1, p1 until piece measures 12 cm (4.5 inches).
Round 1: knit all stitches around.
Round 2: purl all stitches around.
Rounds 3-8: repeat Rounds 1 and 2.
Round 9: k1, inc, k36, inc, k1.
Round 10: purl all stitches around. Purl increases through the front loop.
Rounds 11-30: repeat Rounds 1 and 2
Round 31: k1, inc, k38, inc, k1.
Round 32: purl all stitches around.
Round 33: k1, inc, k40, inc, k1.
Round 34: purl all stitches around.
Round 35: k1, inc, k42, inc, k1.
Round 36: purl all stitches around.
Cut the yarn and repeat everything for the second leg. Do not cut the working yarn.
Knitting body of the baby overall:
Place two legs in a way that increases look inside to each other.
Round 1: Сast on 2 sts to the needle with the left leg and pm (in my case it is red stitch marker) that will show us the beginning of the round, after that cast on 3 more stitches, then knit all stitches of the right leg, cast on 5 sts from the 5 sts that we added at the very beginning. Place marker after the second stitch that will show us center of the back part (in my case it is a yellow stitch marker), after that knit all stitches of the left leg till the red stitch marker.
Round 2: p1, k2tog, k46, k2tog, pm, p1, k2tog, k46, k2tog.
Round 3: purl all stitches around.
Round 4: p1, k2tog, k44, k2tog, pm, p1, k2tog, k44, k2tog.
Round 5: purl all stitches around.
Round 6: p1, k2tog, k42, k2tog, pm, p1, k2tog, k42, k2tog.
Round 7: purl all stitches around.
Round 8: knit all stitches around. Pay attention that in knit rounds you are going to purl first stitch after red stitch marker and first stitch after yellow stitch marker.
Round 9: purls all stitches around.
Rounds 10-37: repeat Rounds 8 and 9 or until body part measures 15 cm.
Finish knitting this part with a round where you purl all stitches.
After that, with a help of short rows, we are going to make back part of trousers longer. It is important to make this adjustment, especially when baby wears a diaper.
Now find the center between red and yellow stitch markers on the right and on the left side. Place 2 stitch markers (purple ones). On one side I have 1 stitch more, so I will decrease it when I finish knitting short rows. Now you need to remove purple stitch markers from both sides by moving them closer to the back (to the yellow stitch marker) by 4 stitches. (4 stitches from one side and 4 stitches from another side). Please check video tutorial if my explanation seems complicated.
Row 1: p1, k26, purple stitch marker, k18, pm, p1, k17, slip 2nd purple stitch marker, k1, slip next stitch holding working yarn in front, after that move the yarn in back and turn the work so the wrong side is facing.
Row 2: Now the working yarn is in front, slip the same st back and bring the yarn to the back. It looks like you wrapped the slipped stitch. K1, slip 2nd purple stitch marker, k18, slip yellow st marker, k18, slip 1st purple st marker, k1, holding working yarn in front slip the next stitch, then bring the yarn to the back and turn your work so that the right side is facing.
Row 3: When the working yarn is in front, slip the same stitch back and after bring the yarn to the back. K1, slip 1st purple st marker, k18, yellow st marker, p1, k17, 2nd st marker, k1, find wrap and the wrapped stitch, pick up the wrap and place it on the left-hand needle, after that knit it together with the wrapped stitch. Like this you hide the wrap and get rid off the hole. K1, slip next stitch holding working yarn in front, after that move the yarn in back and turn the work so the wrong side is facing.
Row 4: Now the working yarn is in front, slip the same st back and bring the yarn to the back. K3, 2nd purple st marker, k18, slip yellow st marker, k18, 1st purple st marker, k1, pick up the turning yarn from the back, place it on the left-hand needle, then purl it together with the wrapped stitch. K1, holding working yarn in front slip the next stitch, then bring the yarn to the back and turn your work so that the right side is facing.
Row 5: When the working yarn is in front, slip the same stitch back and after bring the yarn to the back. K3, slip 1st purple st marker, k18, yellow st marker, p1, k17, 2nd st marker, k3, find wrap and the wrapped stitch, pick up the wrap and place it on the left-hand needle, after that knit it together with the wrapped stitch. K1, slip next stitch holding working yarn in front, after that move the yarn in back and turn the work so the wrong side is facing.
Row 6: Now the working yarn is in front, slip the same st back and bring the yarn to the back. K5, 2nd purple st marker, k18, slip yellow st marker, k18, 1st purple st marker, k3, pick up the turning yarn from the back, place it on the left-hand needle, then purl it together with the wrapped stitch. K1, holding working yarn in front slip the next stitch, then bring the yarn to the back and turn your work so that the right side is facing.
Row 7: When the working yarn is in front, slip the same stitch back and after bring the yarn to the back. K5, slip 1st purple st marker, k18, yellow st marker, p1, k17, 2nd st marker, k5, find wrap and the wrapped stitch, pick up the wrap and place it on the left-hand needle, after that knit it together with the wrapped stitch. K1, slip next stitch holding working yarn in front, after that move the yarn in back and turn the work so the wrong side is facing.
Row 8: Now the working yarn is in front, slip the same st back and bring the yarn to the back. K7, 2nd purple st marker, k18, slip yellow st marker, k18, 1st purple st marker, k5, pick up the turning yarn from the back, place it on the left-hand needle, then purl it together with the wrapped stitch. K1, holding working yarn in front slip the next stitch, then bring the yarn to the back and turn your work so that the right side is facing.
Row 9: When the working yarn is in front, slip the same stitch back and after bring the yarn to the back. K7, slip 1st purple st marker, k18, yellow st marker, p1, k17, 2nd st marker, k7, find wrap and the wrapped stitch, pick up the wrap and place it on the left-hand needle, after that knit it together with the wrapped stitch. K18 till the red st marker.
From this point you are going to knit only in rounds.
Round 10: purl all stitches around. When you reach the last wrapped stitch in this round, repeat the same what you were doing before by knitting together the wrap and the wrapped stitch. In this round I am also making five p2tog. Please redistribute decreases evenly. The number of stitches after this round must be divisible by two.
Knitting a ribbed waist of the overall
Round 1: [k1, p1] repeat till the end.
Repeat Round 1 until the waist reaches at least 10 cm. Bind off. You can use Italian bind off method where you will need a tapestry needle, or just an ordinary one that I am showing in my tutorial.
Knitting suspenders of the baby overall:
On the back part, count 10 sts to the right and 10 sts to the left from the yellow stitch marker. Place 2 markers if needed. Pick up 20 stitches between markers skipping the central st with yellow st marker.
Row 1-15: sel s, [k1, p1] – repeat till the end, sel s. Or knit until the piece measures 7 cm.
Now we are going to split stitches and knit each suspender separately (10 sts each).
Row 16: sel s, k1, p1, k1, p1, k1, p1, k1, p1, k1. Slip other 10 sts to the waste yarn.
Row 17: sel s, k1, p1, k1, p1, k1, p1, k1, p1, sel s.
Repeat Row 17 until suspenders reaches 14-15 cm. Always stretch a bit the suspender before you measure it.
Next Row (buttonhole): sel sl, k1, p1, k1, p1, k1, then slip the previous purl stitch over the last knit stitch on the left-hand needle, p1, k1, p1, sel s.
Next Row: sel s, k1, p1, k1, p1, ryo, p1, k1, p1, sel s.
Next Row: sel s, k1, p1, k1, purl ryo st through the front loop, k1, p1, k1, p1, sel s.
Next 5 Rows : sel s, k1, p1, k1, p1, k1, p1, k1, p1, sel s.
Next Row (buttonhole): sel sl, k1, p1, k1, p1, k1, then slip the previous purl stitch over the last knit stitch on the left-hand needle, p1, k1, p1, sel s.
Next Row: sel s, k1, p1, k1, p1, ryo, p1, k1, p1, sel s.
Next Row: sel s, k1, p1, k1, purl ryo st through the front loop, k1, p1, k1, p1, sel s.
Next 3 Rows : sel s, k1, p1, k1, p1, k1, p1, k1, p1, sel s.
Bind off.
Repeat for the second suspender.
Sew buttons, weave in all ends. Good job, you made it to the end, and the overall is ready for a trial.
7 comments
this is a really cute pattern, but it is summer now. Can you tell me how to enlarge the pattern to make it for say 12 or 24 months old baby? I can follow patterns easy but adjusting is more than my skills. Thank you for anything you do.
HI Marsha. You will need only recalculate the pattern. Find measurement for the baby 12-18 months and check for how many stitches you need to increase the width and length. I think if you add 5-7 sts for each leg it will be enough. Just check the leg’s length. I am not sure if I helped you with my explanations, but feel free to write your questions.
And forget to add that video for this romper will be publishes on my Youtube channel at the very end of August.
Very cute overalls but can’t find your video tutorial anywhere. Just need some clarity on joining the legs and the short rows. Please let me know where I can find the video and thank you for this adorable free pattern.
Hi Jan. The video tutorial will be available on my Youtube channel on Aug 26. Sorry for delays
Hi, i really want to make this for my 4 year old. how do you think i can adjust the stitches? any guidance would be appreciated!
You need to know measurements of your daughter ( or take the trousers she wears now). Knowing your gauge you can calculate the number of stitches for 1 leg. Read the pattern and make similar calculation before you start knitting.