
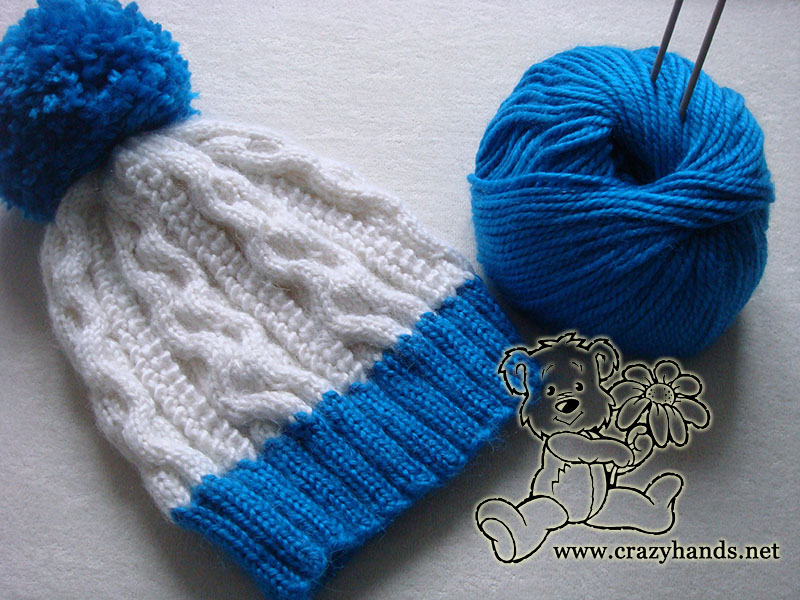
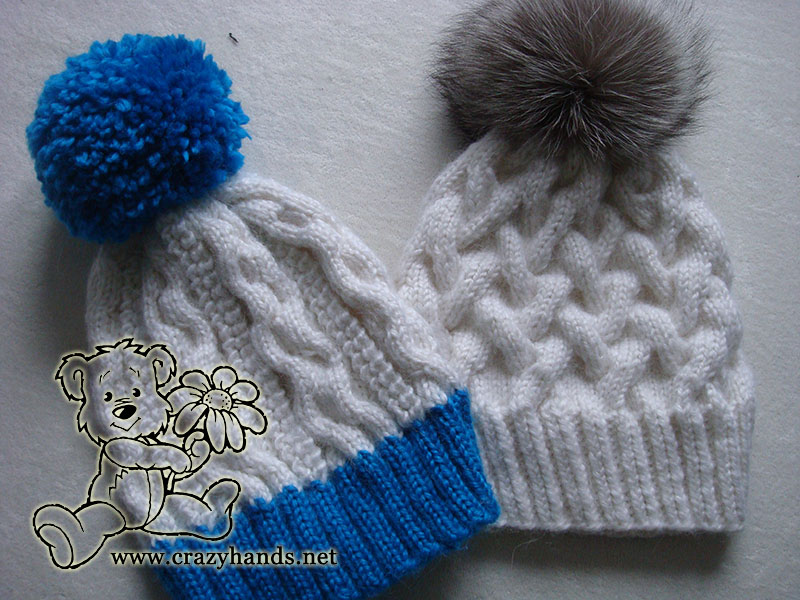
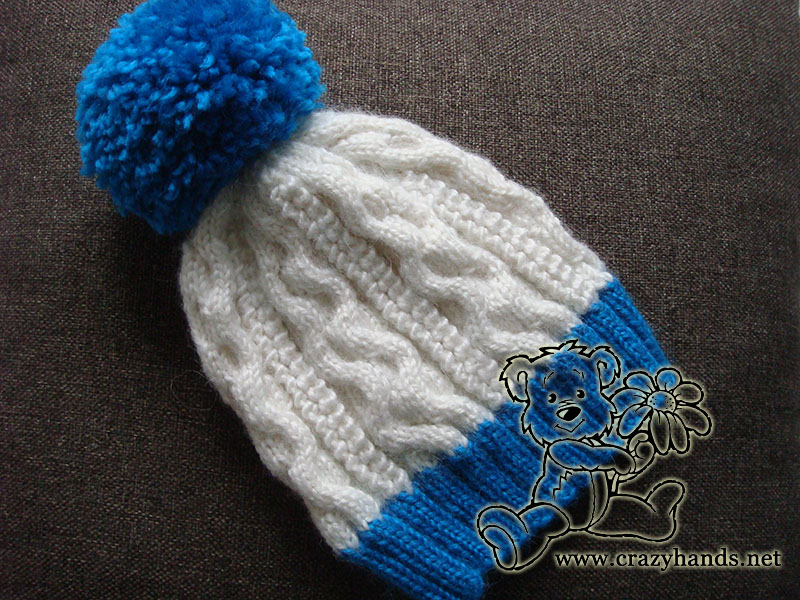
This two color cable knit hat for the winter is an excellent gift for the holiday season, it’s also warm and very cute. Choose your preferred colors for the ribbing and main part of the cable hat to match your style.
Try customizing it with embroidery, buttons or beads to add a special touch to your handcrafted hat. This pattern is easy enough for beginners and interesting enough for more advanced knitters. I hope your will enjoy knitting and wearing this winter cable hat.
Two color cable knit hat size:
Adult hat: 52-54 cm
Common abbreviations of knitting stitches:
k – knit
p – purl
ppc – popcorn
k2tog – knit two together
k4tog – knit four together
Cable 3 Back (C3B): Slip 3 knit stitches to the extra needle and hold in back of work, 3k from the left hand needle, 3k from the extra needle.
Cable 3 Front (C3F): Slip 3 knit stitches to the extra needle and hold in front of work, 3k from the left hand needle, 3k from the extra needle.
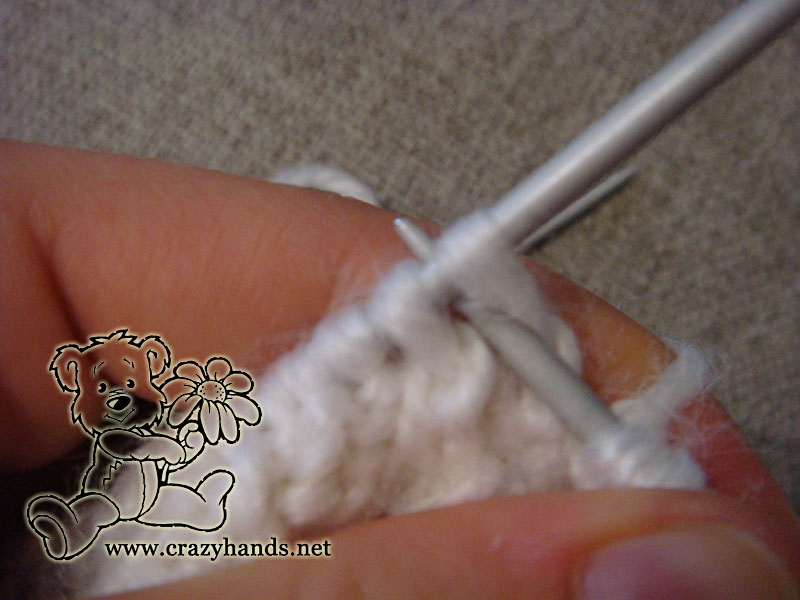
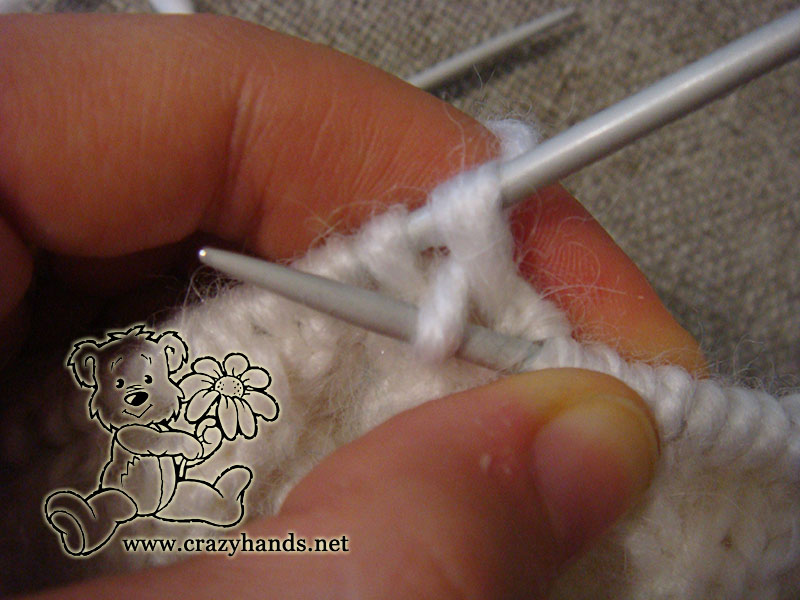
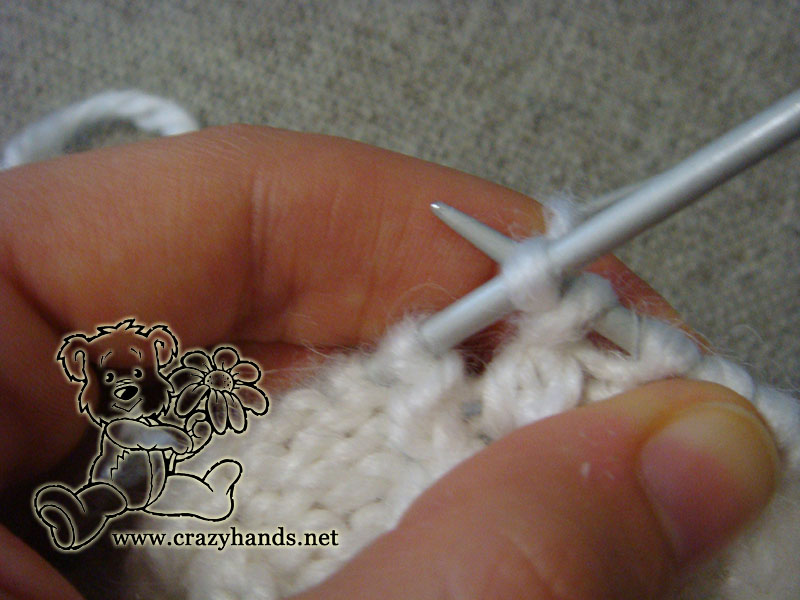
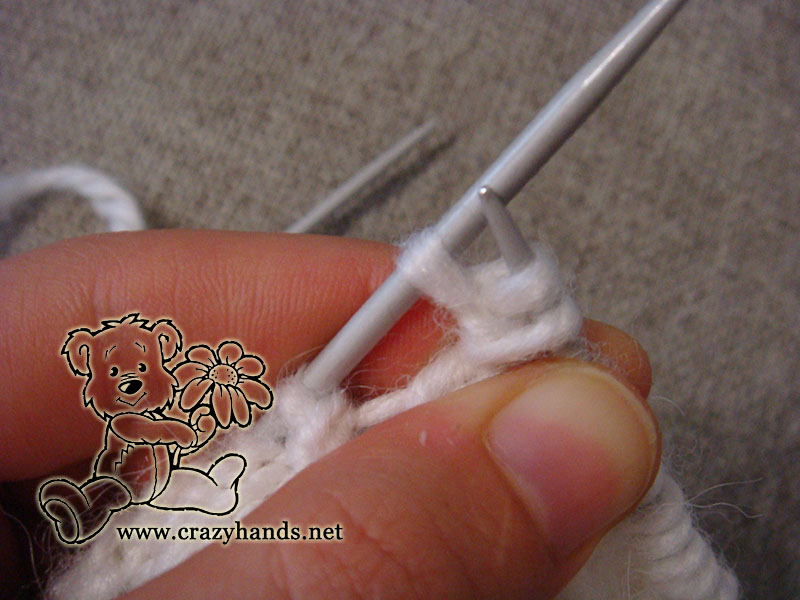
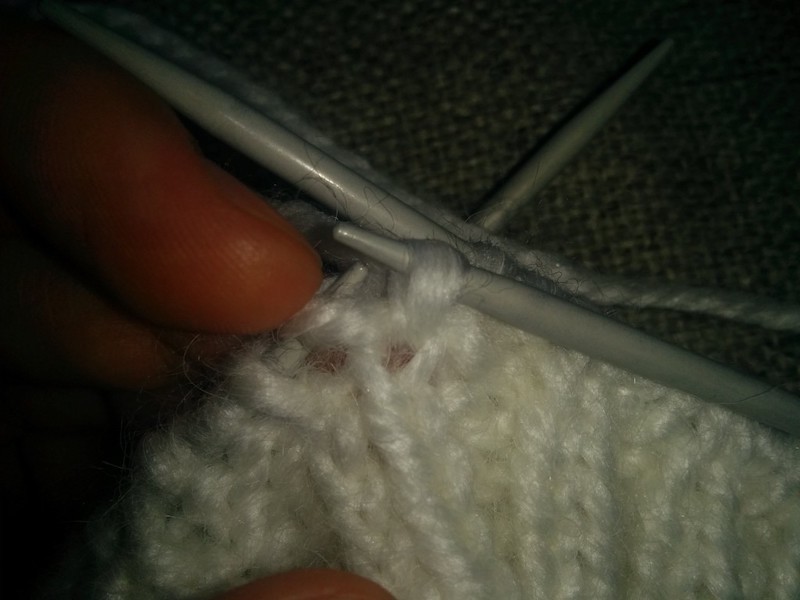
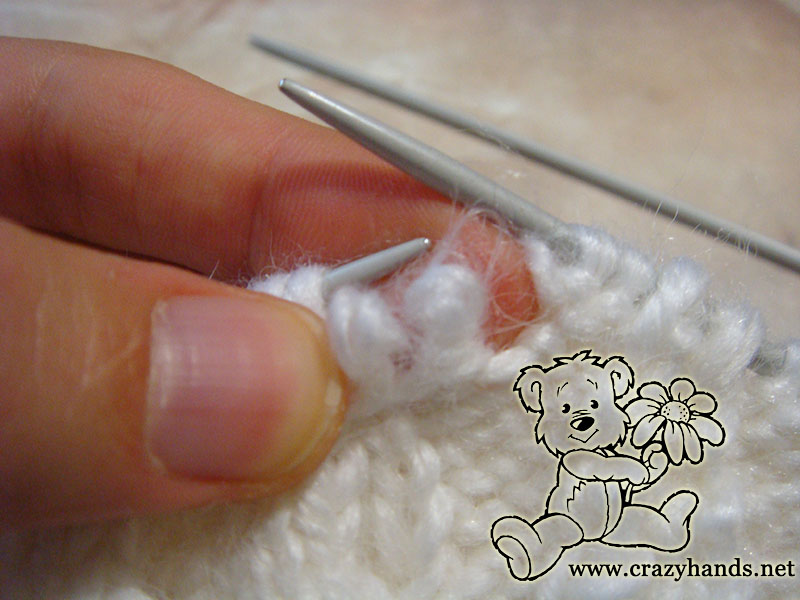
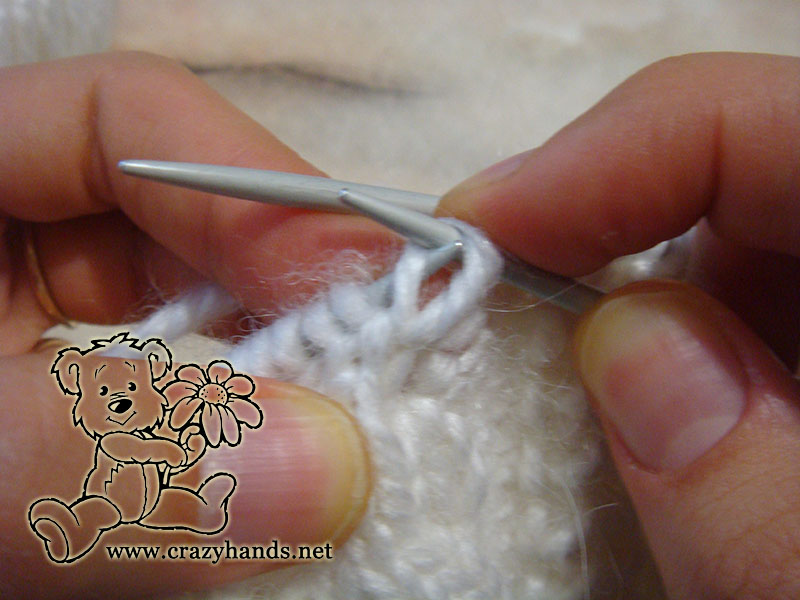
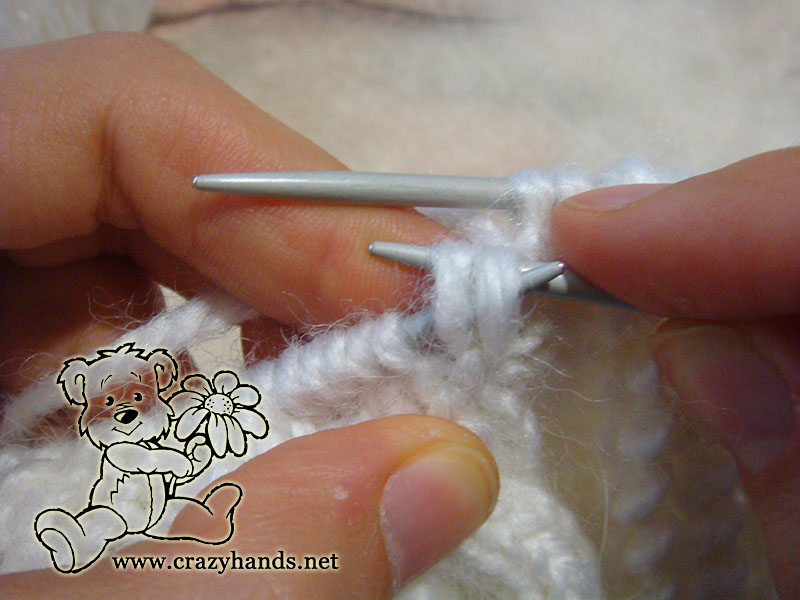
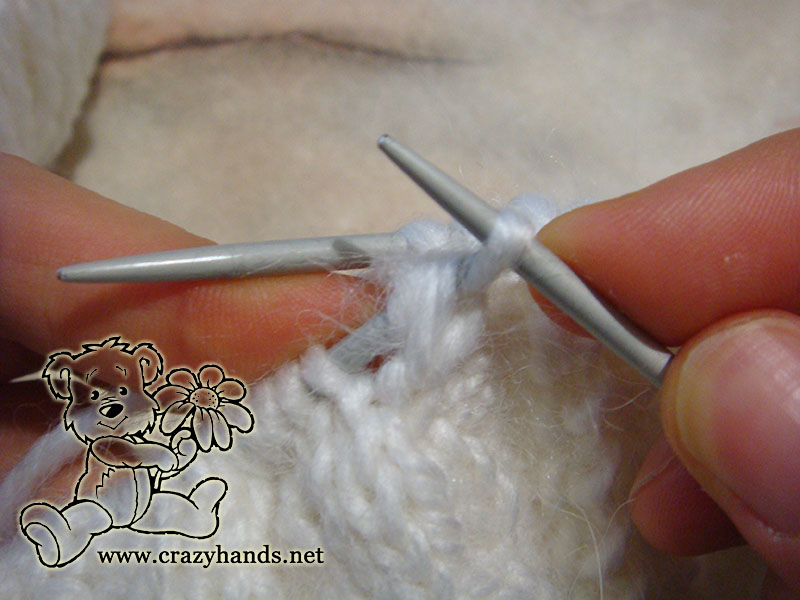
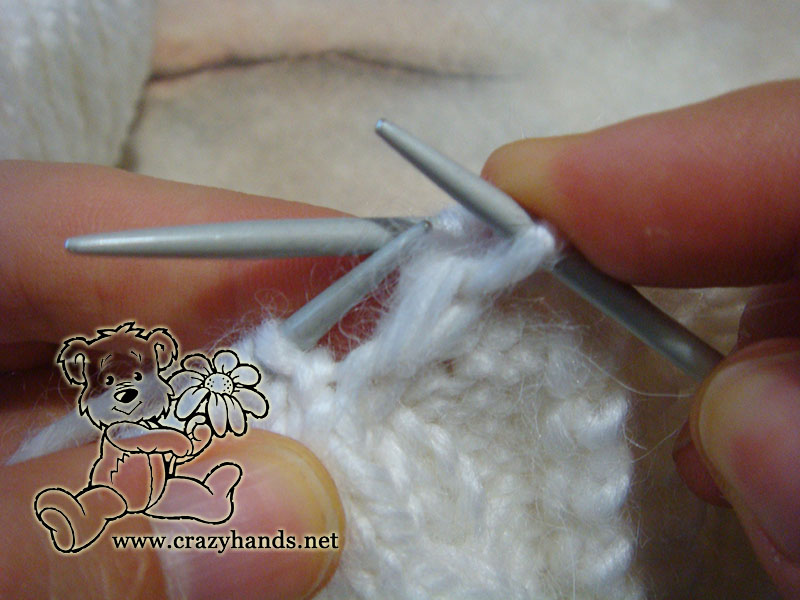
How to knit a popcorn stitch:
Pull the yarn behind the first stitch from the left hand needle, knit first stitch. At the end, you will get 2 stitches on the right hand needle. Please check pictures I think I managed to make it as clear as possible.
Knitting materials and knitting tools:
5 Double Pointed Knitting Needles 3.5 mm. I don’t see it as a problem if you use a circular needles;
Alpacana Lanoso 35% wool, 40% acrylic, 25% alpaca. White and blue colors. (In total I used 1.5 skeins)
Two color cable knit hat pattern
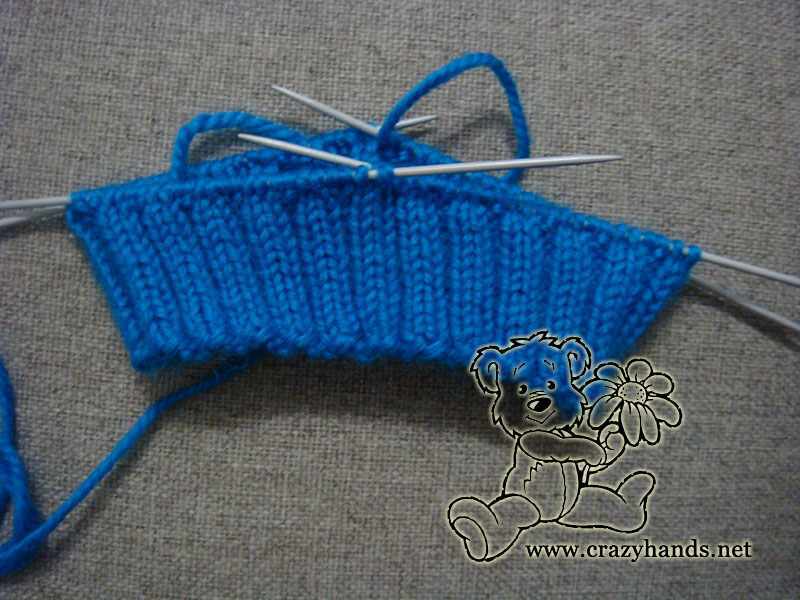
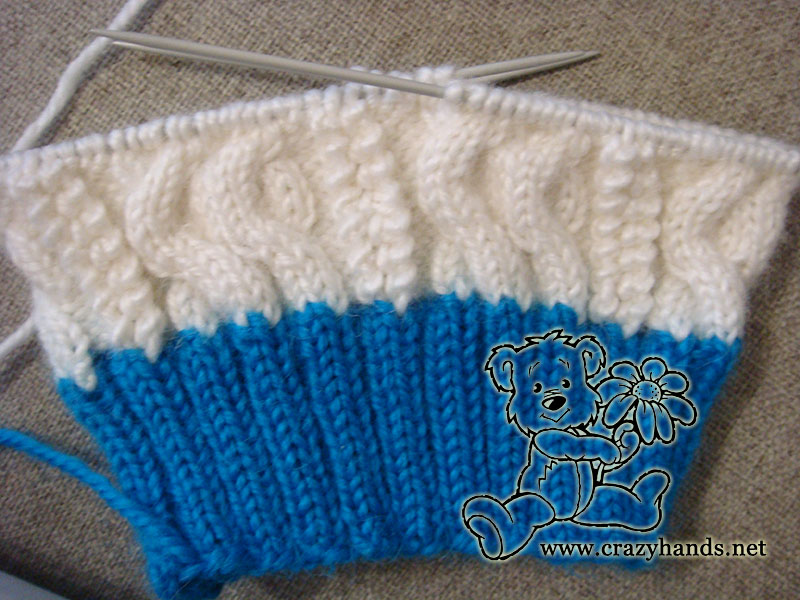
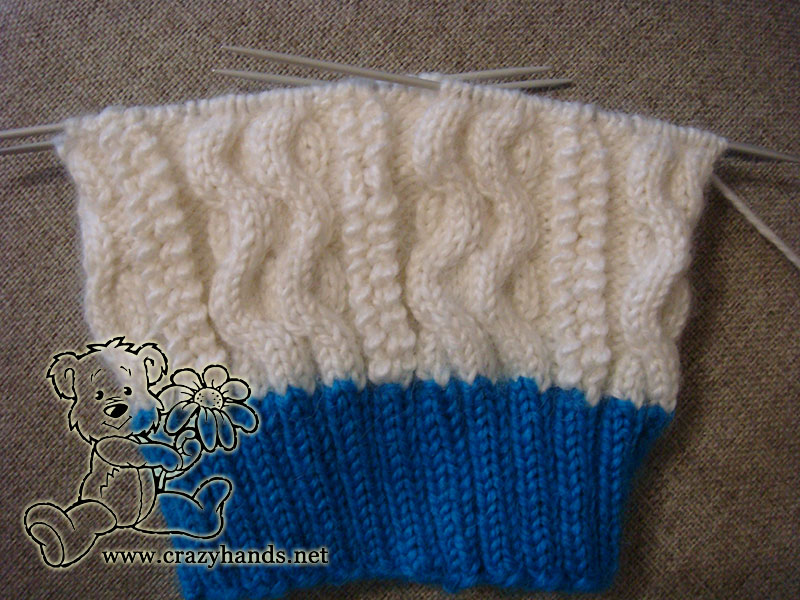
Knitting ribbing of the two color cable hat:
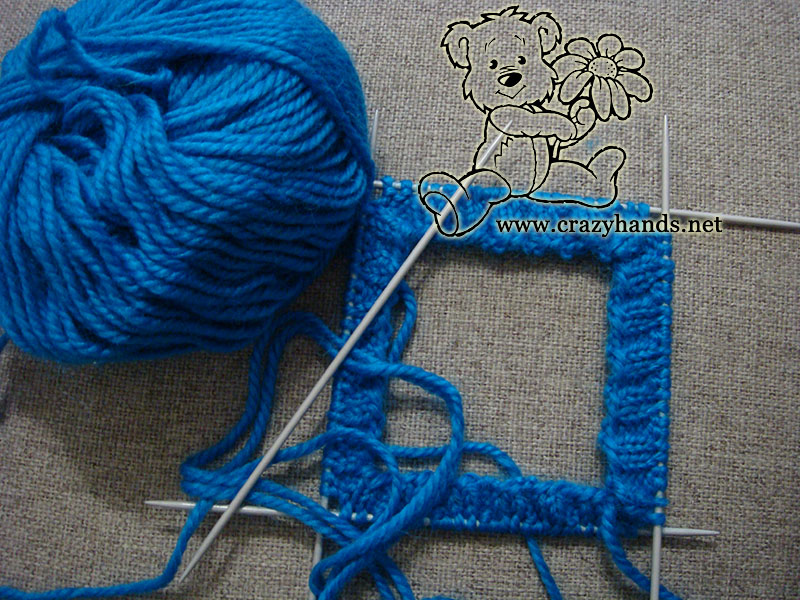
So lets start. Cast on 96 stitches for the hat.
Round 1: Begin with rib 2 by 2 *knit 2, purl 2* keep repeating 13-15 rounds until ribbing measures 5-6 cm from the edge.
Knitting body of the two color cable hat:
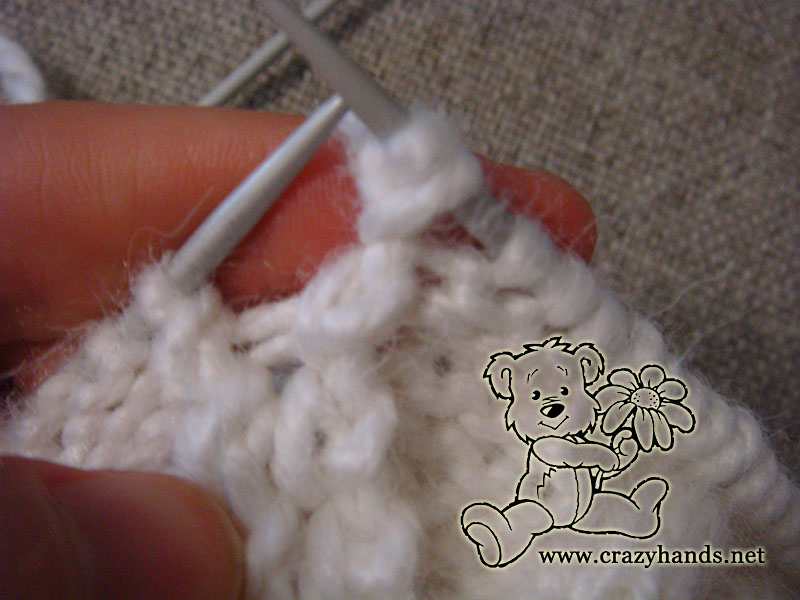
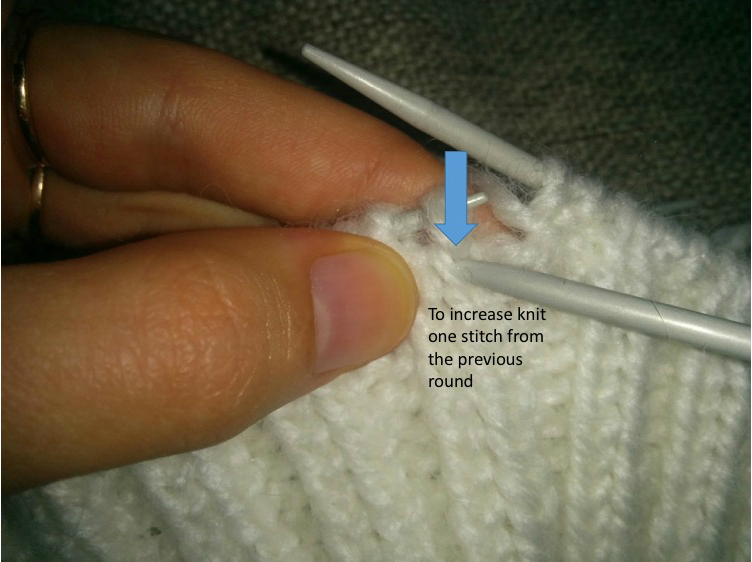
Round 1: In this round, we are going to increase. Please use any methods you know. In my case, I am going to *knit one stitch from the previous round, 4 k, repeat from * to the end of round. At the end of this round, you will get in total 120 stitches.
Please check pictures how to knit stitch from the previous round.
Round 2: *12k, 3p, 2 ppc, 3p, repeat from *to end of round
Round 3: *12k, 3p, 2 k2tog, 3p repeat from* to end of round.
Round 4-5: repeat Rounds 2 and 3.
Round 6: repeat Round 2.
Round 7: *C3F, C3F, 3p, 2 k2tog, 3p, repeat from * to end of round.
Repeat Rounds 2-7 and three (four) more times. The hat should now measure approximately 18 cm from the edge. Don’t forget to alternate C3F with C3B every 6 rounds.
Shaping crown of the cable hat:
Round 1: *12k, 3p, 2 ppc, 3p, repeat from *to end of round. Please don’t purl the last stitch in this round. From this point start Round 2.
Round 2: switch over first and second stitches how it’s shown on the pictures (where the first stitch is the last one from the Round 1), k2tog, 10k, k2tog, 2p, 2 k2tog, 2p, repeat from the start keep switching over stitches where it’s needed.

Round 3: *12k, 2p, 2 ppc, 2p, repeat from *to end of round. Please don’t purl the last stitch in this round. From this point start Round 4.
Round 4: switch over first and second stitches how it’s shown on the pictures above (where the first stitch is the last one from the Round 3), k2tog, 10k, k2tog, 1p, 2 k2tog, 1p, repeat from the start keep switching over stitches where it’s needed.
Round 5: *12k, 1p, 2 ppc, 1p, repeat from *to end of round.
Round 6: *slip 3 knit stitches to the extra needle and hold it in front of work, [k2tog, 1k] – from the left hand needle, [k2tog, 1k] – from the extra needle, slip 3 knit stitches to the extra needle and hold it in front of work, [k2tog, 1k] – from the left hand needle, [k2tog, 1k] – from the extra needle, 1p, 2 k2tog, 1p, repeat from * to end of round.
Round 7: *8k, 1p, 2 ppc, 1p, repeat from *to end of round. Please don’t purl the last stitch in this round. From this point start Round 8.
Round 8: switch over first and second stitches how it’s shown on the pictures above (where the first stitch is the last one from the Round 7), k2tog, 6k, k2tog, 2 k2tog, repeat from the start keep switching over stitches where it’s needed.
Round 9: *8k, 2 ppc, repeat from *to end of round.
Round 10: *8k, k4tog, repeat from *to end of round.
Round 11: *8k, ppc, repeat from *to end of round.
Round 12: slip 2 knit stitches to the extra needle and hold it in back of work, k2tog – from the left hand needle, k2tog – from the extra needle, slip 2 knit stitches to the extra needle and hold it in back of work, k2tog – from the left hand needle, k2tog – from the extra needle, k2tog, repeat from * to end of round.
Round 13: knit in stockinette stitch.
Cut yarn leaving 12-15 cm tail. Use hook or tapestry needle to pull yarn tail through the last remaining stitches on four needles. Pull tight to close the hole. Hide the tail inside of the hat and weave it in into the backside of our stitches.
I think I don’t need to show here tutorial of how to make a pompom. Just make it using the same color as in ribbing part. Another option could be also buying a fluffy large fur pom pom of the color similar or contrasting to the ribbing part.
Hurrah! This is actually my 3d hat and winter hasn’t even started yet.
Honestly I am thinking about doing one more haha….
Stay positive and drink ginger tea :).
9 comments
Oh I love both hats and would love to try knitting them. Your instructions are very easy to follow.
I’m not quite sure of the weight of the yarn. I have 4 worsted, bulky 6 or finger weight 3.
Which weight would work for me. I’m guessing the bulky is out of the question since I just
tried crocheting a cable stitch beanie and tore it all out. Thanks for the patterns.
Have you considered a demonstration on you tube?
Hello, thanks for your feedback.
Try to use similar yarn if you want to have a warm hat.
About You tube, I would like but a little bit later
I dont understand the switching over part ? you should first knit the second stitch and then the first?
Thank you
hi, simply swap the stitches and k2tog (don’t knit them separately). I did it to make increase part more invisible. Skip this step and knit k2tog only if its hard for you. Let me know if you have more questions
thank you vero much
Where do you get the wool? Alpacana Lanoso?
I sell white color
How do you print this pattern?
Hello, you can not print this pattern, it is available only online