
Knitting materials and knitting tools:
<> Circular knitting needles 4.5 mm– 80 cm and dpn same size (US 7/ UK 7)
<> Crochet hook 4.5 mm
<> Super Yarn (4 PLY) – 100% acrylic. Color of your choice. Less than 1 ball (150 grams).
<> Yarn needle, stitch markers.
<> Optionally elastic waist band.
Knit baby pants size:
Baby: 6-12 months
Gauge: 17 stitches in = 4 inches in stockinette
Common abbreviations of knitting stitches:
k – knit
p – purl
p2tog – purl 2 together
st(s) – stitch(es)
inc – increase
ryo– reverse yarn over: bring the yarn to the front over the top of the right needle
pm – place marker
k2tog – knit two together
Knit baby pants pattern
Knitting right and left legs of the baby pants:
Cast on 32 stitches and join to knit in round. If you are using invisible joining method, then cast on 33 stitches. Rib k1, p1 until piece measures 11-12 cm (4 – 4.5 inches).
Round 1: knit all stitches around.
In the next round we are going to add 8 sts.
Rounds 2: knit all stitches around and add extra 8 sts (redistribute your increases evenly) – 40 sts.
Round 3: knit all stitches around.
Round 4: knit all stitches around.
Round 5: k1, inc, k38, inc, k1 – 42 sts.
Rounds 6-22: knit all stitches around.
Round 23: k1, inc, k40, inc, k1 – 44 sts.
Rounds 24-34: knit all stitches around.
Round 35: k1, inc, k42, inc, k1 – 46 sts.
Rounds 36-38: knit all stitches around.
Round 39: k1, inc, k44, inc, k1 – 48 sts.
Rounds 40-42: knit all stitches around.
Round 43: k1, inc, k46, inc, k1 – 50 sts.
Rounds 44-46: knit all stitches around.
Round 47: k1, inc, k48, inc, k1 – 52 sts.
Round 48: knit all stitches around.
Cut the yarn and repeat everything for the second leg. Do not cut the working yarn. The length of the leg without cuff 20 cm.
Knitting body of the baby pants:
Place two legs in a way that increases look inside to each other. Divide each leg in half and place stitch markers (in my case it is yellow stitch markers).
Round 1: Сast on 3 sts to the needle with the left leg and pm (in my case it is purple stitch marker), cast on 1 more stitch and pm (in my case it is purple again) The stitch between 2 purple stitch markers will show us the beginning of the round. After that cast on 3 more stitches, then knit 52 stitches of the right leg, cast on 7 sts from the 5 sts that we added at the very beginning. Place two markers after the third and fourth stitch that will show us center of the back part (in my case they are pink), after that knit all stitches of the left leg till the first purple stitch marker – 118 sts.
Round 2: k1, k2tog, k54, k2tog, k1, k2tog, k54, k2tog – 114 sts.
Round 3: knit all stitches around.
Round 4: k1, k2tog, k52, k2tog, k1, k2tog, k52, k2tog – 110 sts.
Round 5: knit all stitches around.
Round 6: k1, k2tog, k50, k2tog, k1, k2tog, k50, k2tog – 106 sts.
Round 7: knit all stitches around.
Round 8: k1, k2tog, k48, k2tog, k1, k2tog, k48, k2tog – 102 sts.
Round 9: knit all stitches around.
Repeat Round 9 to knit the next 10 -10.5 cm.
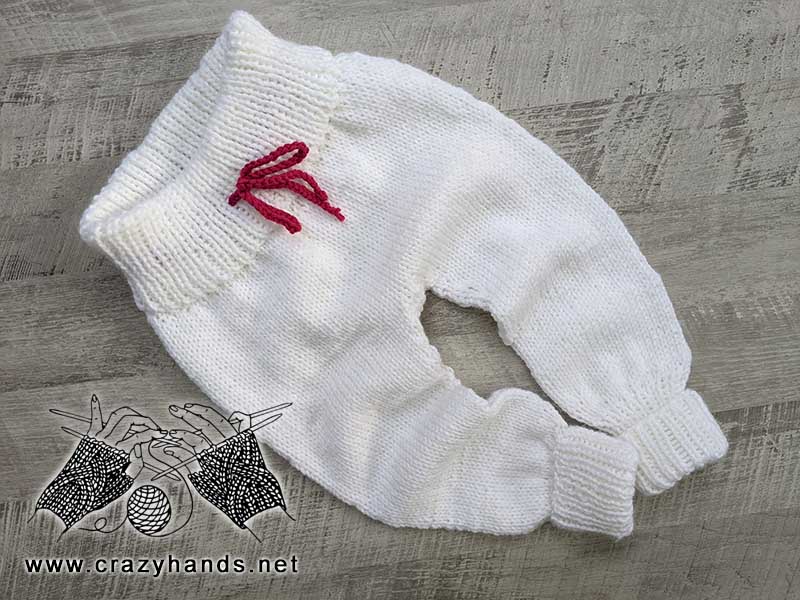
After that, with a help of short rows, we are going to make back part of trousers longer. It is important to make this adjustment, especially when baby wears a diaper.
Remove pink stitch markers from the back part.
Now you need to remove yellow stitch markers from both sides by moving them closer to the back by 6 stitches. (6 stitches from one side and 6 stitches from another side). Please check video tutorial if my explanation seems complicated.
Row 1: k71, slip 2nd yellow stitch marker, k1, slip next stitch holding working yarn in front, after that move the yarn in back and turn the work so the wrong side is facing.
Row 2: Now the working yarn is in front, slip the same st back and bring the yarn to the back. It looks like you wrapped the slipped stitch. P1, slip 2nd yellow stitch marker, p39, slip 1st yellow st marker, p1, holding working yarn in front slip the next stitch, then bring the yarn to the back and turn your work so that the right side is facing.
Row 3: When the working yarn is in front, slip the same stitch back and after bring the yarn to the back. K1, slip 1st yellow st marker, k39, yellow st marker, k1, find wrap and the wrapped stitch, pick up the wrap and place it on the left-hand needle, after that knit it together with the wrapped stitch. Like this you hide the wrap and get rid off the hole. K1, slip next stitch holding working yarn in front, after that move the yarn in back and turn the work so the wrong side is facing.
Row 4: Now the working yarn is in front, slip the same st back and bring the yarn to the back. p3, 2nd yellow st marker, p39, slip 1st yellow st marker, p1, pick up the wrap (it is better to pick up the wrap on the right side), place it on the left-hand needle, then purl it together with the wrapped stitch. p1, holding working yarn in front slip the next stitch, then bring the yarn to the back and turn your work so that the right side is facing.
Row 5: When the working yarn is in front, slip the same stitch back and after bring the yarn to the back. K3, slip 1st yello st marker, k39, second yellow st marker, k3, find wrap and the wrapped stitch, pick up the wrap and place it on the left-hand needle, after that knit it together with the wrapped stitch. K1, slip next stitch holding working yarn in front, after that move the yarn in back and turn the work so the wrong side is facing.
Row 6: Now the working yarn is in front, slip the same st back and bring the yarn to the back. p5, 2nd yellow st marker, p39, 1st yellow st marker, p3, pick up the wrap (it is better to pick up the wrap on the right side), place it on the left-hand needle, then purl it together with the wrapped stitch. p1, holding working yarn in front slip the next stitch, then bring the yarn to the back and turn your work so that the right side is facing.
Row 7: When the working yarn is in front, slip the same stitch back and after bring the yarn to the back. K5, slip 1st yellow st marker, k39, 2nd st marker, k5, find wrap and the wrapped stitch, pick up the wrap and place it on the left-hand needle, after that knit it together with the wrapped stitch. K2, slip next stitch holding working yarn in front, after that move the yarn in back and turn the work so the wrong side is facing.
Row 8: Now the working yarn is in front, slip the same st back and bring the yarn to the back. P8, 2nd yellow st marker, p39 1st yellow st marker, p5, pick up the wrap (it is better to pick up the wrap on the right side), place it on the left-hand needle, then purl it together with the wrapped stitch. P2, holding working yarn in front slip the next stitch, then bring the yarn to the back and turn your work so that the right side is facing.
Row 9: When the working yarn is in front, slip the same stitch back and after bring the yarn to the back. K8, slip 1st yellow st marker, k39, 2nd st marker, k8, find wrap and the wrapped stitch, pick up the wrap and place it on the left-hand needle, after that knit it together with the wrapped stitch. K2, slip next stitch holding working yarn in front, after that move the yarn in back and turn the work so the wrong side is facing.
Row 10: Now the working yarn is in front, slip the same st back and bring the yarn to the back. P11, 2nd yellow st marker, p39 1st yellow st marker, p8, pick up the wrap (it is better to pick up the wrap on the right side), place it on the left-hand needle, then purl it together with the wrapped stitch. P2, holding working yarn in front slip the next stitch, then bring the yarn to the back and turn your work so that the right side is facing.
Row 11: When the working yarn is in front, slip the same stitch back and after bring the yarn to the back. K11, slip 1st yellow st marker, k39, 2nd st marker, k11, find wrap and the wrapped stitch, pick up the wrap and place it on the left-hand needle, after that knit it together with the wrapped stitch. K19.
From this point you are going to knit only in rounds.
Round 10: knit all stitches around. [K8, k2tog] repeat till the end of round, k2. When you reach the last wrapped stitch in this round, repeat the same what you were doing before by knitting together the wrap and the wrapped stitch. The number of stitches after this round must be divisible by 2.
Knitting a ribbed waist of baby pants
Round 1: [k1, p1] repeat till the end.
Repeat Round 1 until the waist reaches at least 8 cm. Go on ribbing for 8 cm more starting with [p1, k1]
Check video tutorial where I show how to sew ribbing (time 57:45)
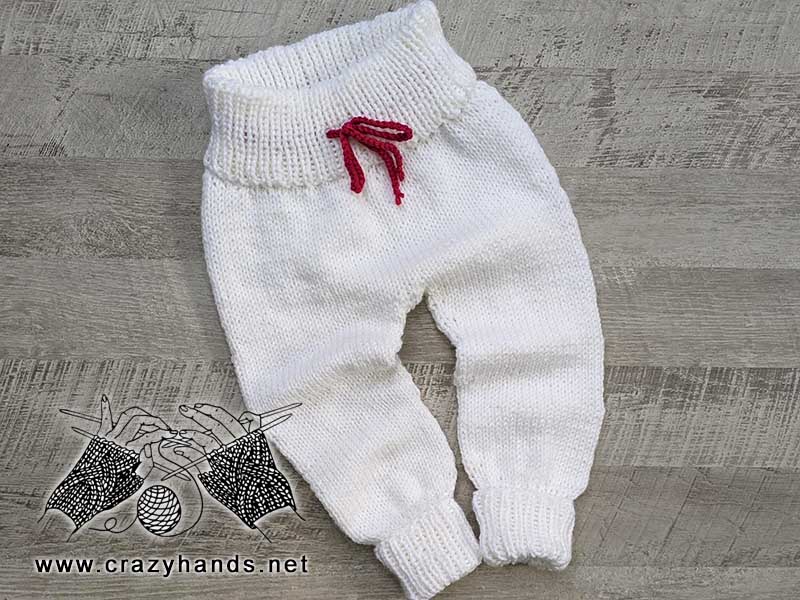
Crochet ties for baby pants:
Using 4.5 mm crochet hook, make 85 cm chain. Thread the chain (or elastic) to a waistband.
Sew up tiny holes on the crotch. Weave in all ends. Wash the pants and dry flat.
3 comments
how do I print your free patterns ? I have tried a few different ways but nothing is working
have you bought ads free pattern?
Hi! I really enjoy your patterns. I have several small grandchildren, and I enjoy knitting and crocheting hats, scarves, mittens, fingerless gloves, bags, leg warmers, cowls, jackets, sweaters, etc. Where do you get your inspiration from if you don’t mind sharing?