
Contents

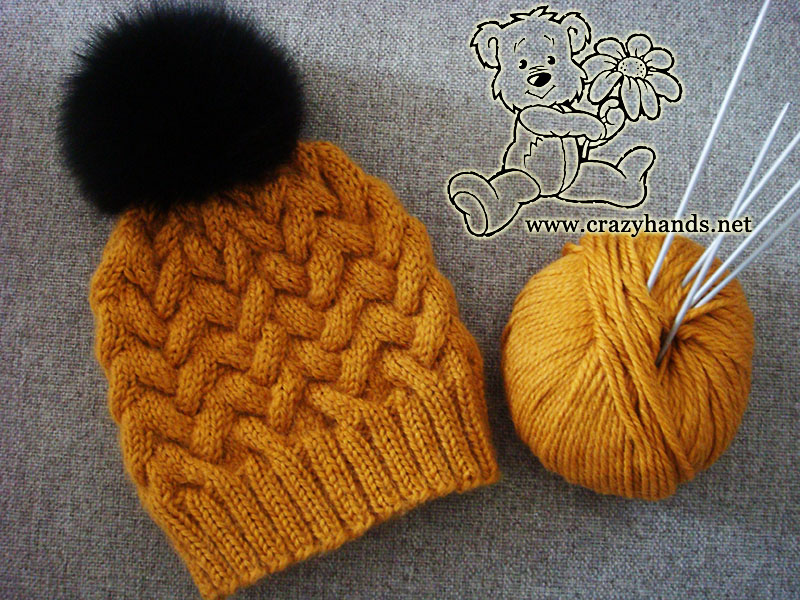
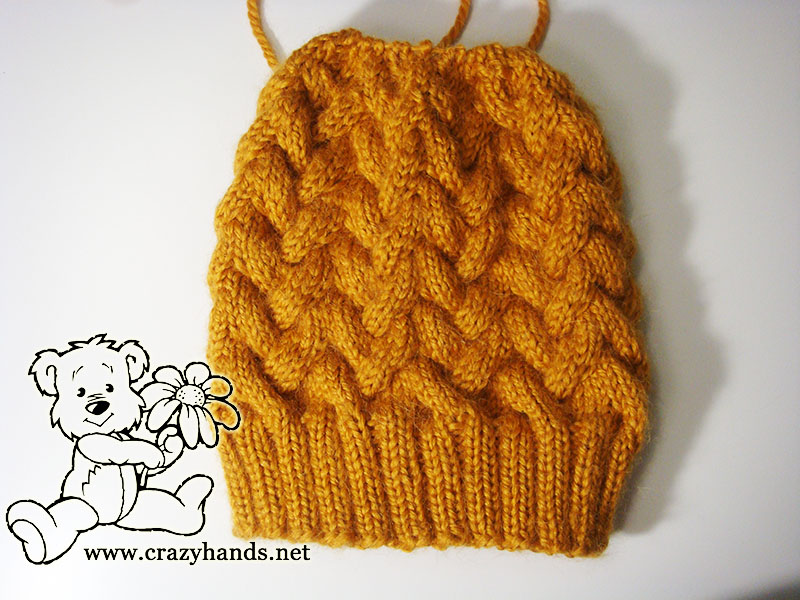
Winter is an awesome time to express your full creativity, especially in crocheting and knitting art. As long as you have enough yarn, free time and a worthy pattern at hands, the process is enjoyable and goes flawlessly. This chunky cable knit beanie is easy to make and it shines the warmth that we are all slightly missing during the snowy winter time.
Chunky cable knit beanie size:
Fits head 50-54 cm – adult
Common abbreviations of knitting stitches:
k – knit
k2tog – knit two together
Cable 4 Back (C4B): Slip 4 knit stitches to the extra needle and hold in back of work, 4k from the left hand needle, 4k from the extra needle.
Cable 4 Front (C4F): Slip 4 knit stitches to the extra needle and hold in front of work, 4k from the left hand needle, 4k from the extra needle.
Knitting materials and knitting tools:
<> 5 Double Pointed Knitting Needles number 5 mm US (8) for the main part and 4-4.5 mm (US 6-7) for the ribbing part. You can use a circular needles as well;
<> Alpacana Lanoso 35% wool, 40% acrylic, 25% alpaca chunky yarn. Sandy color: 100 grams – 130 m. (In total I used 1.5 skeins)
<> Fur pom pom.
Chunky cable knit beanie pattern
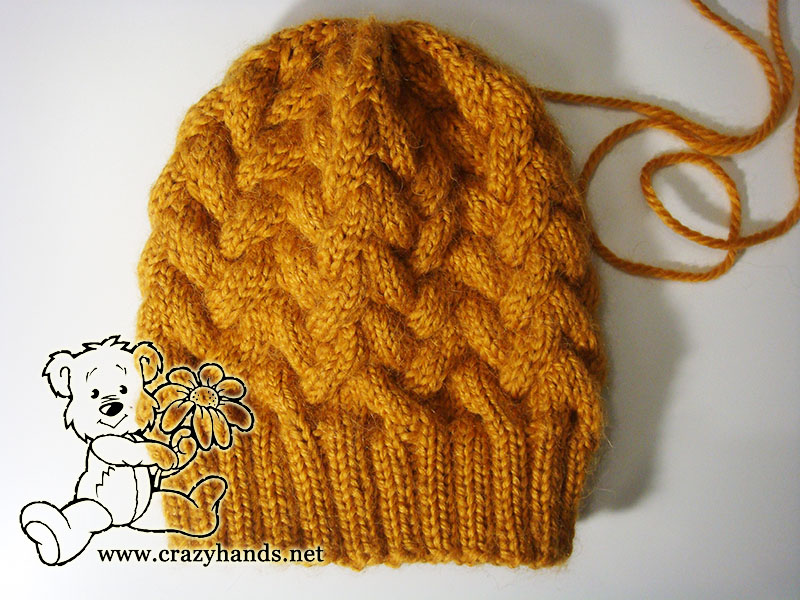
Ribbing of the chunky cable beanie:
The hat is worked in the round from brim to crown.
So let’s start. Cast on 96 stitches for the hat.
Round 1: Begin with rib 2 by 2 *knit 2, purl 2* keep repeating 13-15 rounds until ribbing measures 5-6 cm from the edge. You can also do a folded brim.
Body of the chunky cable beanie:
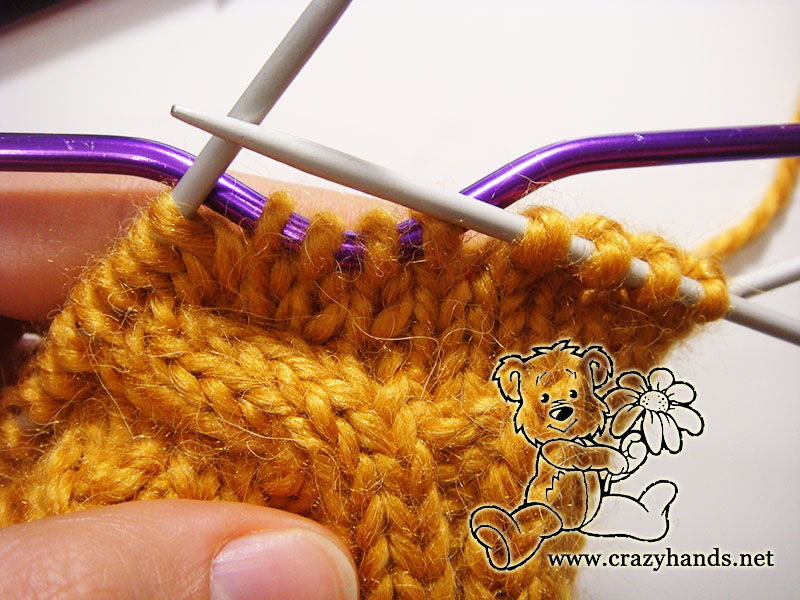
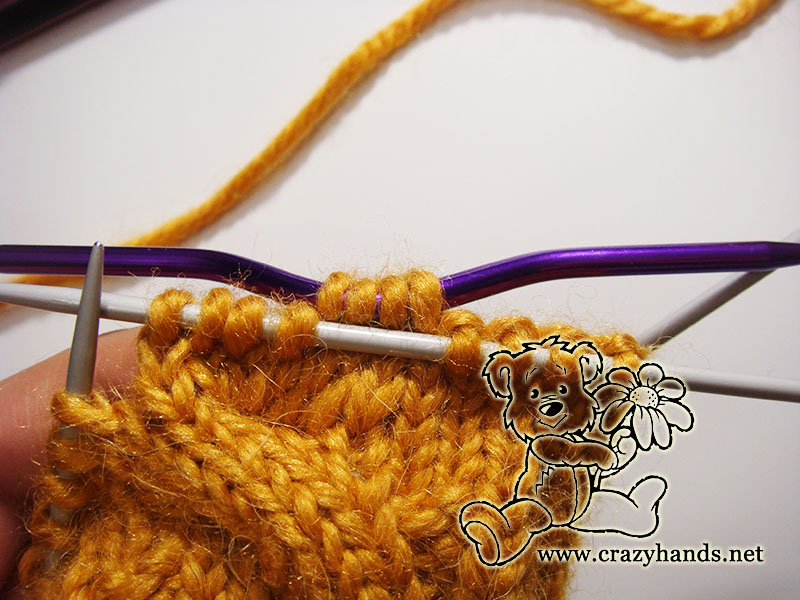
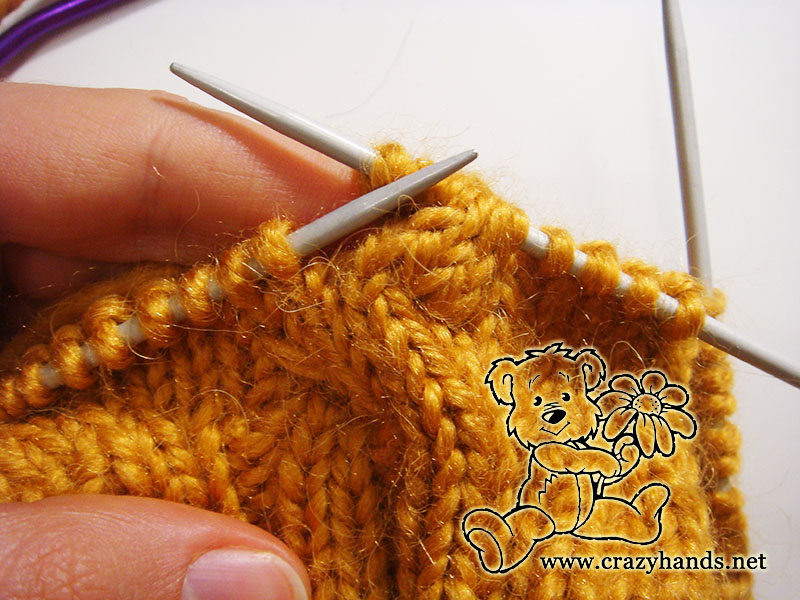
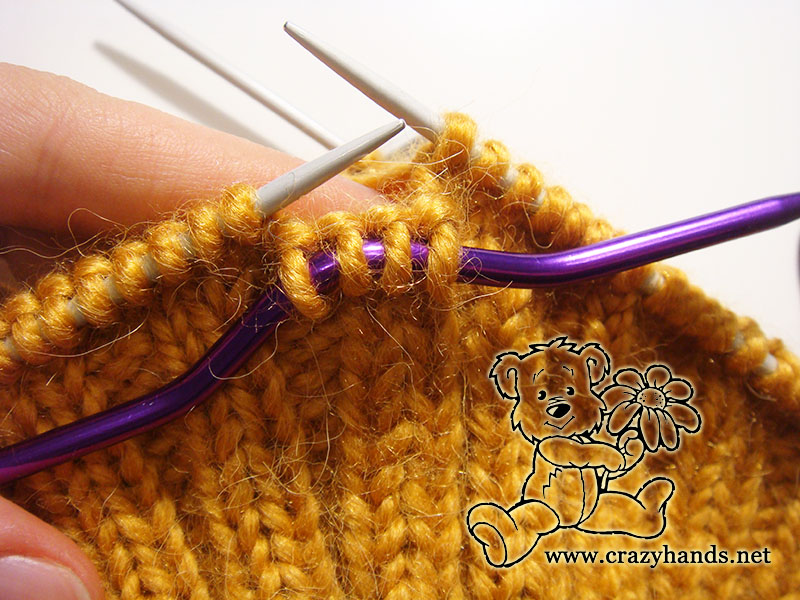
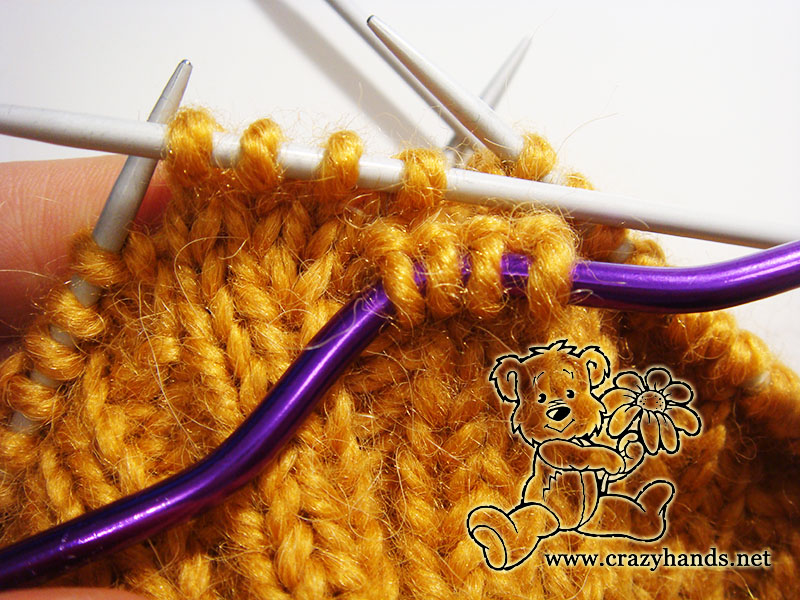
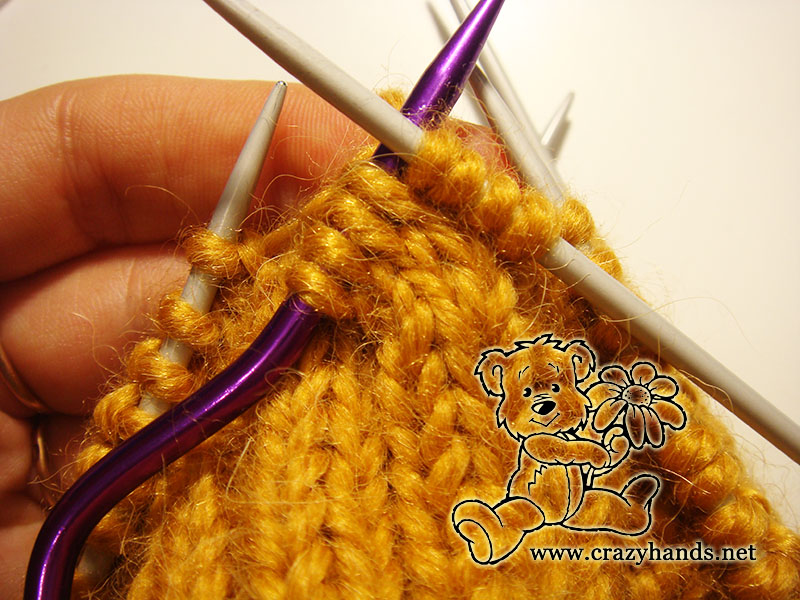
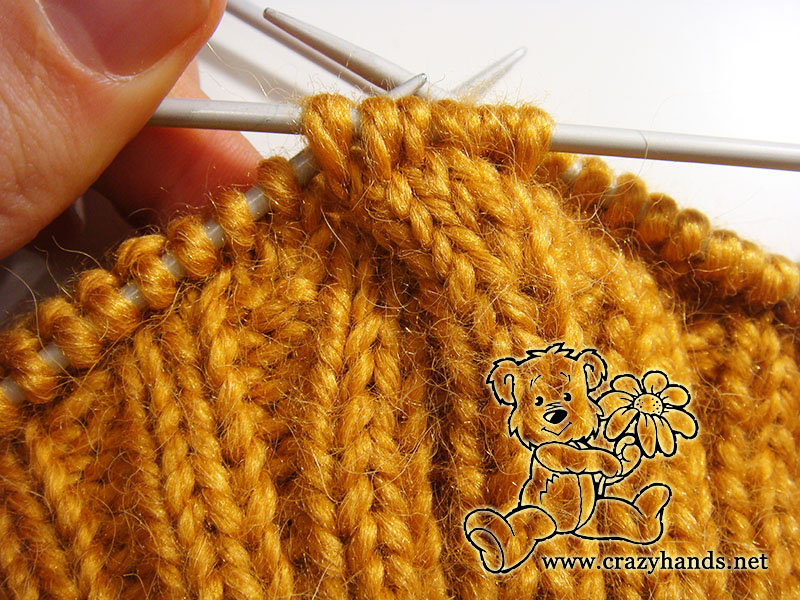
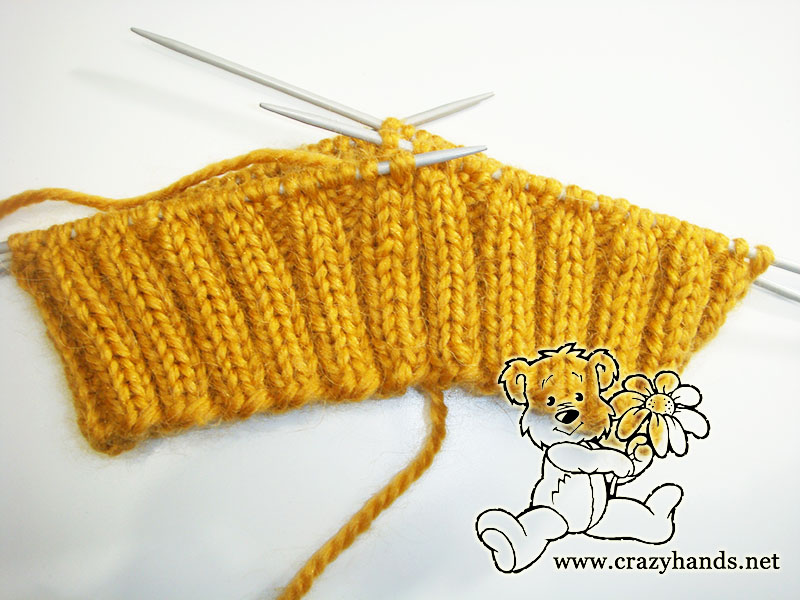
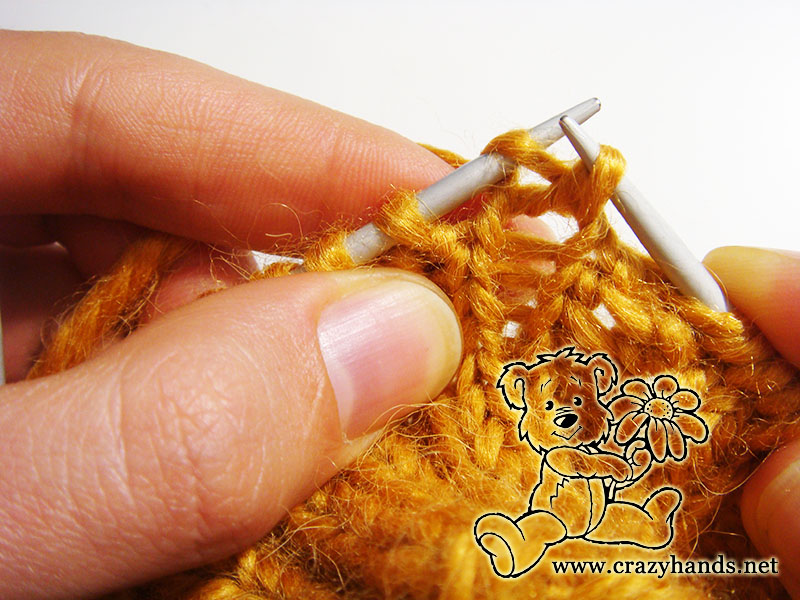
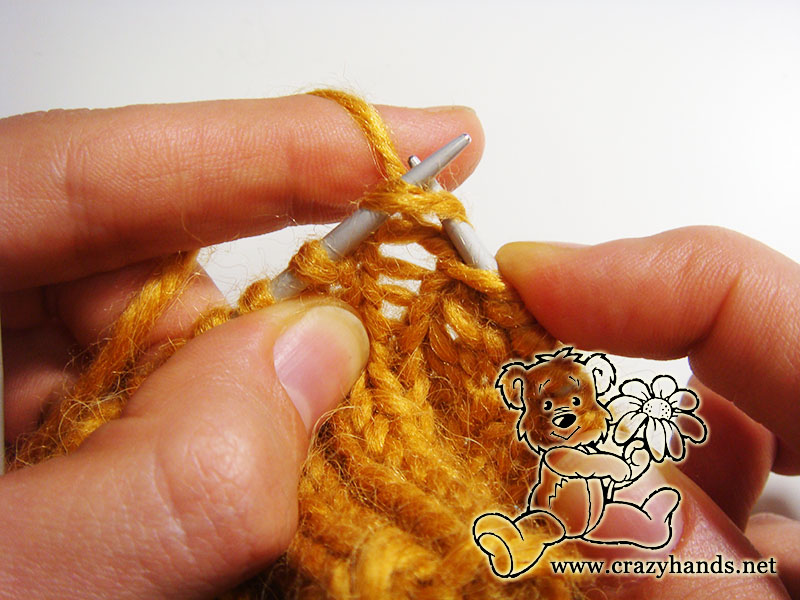
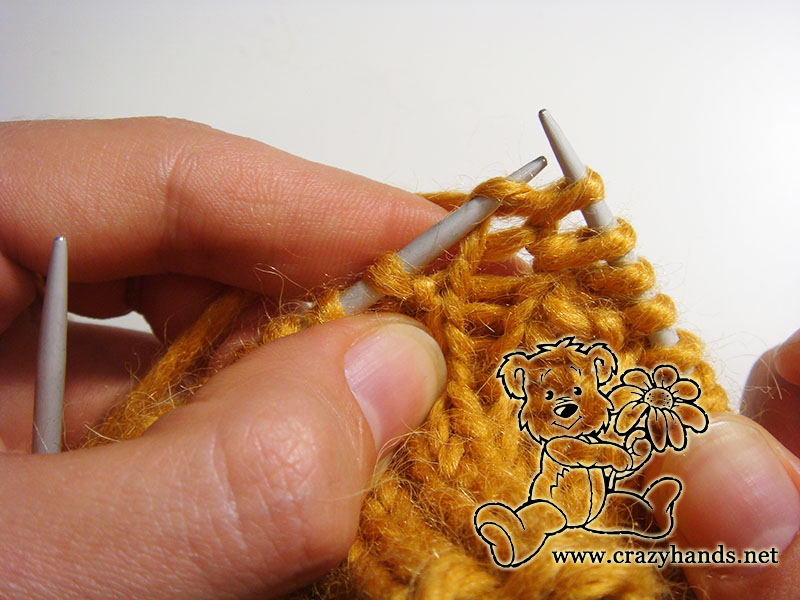
Round 1: In this round, we are going to increase. Please use any methods you know. In my case, I am going to *knit one stitch from the previous round, 4 k, repeat from * to the end of round. At the end of this round, you will get in total 120 stitches. I didn’t change size of needles, but from this point you can use size number 7-8.
I have made pictures how to knit stitch from the previous round. Please check them below:

Rounds 2-4: knit in stockinette stitch.
Round 5: *4k, C4F, repeat from* to end of round.
Rounds 6-8: knit in stockinette stitch.
Round 9: * C4B, 4k, repeat from* to end of round.

Repeat Rounds 2-9 four (five) more times. In the last time don’t repeat Round 9th, because this is round where we start decreasing.
The hat should now measures approximately 20-22 cm from the edge. The best way is to try on hat while knitting.
Shaping the crown of chunky cable beanie:
From this point we start decreasing hat.
Round 1: *Slip 4 knit stitches to the extra needle and hold in back of work, [k2tog, 2k] – from the left hand needle, [k2tog, 2k] – from the extra needle, k2tog, 2k, repeat from* to end of round.
Round 2-4: knit in stockinette stitch.
Round 5: * k2tog, 1k, slip 3 knit stitches to the extra needle and hold in front of work, [k2tog, 1k] – from the left hand needle, [k2tog, 1k] – from the extra needle, repeat from* to end of round.
Round 6-8: knit in stockinette stitch.
Round 9: *k2tog, 2k, repeat from* to end of round.
Round 10: *k2tog, 2k, repeat from* to end of round.
Round 11: knit in stockinette stitch.
Break the yarn leaving 10-15 cm of tail. Use a hook or a tapestry needle to thread the yarn tail through the last remaining stitches. Pull it tight and secure the end. Hide the tail inside of the hat and weave it in into the back side of our stitches.
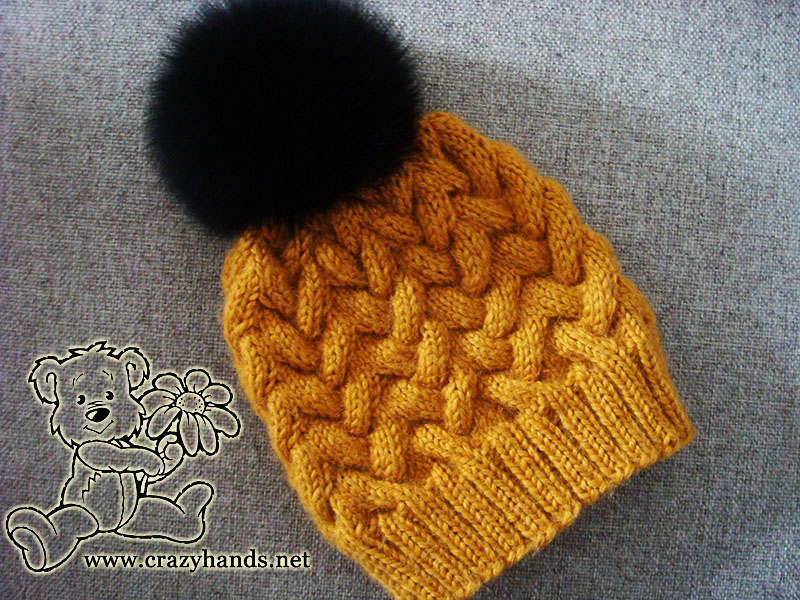
Attach a pom pom. A wide variety of fur pom poms you can find and even buy one if you like some in our shop section.
I would definitely suggest to knit cable scarf or snood for this lovely hat.
66 comments
What weight yarn?
bulky
Gauge to please?
with 3.5 cm needles 1 st =0,5 cm
Hello Anna,
I love your pompom patterns!
I just wanted to clarify the weight of the yarn, needle size and gauge.
Weight= bulky= 5?
Needles= US 6= 4.00 mm?
Gauge for the above?
Should I expect a fairly tightly knit fabric? Many thanks for help!!!
hello, thanks you for your question. In my case I was using 3.5 cm needles and the gauge 1 st =0,5 cm. But I got many feedbacks that its so hard to knit bulky yarn with 3.5 cm. So I suggest using bigger size after ribbing part (4 -5 cm).
Hi!
I was wondering if I could make and sell a few hats using this pattern online. I think it is absolutely beautiful and I would love to make a few if you’d let me.
Thanks so much!
Hello Cora!
Sure you can sell finished items.
Of course, I will be happy if you can tell about me and my blog somewhere. If no, then its fine as well.
Wish you luck!
Hi, First of all, Thank you for sharing your pattern for such a unique and beautiful cable hat. I am on round 1 and I am confused. Round 1 indicates that you have increased your stitches by knit one stitch from the previous round, 4 k. After the brim, it is k2, P2. During the increase using your technique, am I supposed to increase the purl stitches using a pearl increase or knit it? If so, how can I increase the purl stitches with a knit stitch? I am sort of new, please help Thank you.
Hi, thanks for your question and I hope you still didn’t give up. You increase every 4 stitches, so it means that you increase only with a knit stitch and never with a purl, something like this – inc from previous round, 4k, inc from previous round 4k……… I hope it is clear now. Please, let me know if you have more questions. Ann
What does 4k mean?
Thank you
hey, it means knit 4 times
Hello Anna,
I seem to be getting big wholes between the cables when moving from row 9 back to row 2 to repeat the pattern. Any idea what the problem might be? I’m using no5 needles with the appropriate yarn weight.
How about doing a different color for the cable twists?
hey Katy!
Good idea. Let your imagination fly and share your project afterward.
I’m just loving this pattern and am making two hats. One orange for my grandson and one white for my grand daughter. I can’t seem to locate where to purchase the beautiful Pom poems? Could you please help me? Thank you so much!!!
hello Diane,
please visit shop section where you can purchase different kind of pompoms.
Hi just wondering what size pompon
From your store is on this hat? Thank you!
Hello Gisele!
It is an Arctic fox (black) 13-14 cm. But if you wanna bigger size please check black Raccoon 15-16 or 17-18 cm.
What color is the gold yarn in sands winter pom pom hat
Love it
hi,
It is Alpacana Lanoso 35% wool, 40% acrylic, 25% alpaca. Sandy color: 100 grams -130 m. If you cant find it, you can always buy it in my shop. Thank you and enjoy knitting
I love your pattern but cannot figure out how to print a copy without all the ads. I never have enough paper. Thank you/
Hi Patricia. There is no printable version of my patterns, but you are always welcome here.
Is there 4 k between each cable ?
yes, you are right
Hi I have 120 st when I started the cable I c4f to the end and had 6 st left it doesn’t match the pattern what do I do is it my problem or is their a mistake on the pattern.
Hi, you have to knit 4k, C4F not just C4F
When I added a stitch every 4 st I got 121 not 120
Hi Sarah, it will be definitely 120 stitches: 96/4=24 ( 24+96=120 total amount of stitches)
Hi
Do you have a pattern for Little ones, 1yr , 2yr, 4yr? I’m not good at adjusting and figuring out proper proportions?
Thanks
Hi, try this one but it will suit better 4 yr old https://crazyhands.net/baby-hat-knitting-pattern/
Hi. I really like this pattern, but I have different yarn and gauge. So I am wondering if this pattern is divisible by 8 or 12 stitches during cast on or after the increase. I casted on 104 sts, and had 130 sts after the increase. I am sure I can’t use up all the sts for my *k4, k4f/b* repeats. 🙁
Hi Jenny,
It doesn’t matter how many stitches will be your ribbing part, the most important after increasing round the total amount must be divisible by 12 stitches. So 132 sts will be perfect. Let me know if it is clear now.
Hi,
I was wondering how you cast on your stitches? I know two ways but i wanted to know the way you to it so mine doesn’t end up to tight!
Thanks!
Hi,
I usually use long tail cast on method.
Does anyone know how to do a 2x2x2 cable stitch
I made this hat and the lady at the yarn shop recommended #4 worsted weight yarn and a 4mm needle. After all the time & money that went into the yarn and the pompom it wouldn’t fit any adult it was so small. I want to make one but I am scared to try it since hers was so small.
Hello Brenda, the pattern calls minimum for 4.5 mm knitting needles and bulky yarn. Also I think your way of knitting is too tight. Take at least 5 mm knitting needles and bulky yarn. Always use bigger number of needles for the braided part (compare to ribbing).
Question on the “Repeat Rounds 2-9 and four (five) more times. Is this saying you should knit rounds 2-9 and an extra round 4 or are you saying to knit 2-9 four or five more time
Hi – Repeat Rounds 2-9 four (five) more times. Small misprint. You repeat Rounds 2-9 4 times and if you see that hat is still short you can repeat 5th time. Let me know if it is clear now
What adjustments do I have to make if I use a single strand of worsted yarn and a size 6 (4mm)? Will it come out in adult size? I am a beginner but have used cable needles, I just don’t understand the math part yet. Thank you! I love the look of the hat and know my adult granddaughter will love it too.
is there any way to knit this with just 2 needles?
Do you know how to knit cables in the wrong rows? If yes, add 2 more stitches (salvage stitches) to the pattern and follow it.
Can you please explain better how to knit this with just 2 straight needles? Thank you so much!
Hi. Cast on 2 exstra stitches (salvage stiches). Do you know how to knit ribbing part with 2 stright needles? Body part: Row 1 knit all sts, row 2 purl all sts, row 3 knit, row 4 purl, row 5 knit cables according to the pattern etc. Make all decreases according to the pattern as well. Sew 2 edges of the hat.
Hi, will this hat fit a 10-11 year old girl? If not do you have any other cabled knitting patterns that would fit her?
Hi. 10-11 years child already wears an adult size.
The difference might be only in hat’s length but i am sure even length is same. So You can knit any of my cable patterns
Hi, will this hat fit a 10-11 year old girl? If not do you recommend any that will fit her head? Thank you!
Hi. 10-11 years child already wears an adult size.
The difference might be only in hat’s length but i am sure even length is same. So You can knit any of my cable patterns
I am not getting this pattern. I am good until the cable rows ..
C4B and C4 F confuses me. Could you please explain these 2 rows in more details…I know to place needle with four stitches in back and front…knit 4 stitches and then knit those on front or back needles..But do you have to knit additional 4 stitches after completion of cable.
I am hoping someone can help by describing these two rows so I can attempt once more and be successful.
I have 4o stitches divided on 3 needles. Is that correct? Thanks for your help
Hi, you are saying everything correctly. Yes after you finish knit cable you have to knit 4 more stitches. Please check my 2 short videos in Instagram, I am sure it will help you https://www.instagram.com/p/Bt-xFG8FwEE/
Regarding 40 stitches I did not understand, but the total number of stitches after ribbing part have to be divisible by 12. Let me know if you have other questions. Ann
4.5
If only you could print out this pattern! WHY NOT? I got around this issue by copying the text (and photos) and pasting it into “Text Edit” – then editing the information and reformatting so i could print it out – w/o the useless PDF ad information. Please, reconsider all your patterns to include an easy PRINT. Unfortunately my daughter picked your pattern(s) for hats she likes. If it were up to me, i’d choose another that is printer-friendly!
Thank you for your feedback. You can always buy a PDF version without ads.
Hello! I am a beginner trying to make this hat and i find myself a bit confused. When it reaches the cable stage, how do we exactly go about it? For c4f: is it knit 4 dtiches, slip them onto a cable,keep cable at front of work, knit another 4 from the left hand needle, then knit the ones form the cable again? Or should it be just slip unknit sts onto the cable? Thanks!
Hi Maria. Yes you have to slip them before, unknit as you said.
Hello Ann
Thank you very much for generously sharing your lovely Sandy knitted hat pattern. It’s beautiful and I’m looking forward to making it.
I was wondering what procedure I might use if I’m using (5mm) circular needles because when I came to the “Body” part it just seems that Rows 2 – 9 should be knit rows (rather than knit one row, purl one row) because it doesn’t seem possible to purl Row 2 without it showing on the “right” side.
I have done the ribbing and the increases on the circulars and that worked out well but am baffled as to how to proceed to the Body section from there. I am assuming I just keep doing knit rows till I get to the cable row, do the cables and then keep knitting? Is this correct?
Hope this makes some sense?
Thank you in anticipation.
Warm regards, Eva
Hi Eva, Thanks for your question. If you are knitting in the round then yes, you are right you knit all rounds until the round where you will make cable twists. If you knit in rows ( back and forth) then you knit one round and purl another one and so on. But keep in mind that pattern is written to knit in round.
Thanks for this fantastic pattern. My daughter is looking forward to this very much. I realized, sadly, that the yarn we purchased is actually super bulky rather than just bulky. Do you have any advice about reducing the stitch count? Thank you so much!
Hi. You can cast on 44 sts and then add 4 sts. Or cast on 40 sts and add 8 sts. At the end you need to get the number of sts that is divisible by 12. Or you can recalculate a bit pattern and instead of C4B and C4F knit C3B and C3F with the total number of sts divisible by 9. You can also use smaller size knitting needles if you think the hat is too big.
Hi! I’m a beginner thinking about making this, would 6 weight yarn be too bulky? I was considering getting lion brand wool ease thick and quick but it looks bulkier than what you used.
Hi, yes you can use it, it will look nice even it is super bulky But you have to correct the number of stitches then
I PURCHASED this pattern and it is completely different from the one posted here!!! Also, bulky yarn with a size 4 needle is ridiculous!!
I dont sell this pattern it is free always
Hi, do you by any chance have a pdf I can use to print this pattern? Lovely design by the way!
Hi, No I do not have it for this hat